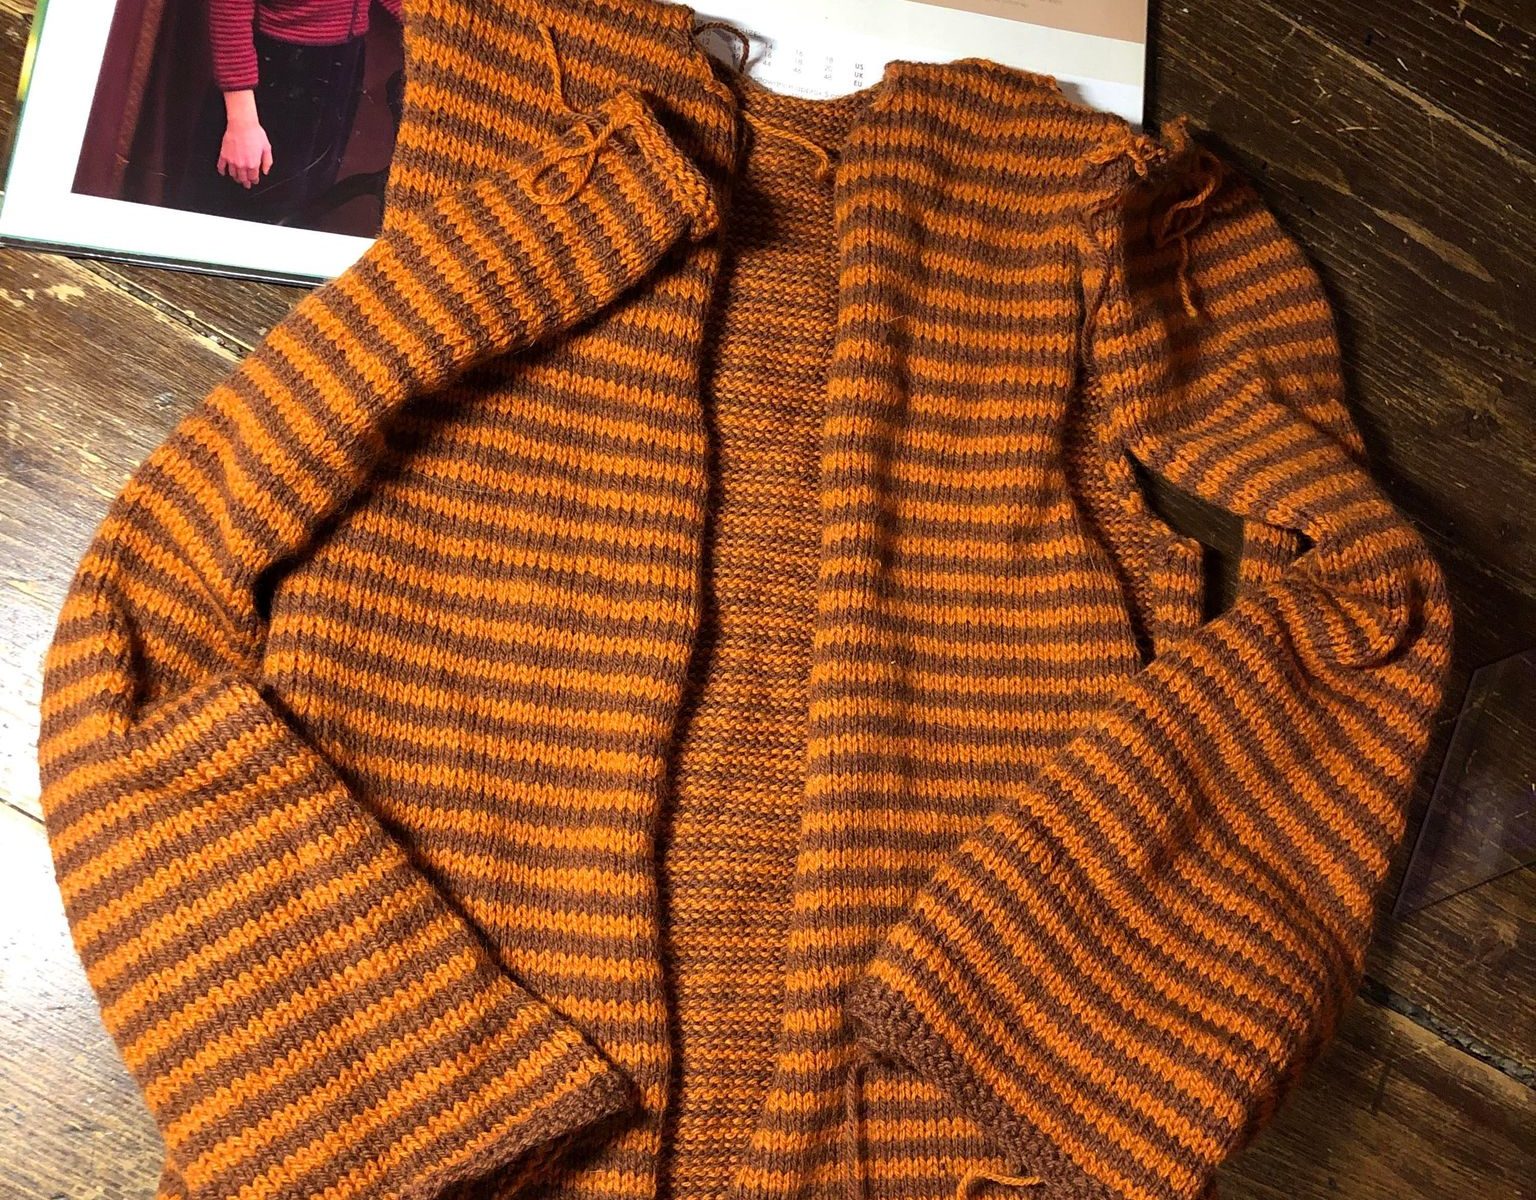
Several years ago Cassie asked me to knit this striped cardigan for her for Christmas. The pattern seemed to be a bit screwy, (maybe it was me), but something seemed to be wrong.
Several times I put the knitted pieces away and then would find it and work on it again. Recently the Needles in the Hay wool shop had a UFO KAL. You were supposed to find an Un Finished Object Knitting project, get it out and finish it and they were offering a discount on purchases for those who could complete an item and finish it within a certain time, and post about it. Well I managed to finish the cardigan and now it is a wearable item.
The Pattern
The Un Finished Object – in piecesCassandra wearing the CardiganLynn modelling the cardiganShawland Artisans
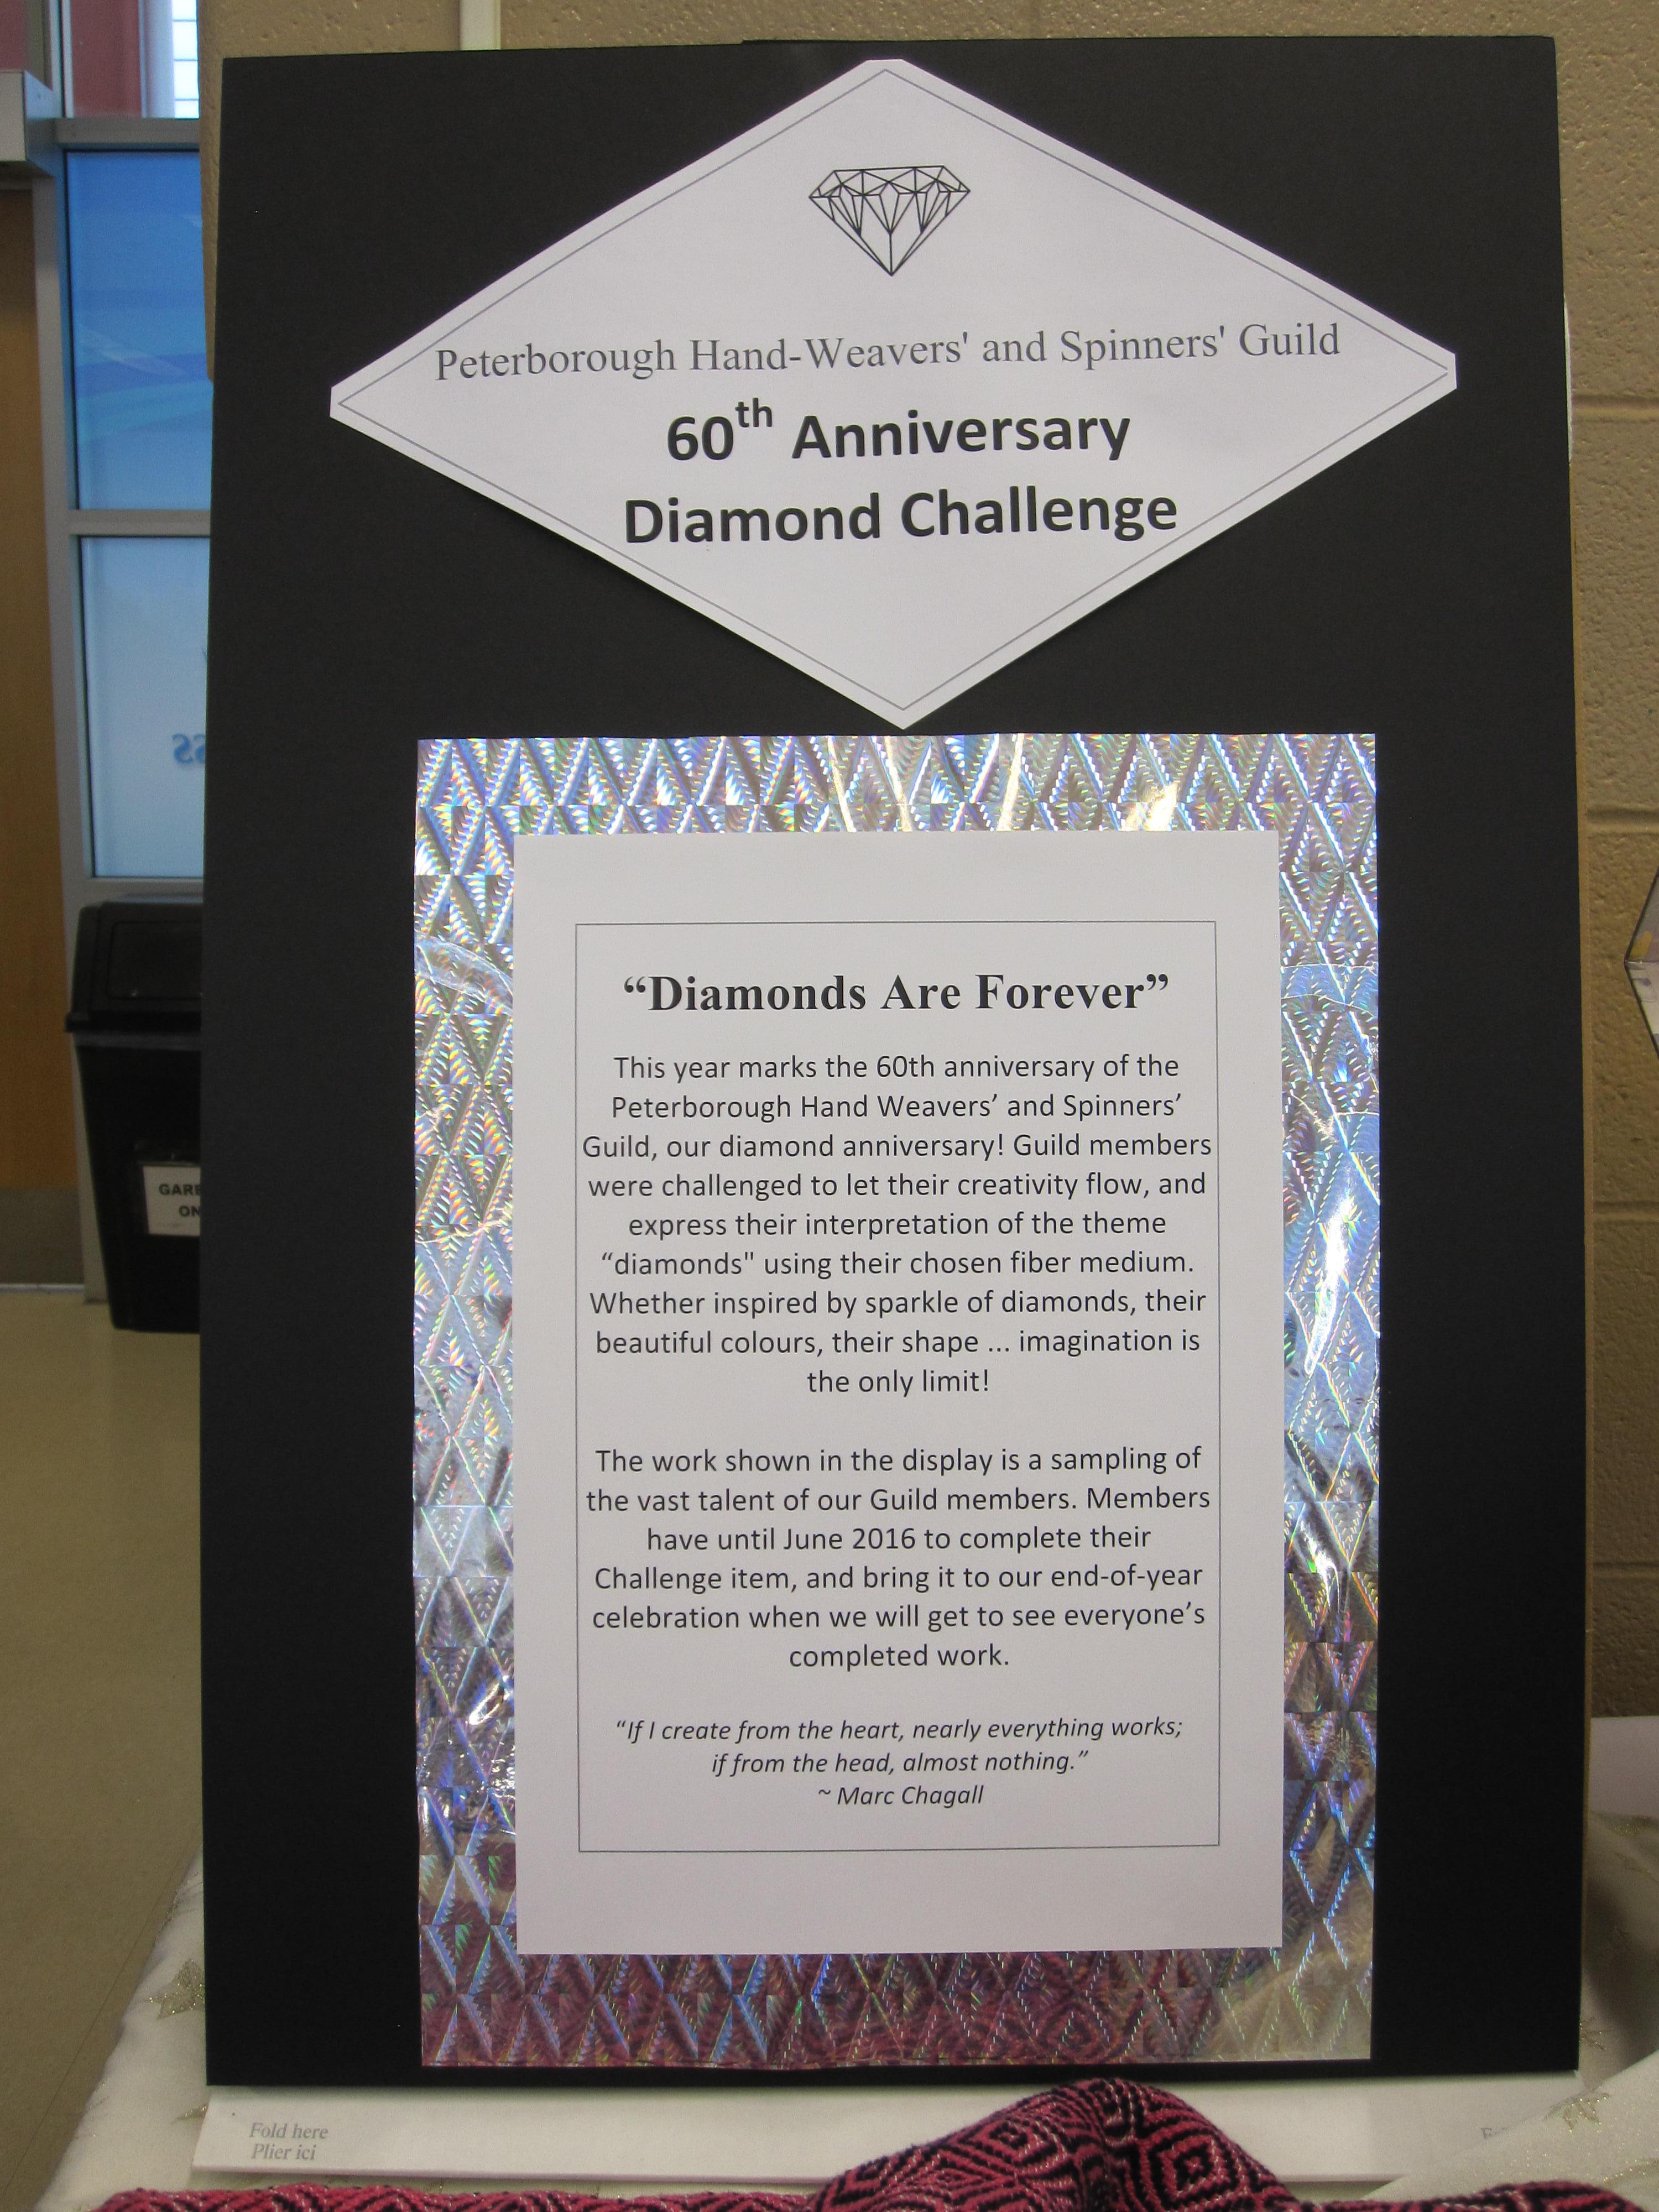
The Peterborough Handweavers and Spinners Guild have a fibre art challenge each year.
This year, 2016, being the 60th Anniversary of the Guild, it was decided that the challenge would be “Diamonds”.
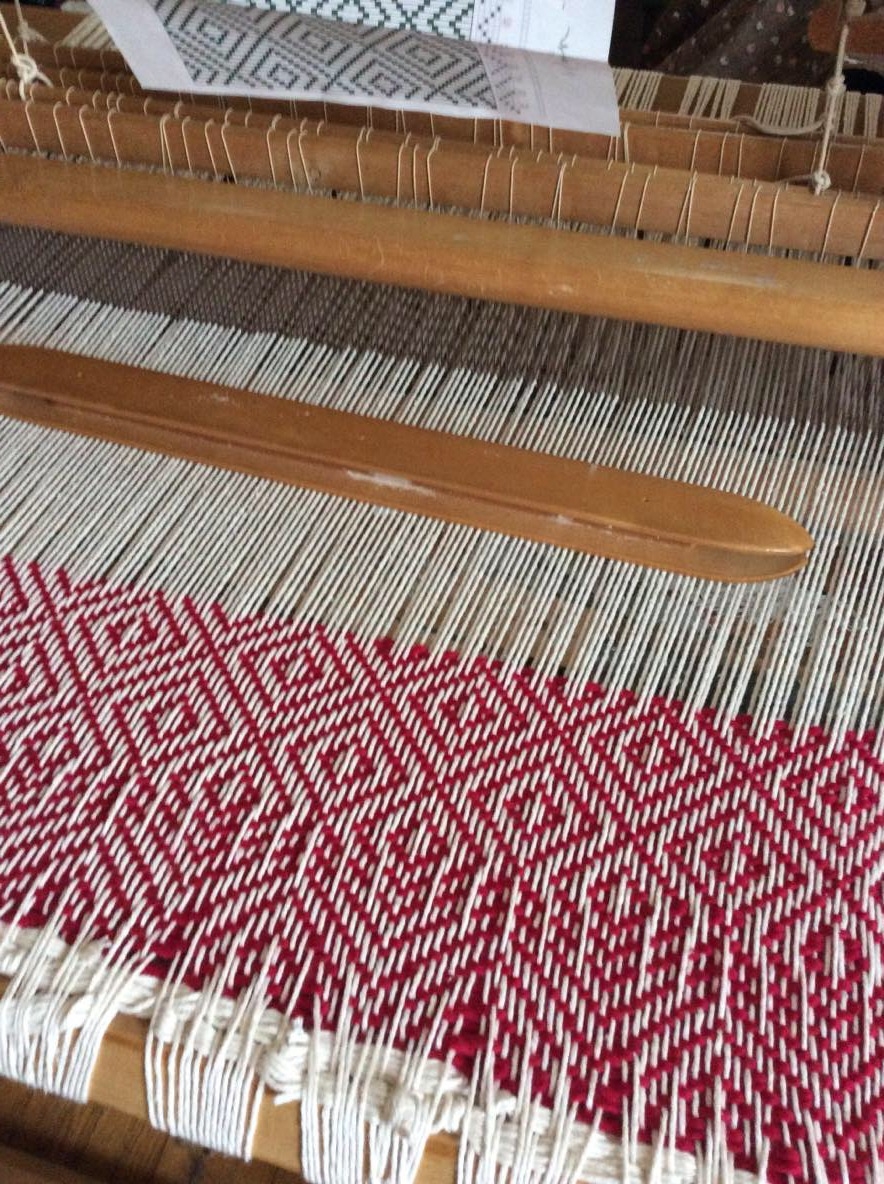
The challenge items are to be displayed at several events during the year, the first one being the Fibre Arts Show and Sale. Of course I left it until about a week before the show, to decide what I was going to do. I thought I would weave something with a diamond pattern. With the help and encouragement of my daughter Cassie, I began the project.
First I made the warp. I used a white cotton. Because my loom isn’t built for uneven weaving, it was a bit of a challenge to get the weaving done. I practiced with a couple of different yarns, in yellow shades, that I had spun myself.
Then for my project … for the weft, I used a navy blue wool. After a certain length… small rug size… I cut it off and hemmed the ends. Then I could use this as my challenge item for the Fibre Arts Show & Sale. Of course there was still quite a length of warp left so I used it up with a red wool weft. For this rug, I left tassels on the ends. They turned out quite nicely. My cats loved them . . .
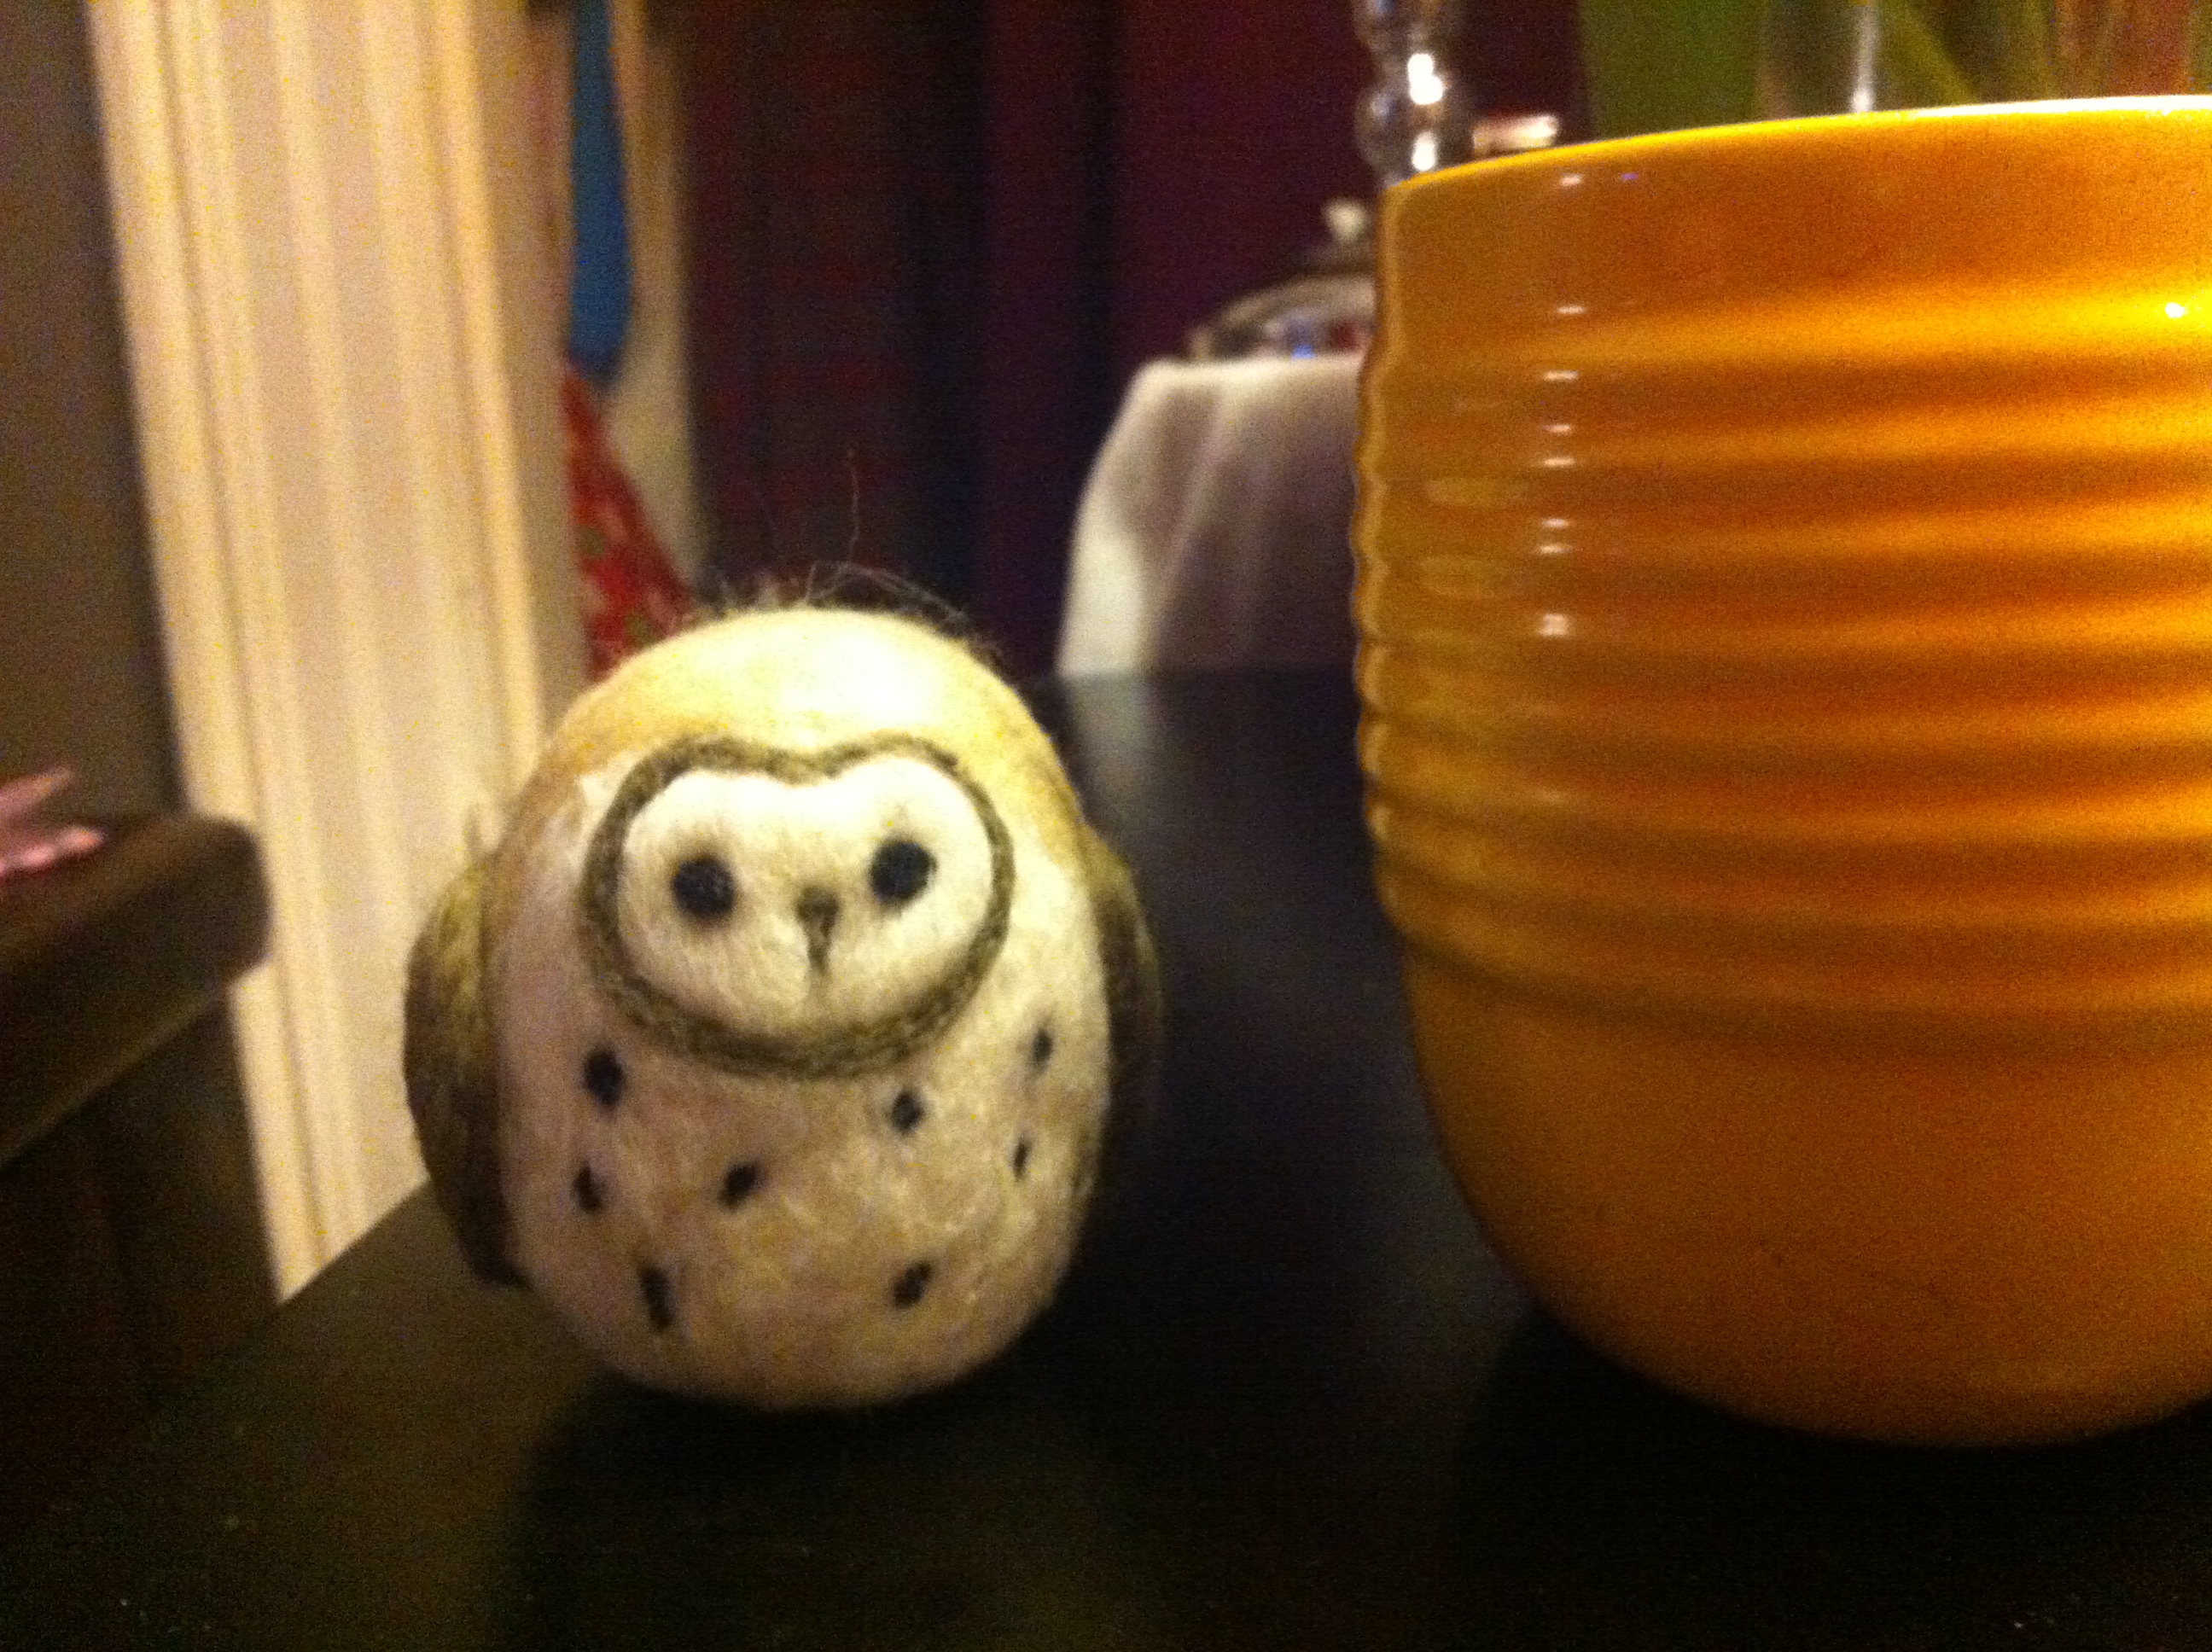
A couple of weeks ago, I was up in Cobourg visiting friends, eating lots of delicious food, and attending the Shelter Valley Folk Festival‘s Annual General Meeting. My awesome friend Lesley ((Who not only has a great and very funny blog but also is starting an excellent project called ‘Northumberland Small Time‘))had me over for brunch and crafternoon, and we took a quick trip over to The Black Lamb in Port Hope to pick up needle-felting supplies.
I’ve been meaning to buy some needle-felting supplies for a long time, but none of the wool stores in Toronto seem very well-stocked for that sort of thing; The Black Lamb, however, has plenty of great colours and supplies, and is pretty awesome for anyone working in wool.
I’ve only ever made one needle-felted object before – a little snow man, which I made at a Peterborough Hand-Weavers and Spinners Guild meeting – and I wasn’t really sure what I was doing, but it’s a pretty straightforward skill to pick up, at least for simple projects.
Anyway, I made a cute little owl – I think maybe it’s a barn owl. As they used to say in Brownies, ‘too-whit, too-woo!’
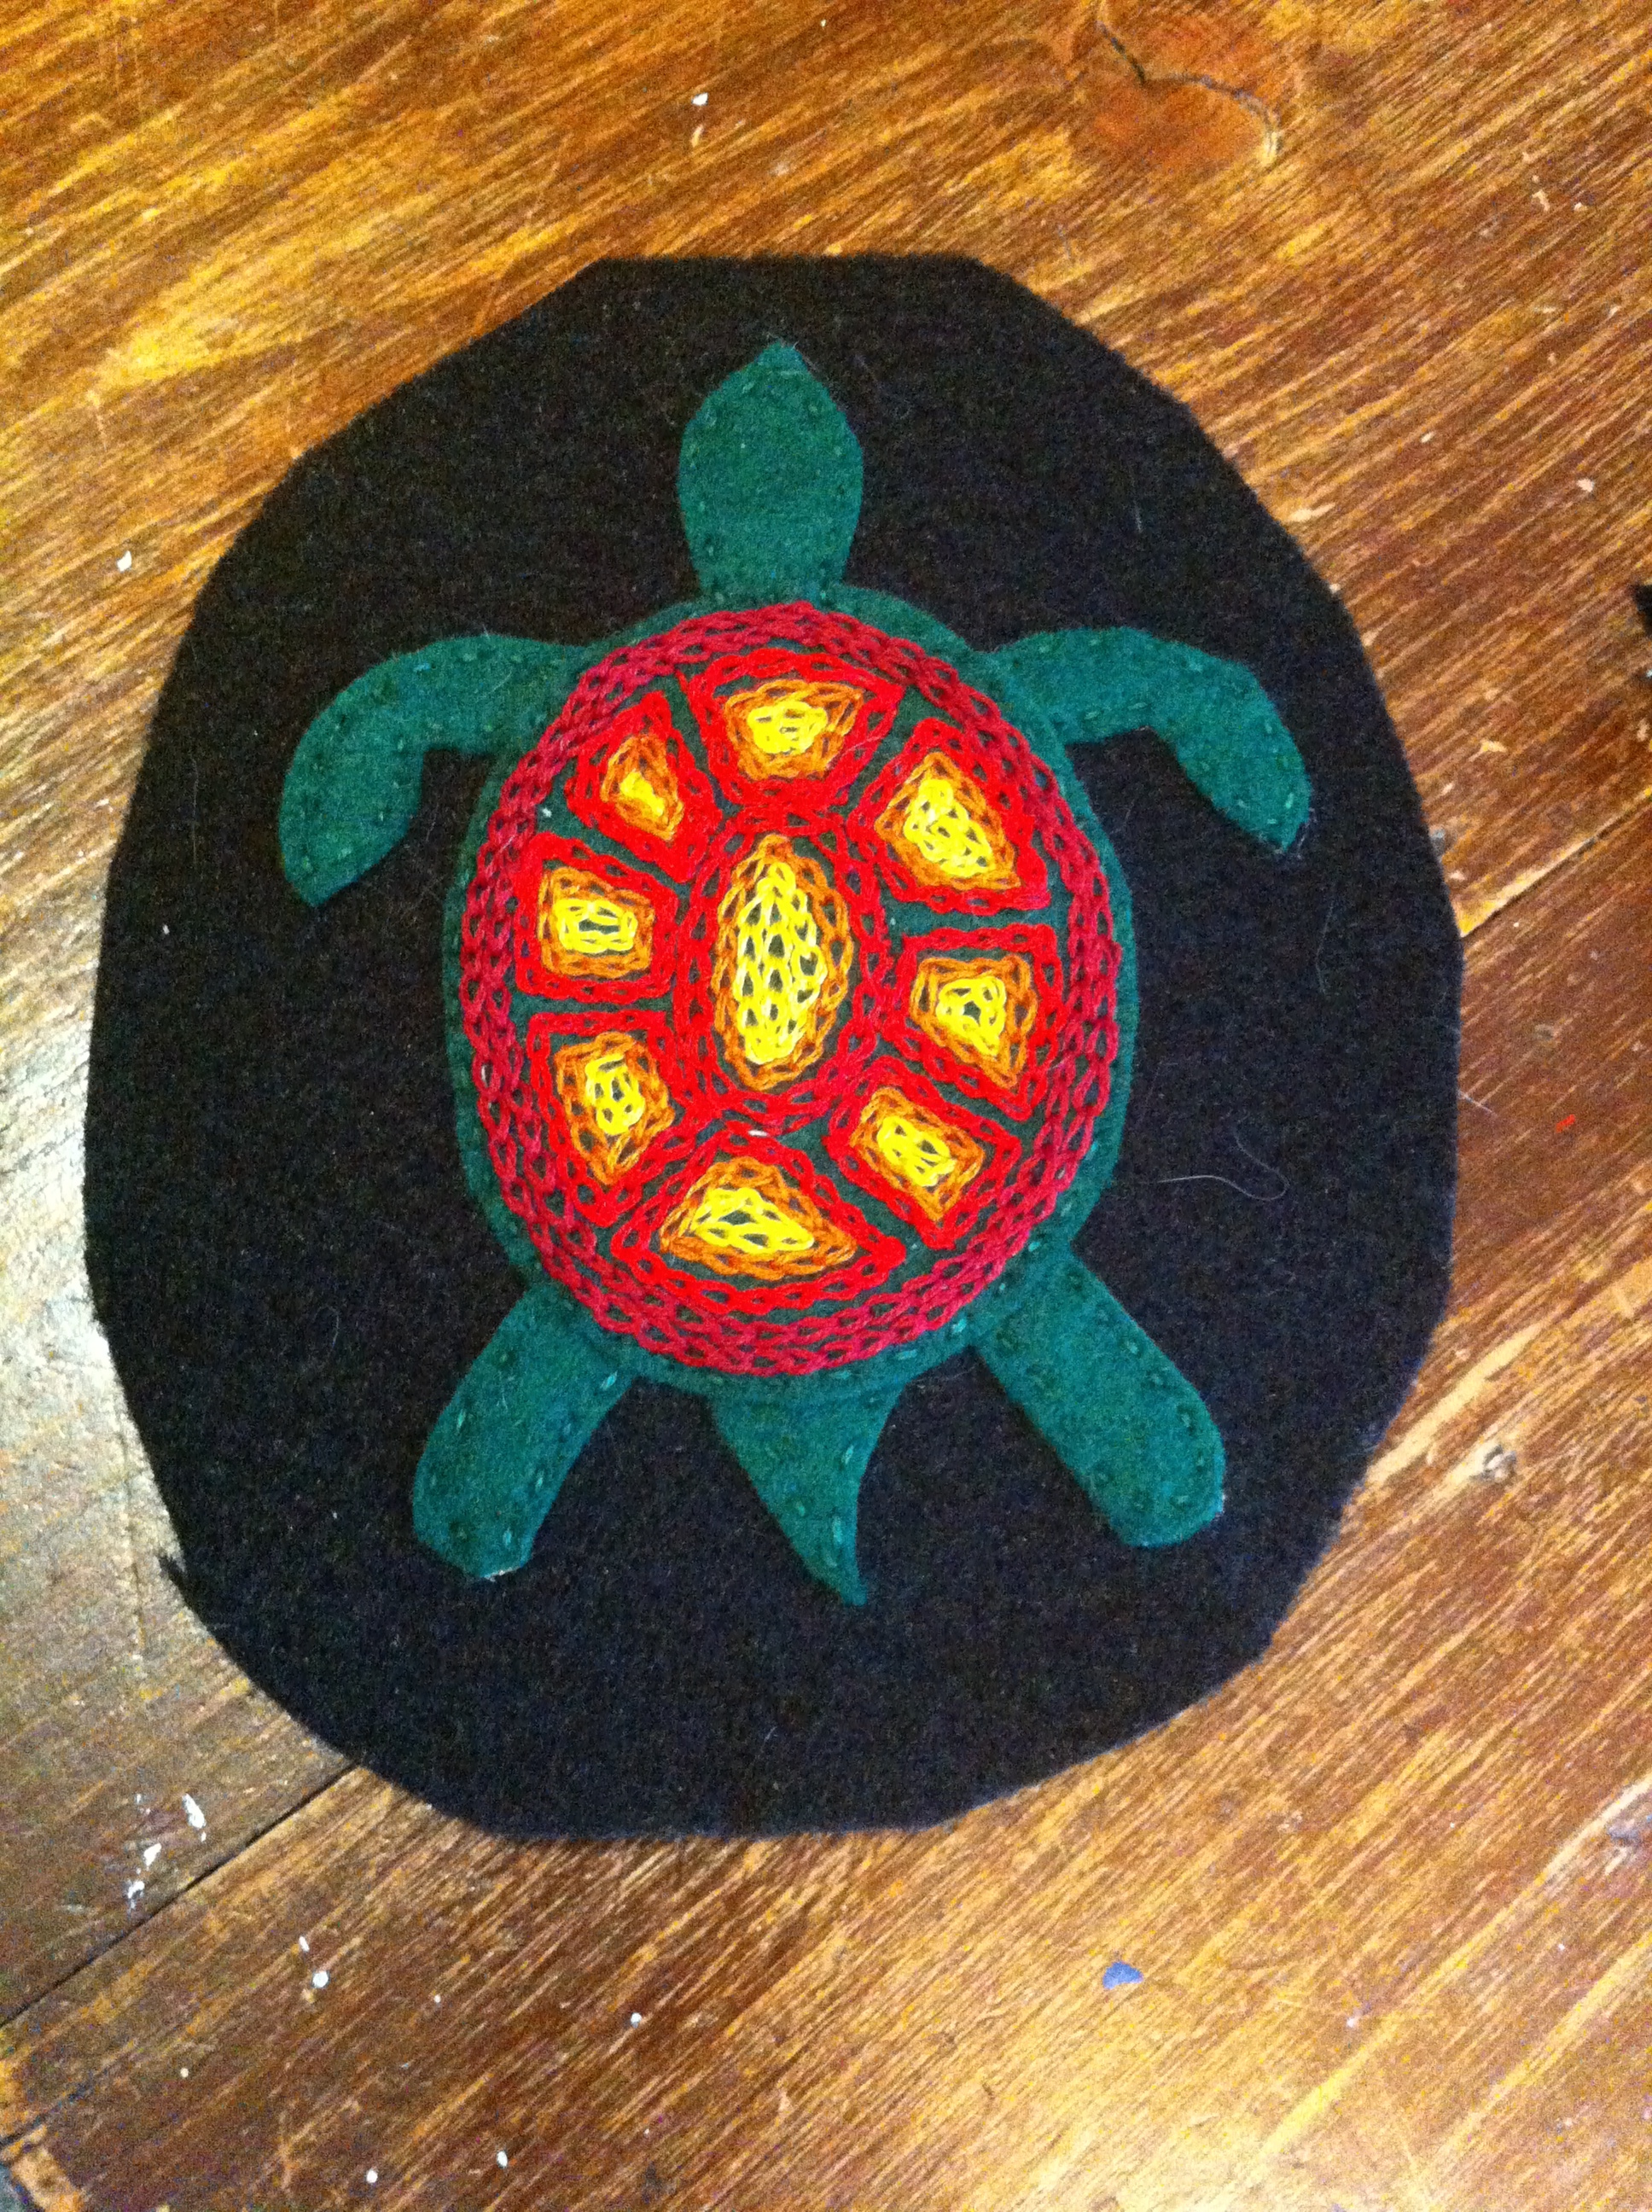
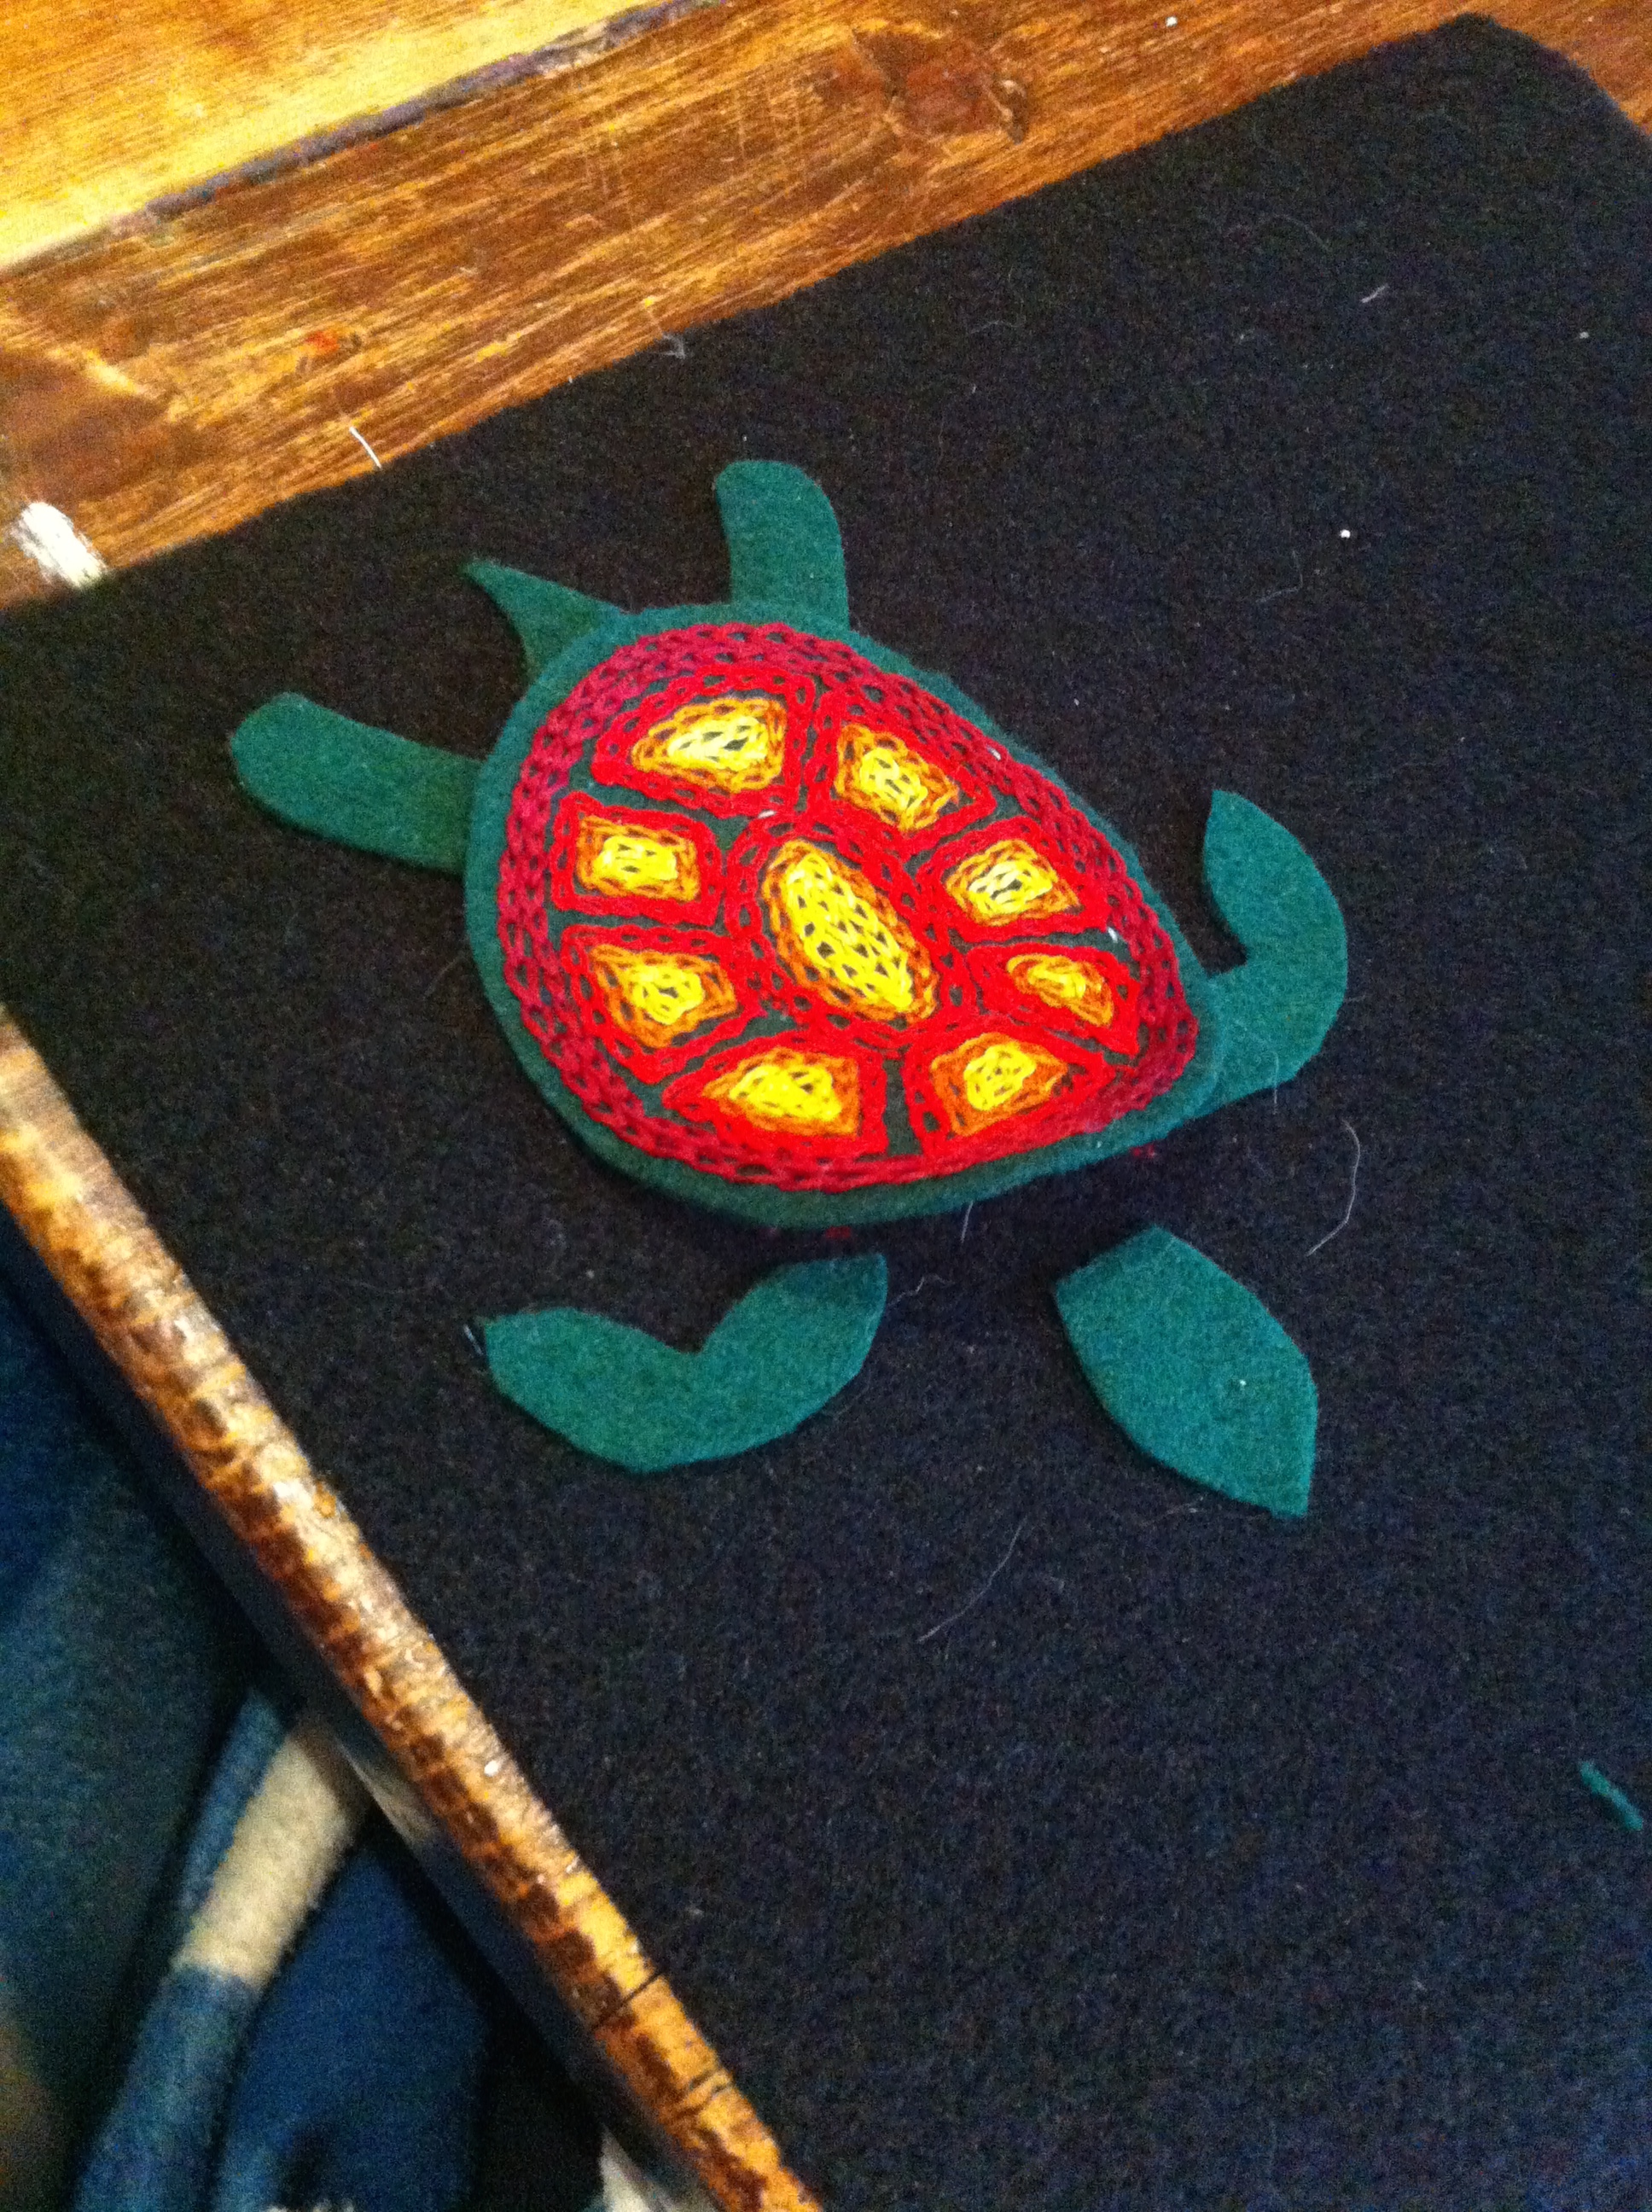
My mom and sisters and I are all fans of the Kawartha Turtle Trauma Centre, a great charity that works to support Ontario’s native turtles. Many native turtle species are on the ‘at risk’ list, and KTTC work to educate the public, conserve wetlands, and make Ontario a safer place for turtles.
I’m generally not a big fan of charities, but this one’s a good one, in my opinion.
Anyhow, they had a fund raiser planned called ‘The Art of the Turtle,’ and asked artists to create turtle ornaments and donate them to sell at their event. We decided to each make an ornament for this great cause.
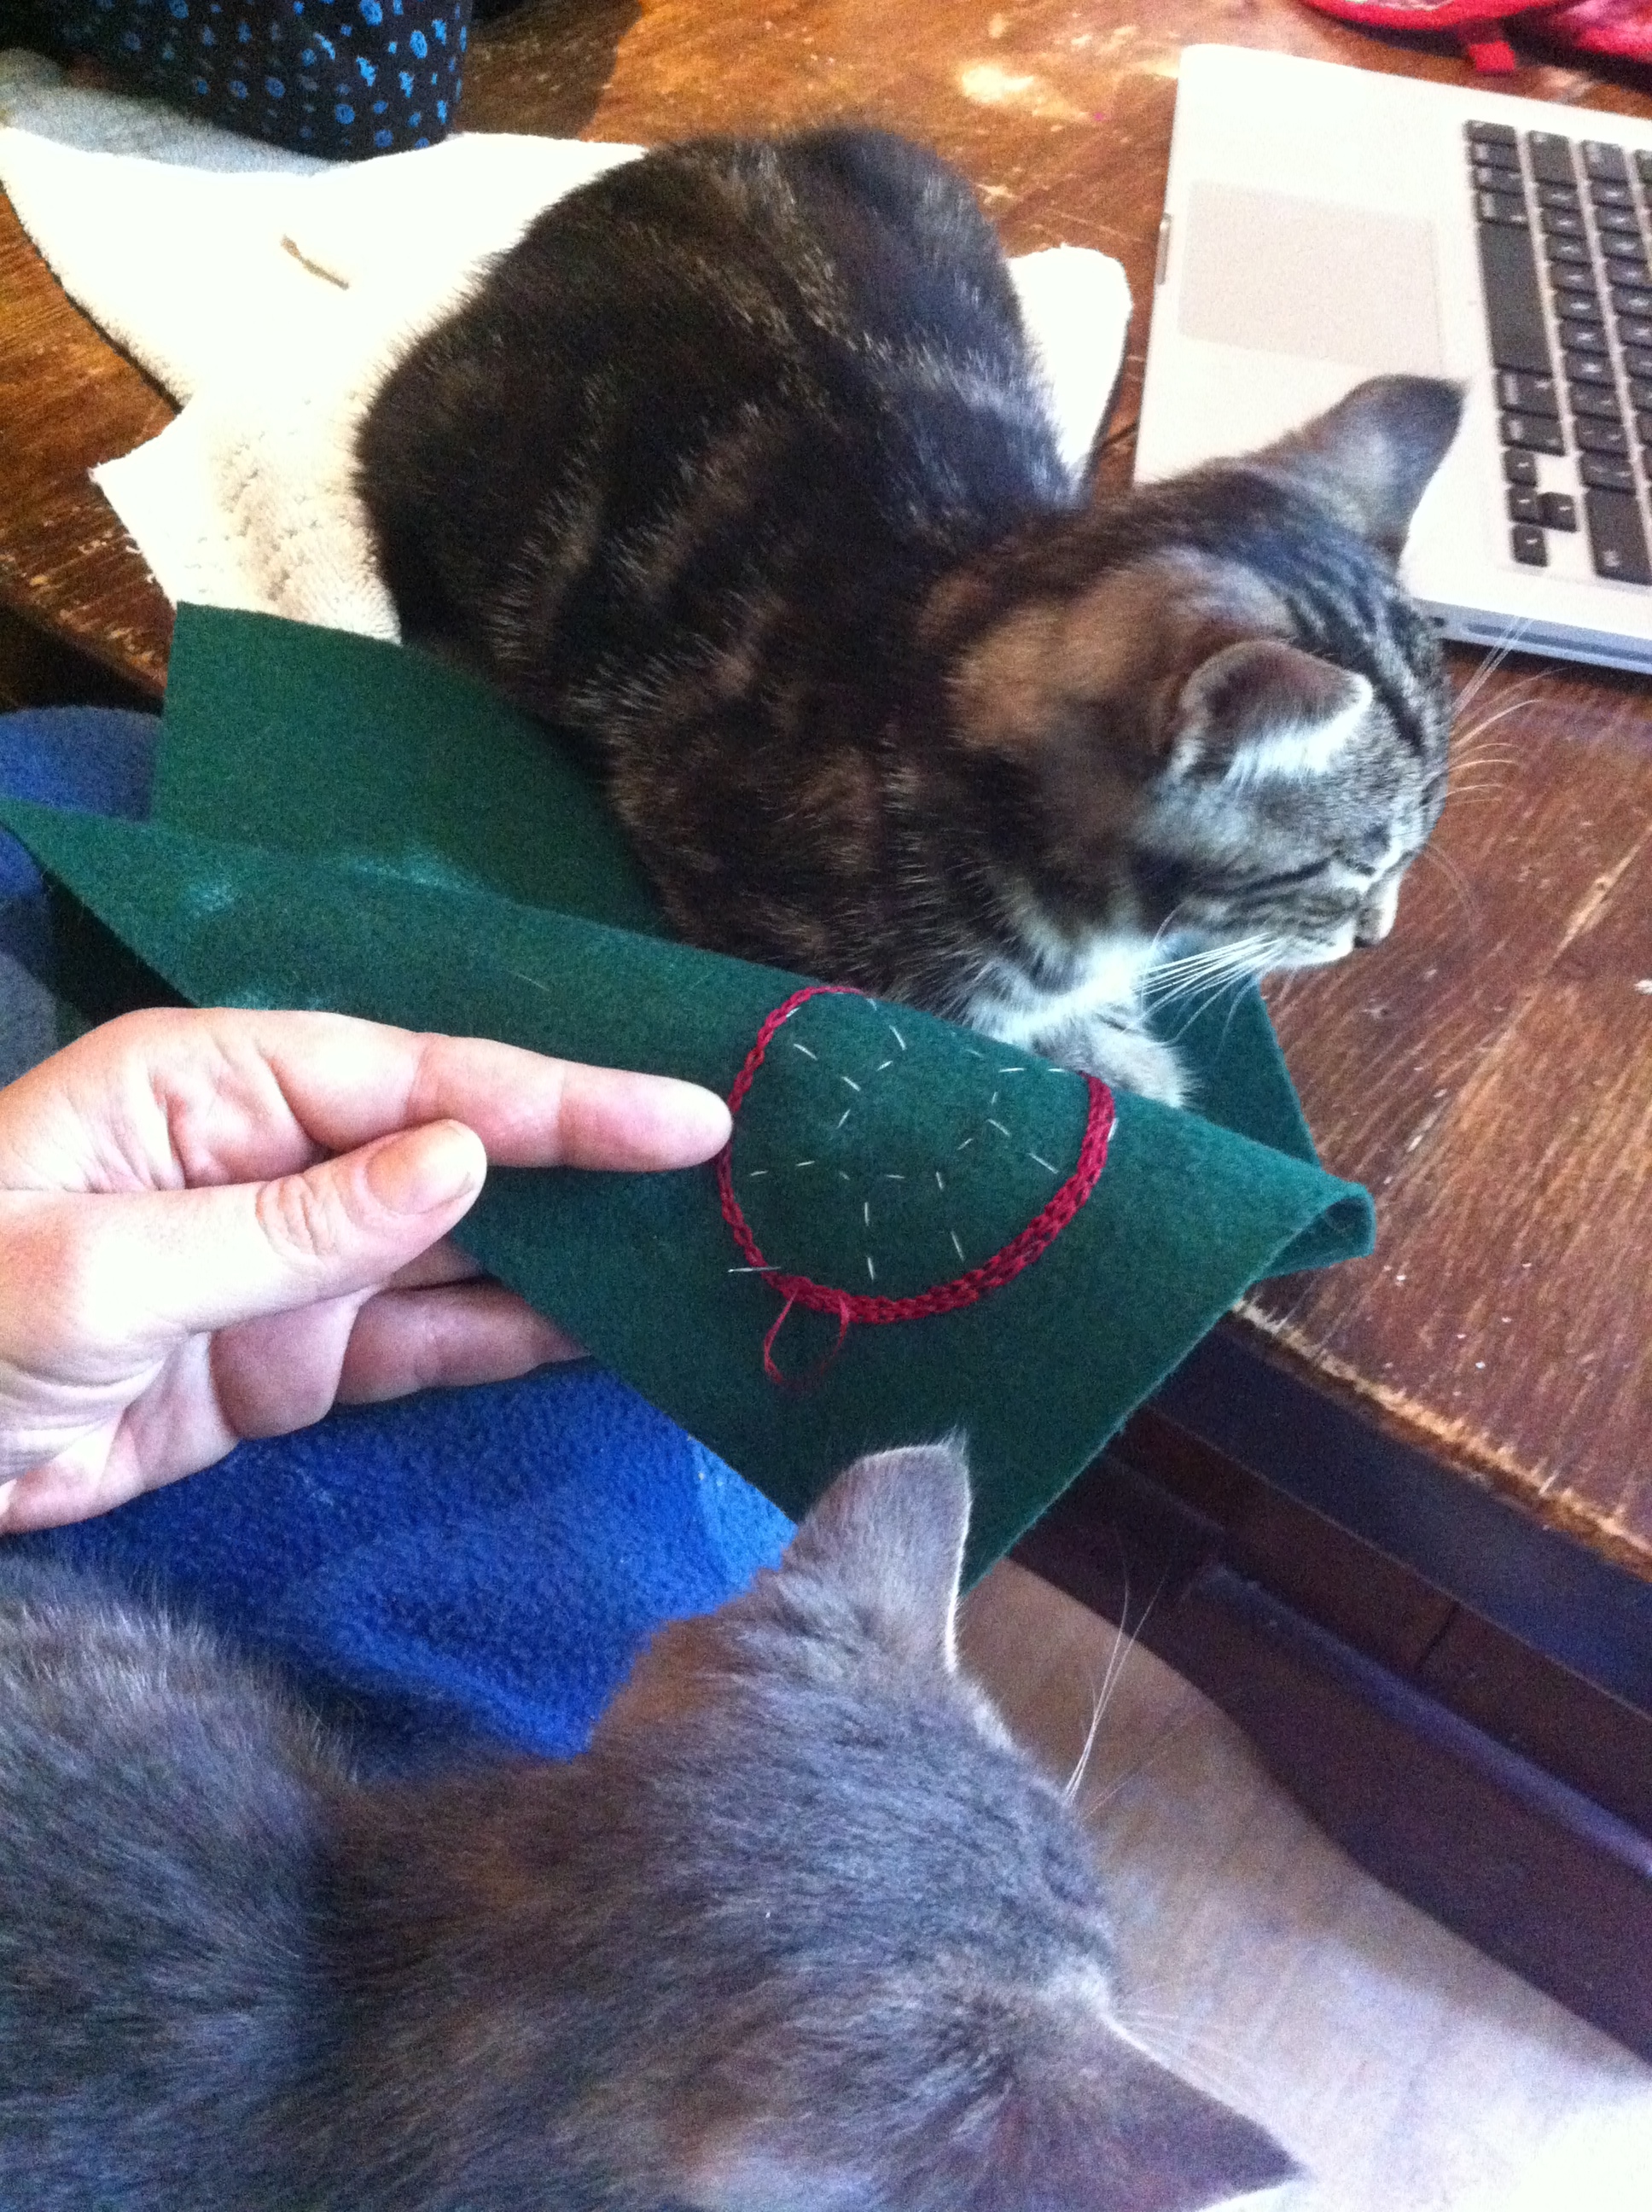
As you can see, the kittens were extremely helpful as I was working, holding the fabric so that it didn’t slip. I
I didn’t have a lot of time to get to this project, so worked on it while I was home for Thanksgiving back in October.
I’d wanted to do something sparkly to catch the light, but was more drawn to embroidery, and knew I could make something that glowed with colour. I research some Metis and Northern European embroidery and beadwork, and got to work.
Embroidering is a nice way to spend the time, particularly if you’ve got a happy cat – or a whole clutch of happy kittens – in your lap (as long as they don’t get too interested in your embroidery floss).
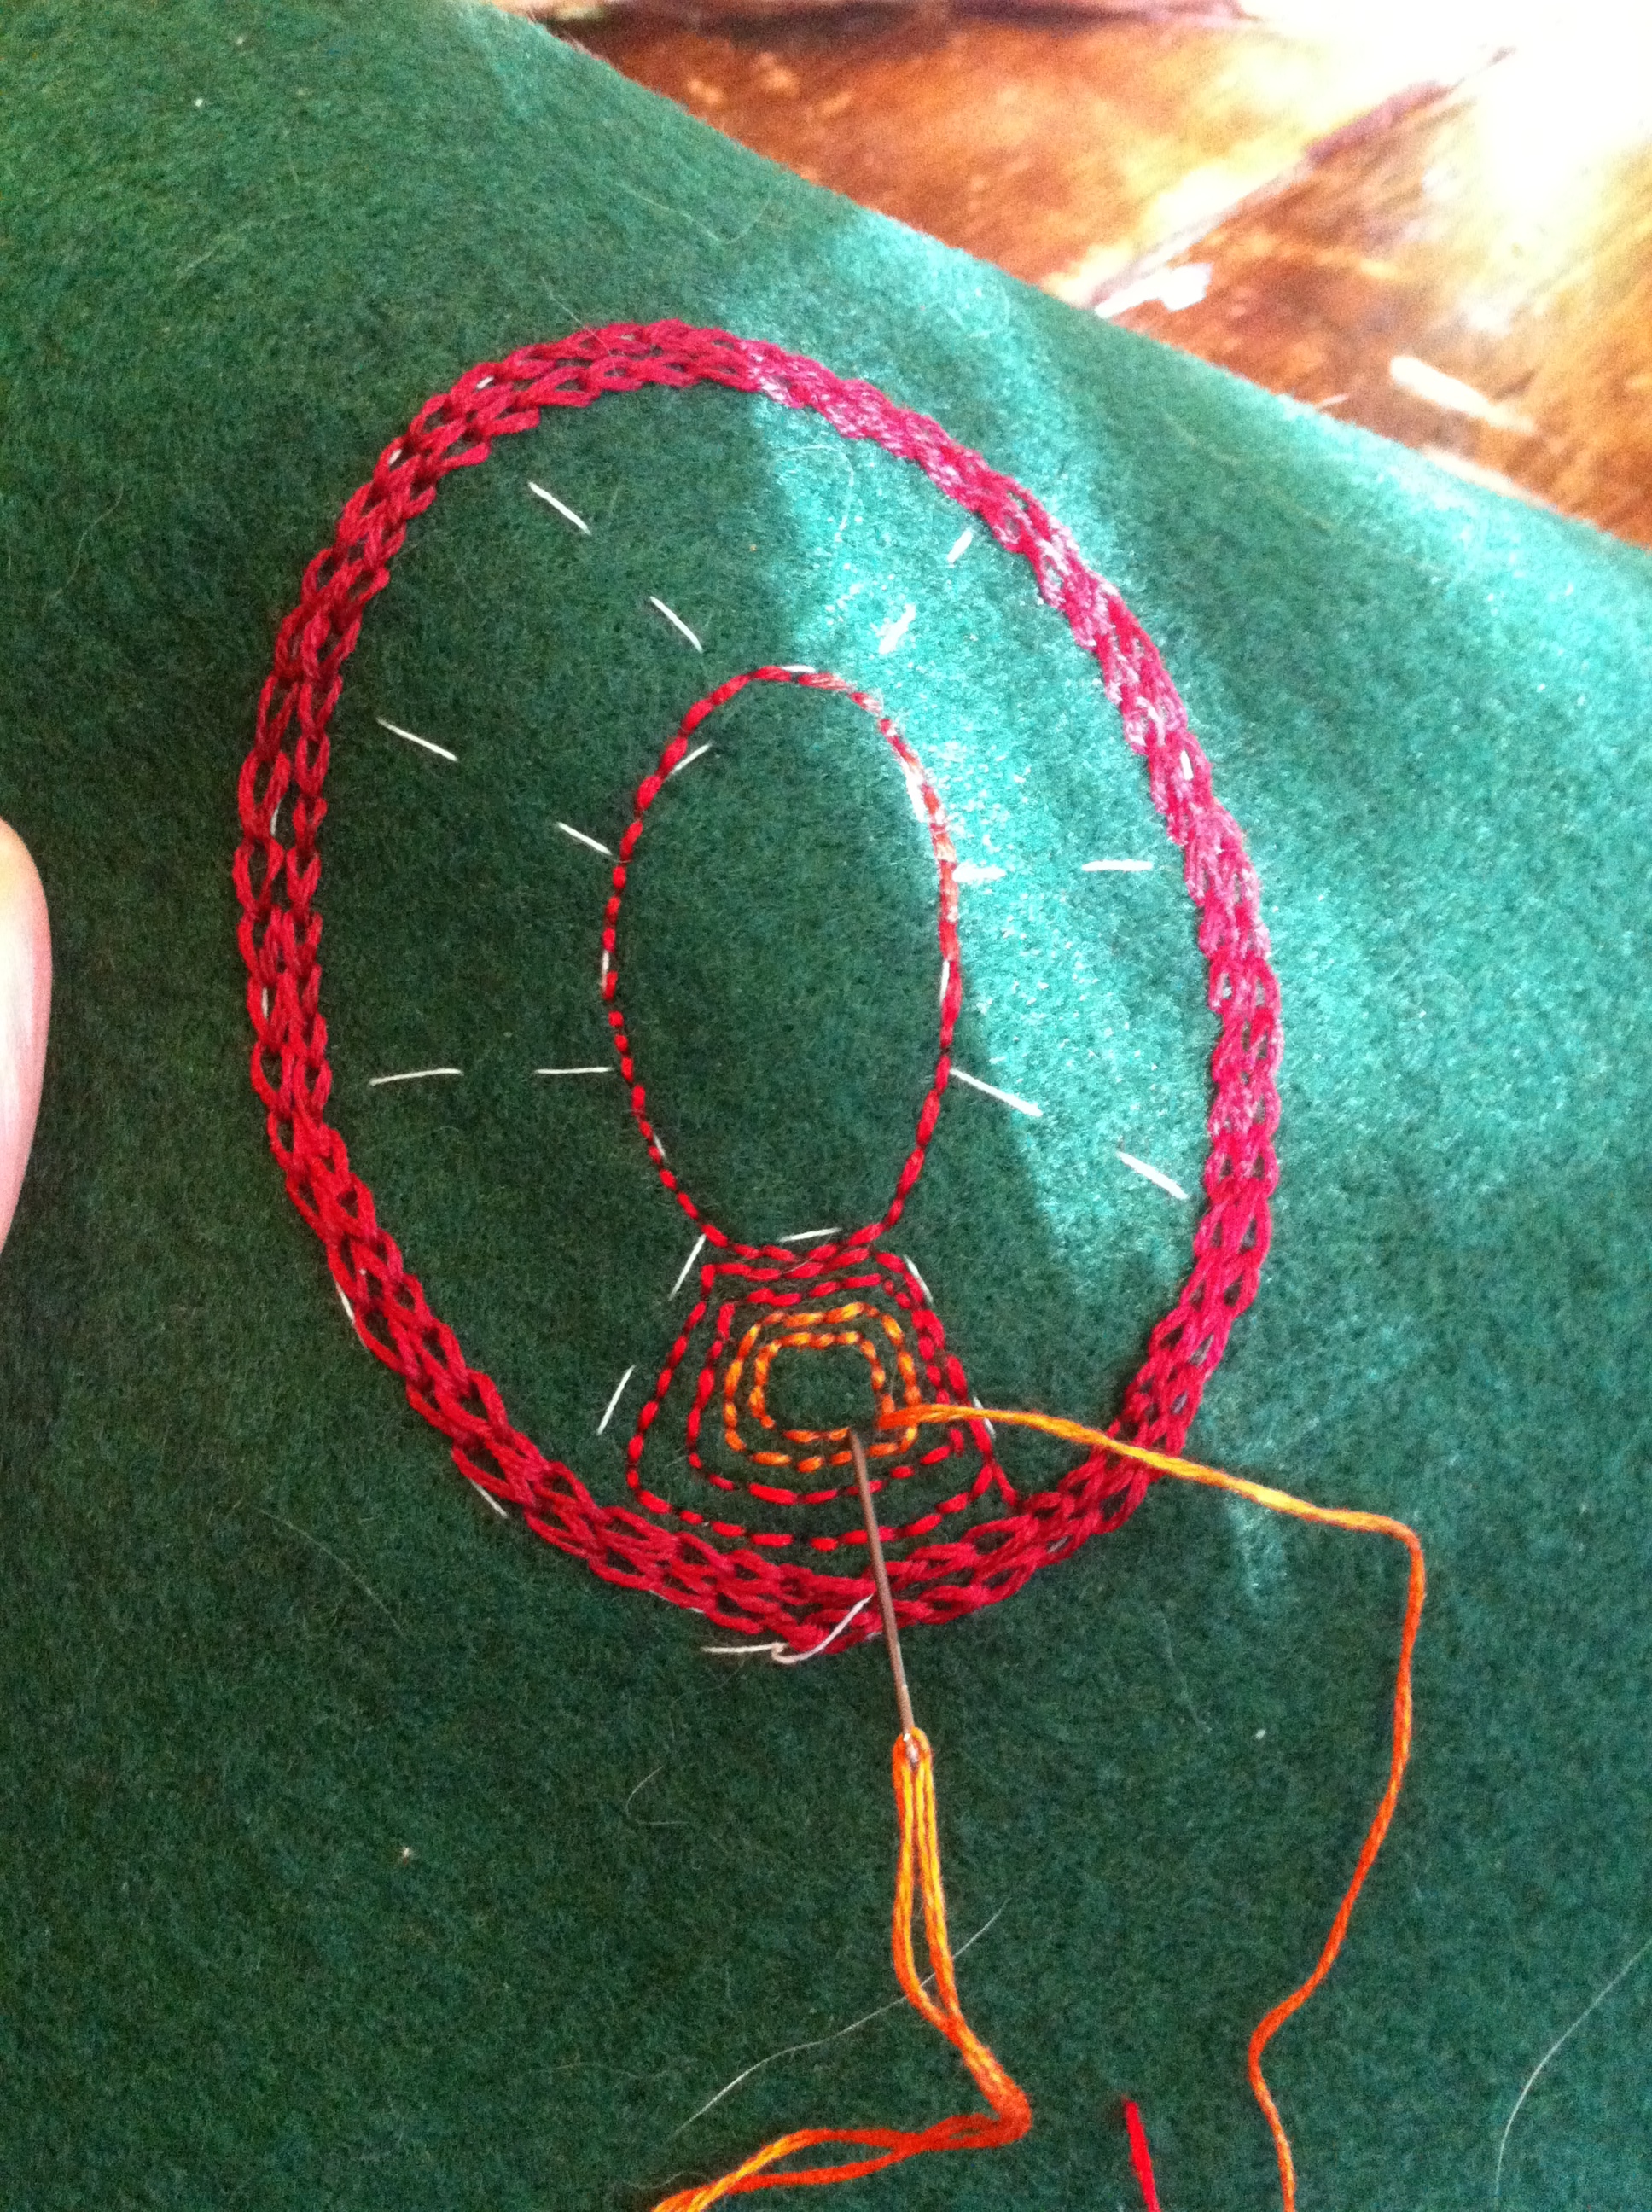
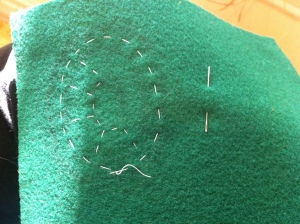
Since I’m working on a dark felt, and didn’t have a good way to draw on it, I sketched out the basic pattern in white thread.
I embroidered the outline in chain stitch, one of my least-favourtite stitches to do, but one that fills space with colour pretty fast.
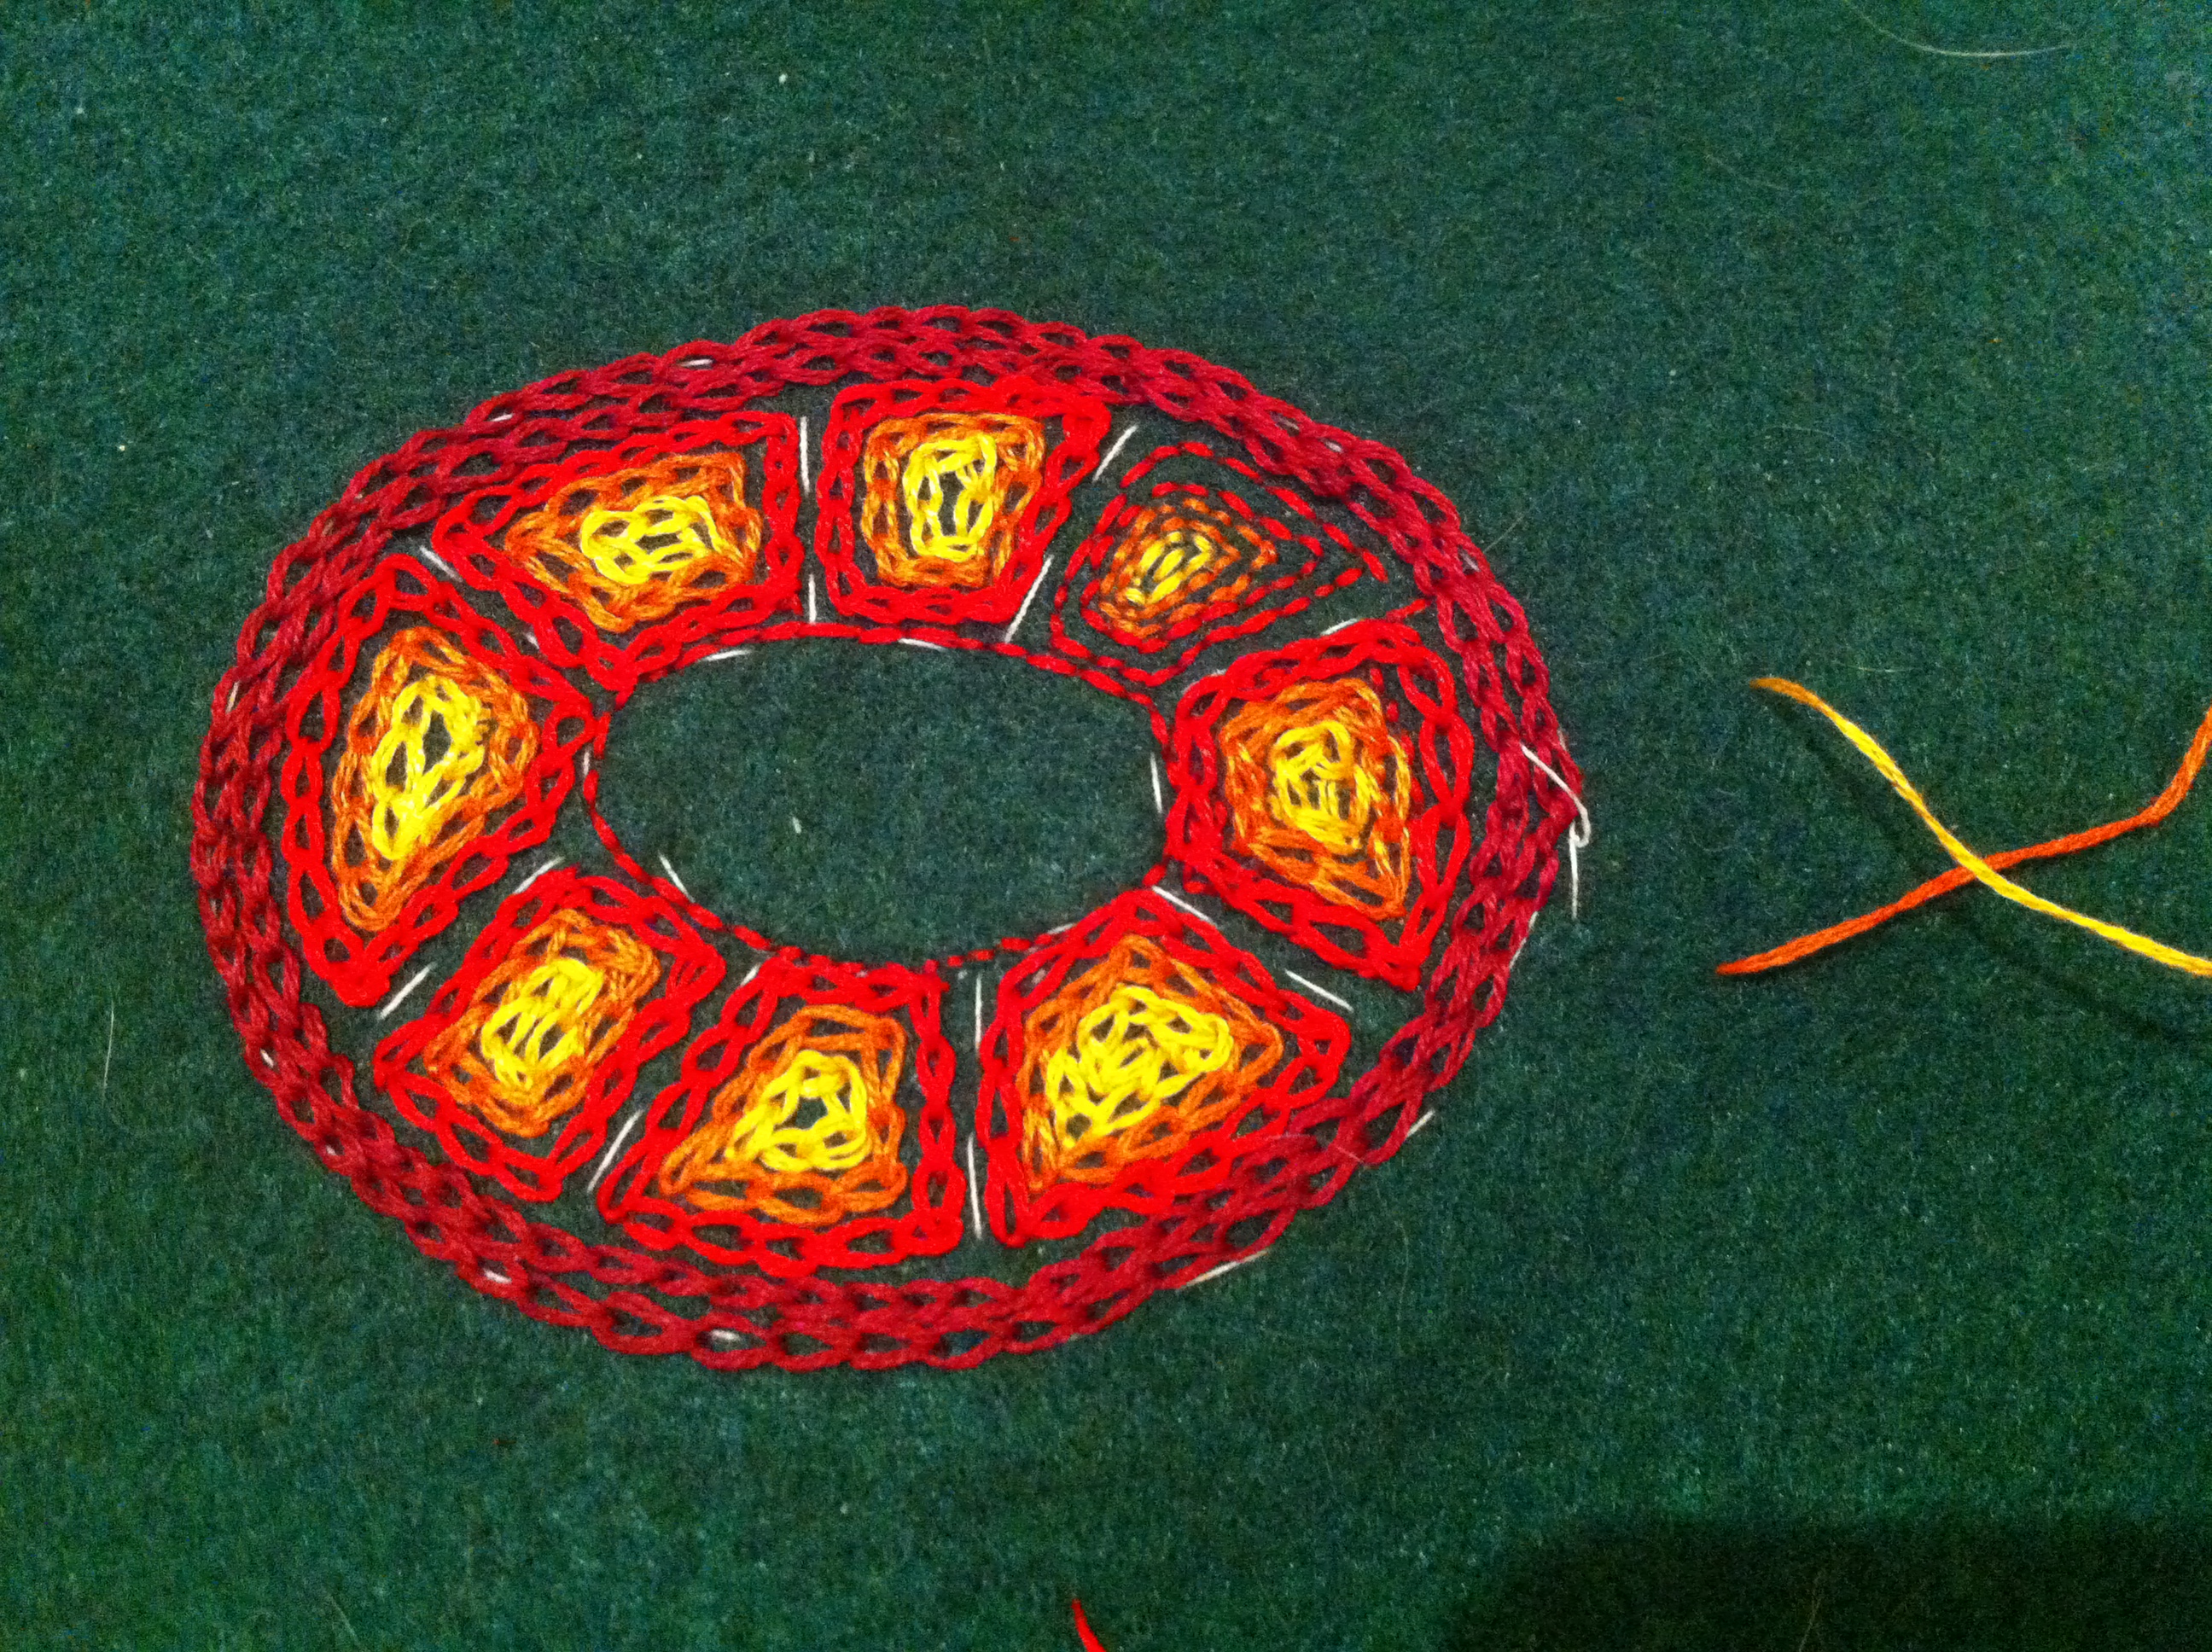
Then I began to fill in the sections of the shell; at first, I was doing backstitch, but switched back to chain stitch because it wasn’t showing the colours very well.
The shell, nearly complete.
I try to keep the back neat and tidy, but usually it just looks like a mess, especially if I know it will be hidden.
I cut out pieces for the head, legs, and tail from more of the green felt.
The kittens were helping me decide which way the turtle’s front legs should go.
I don’t love using glue guns for this kind of thing, but it was the easiest way to keep the layers together so that I could sew without them slipping.
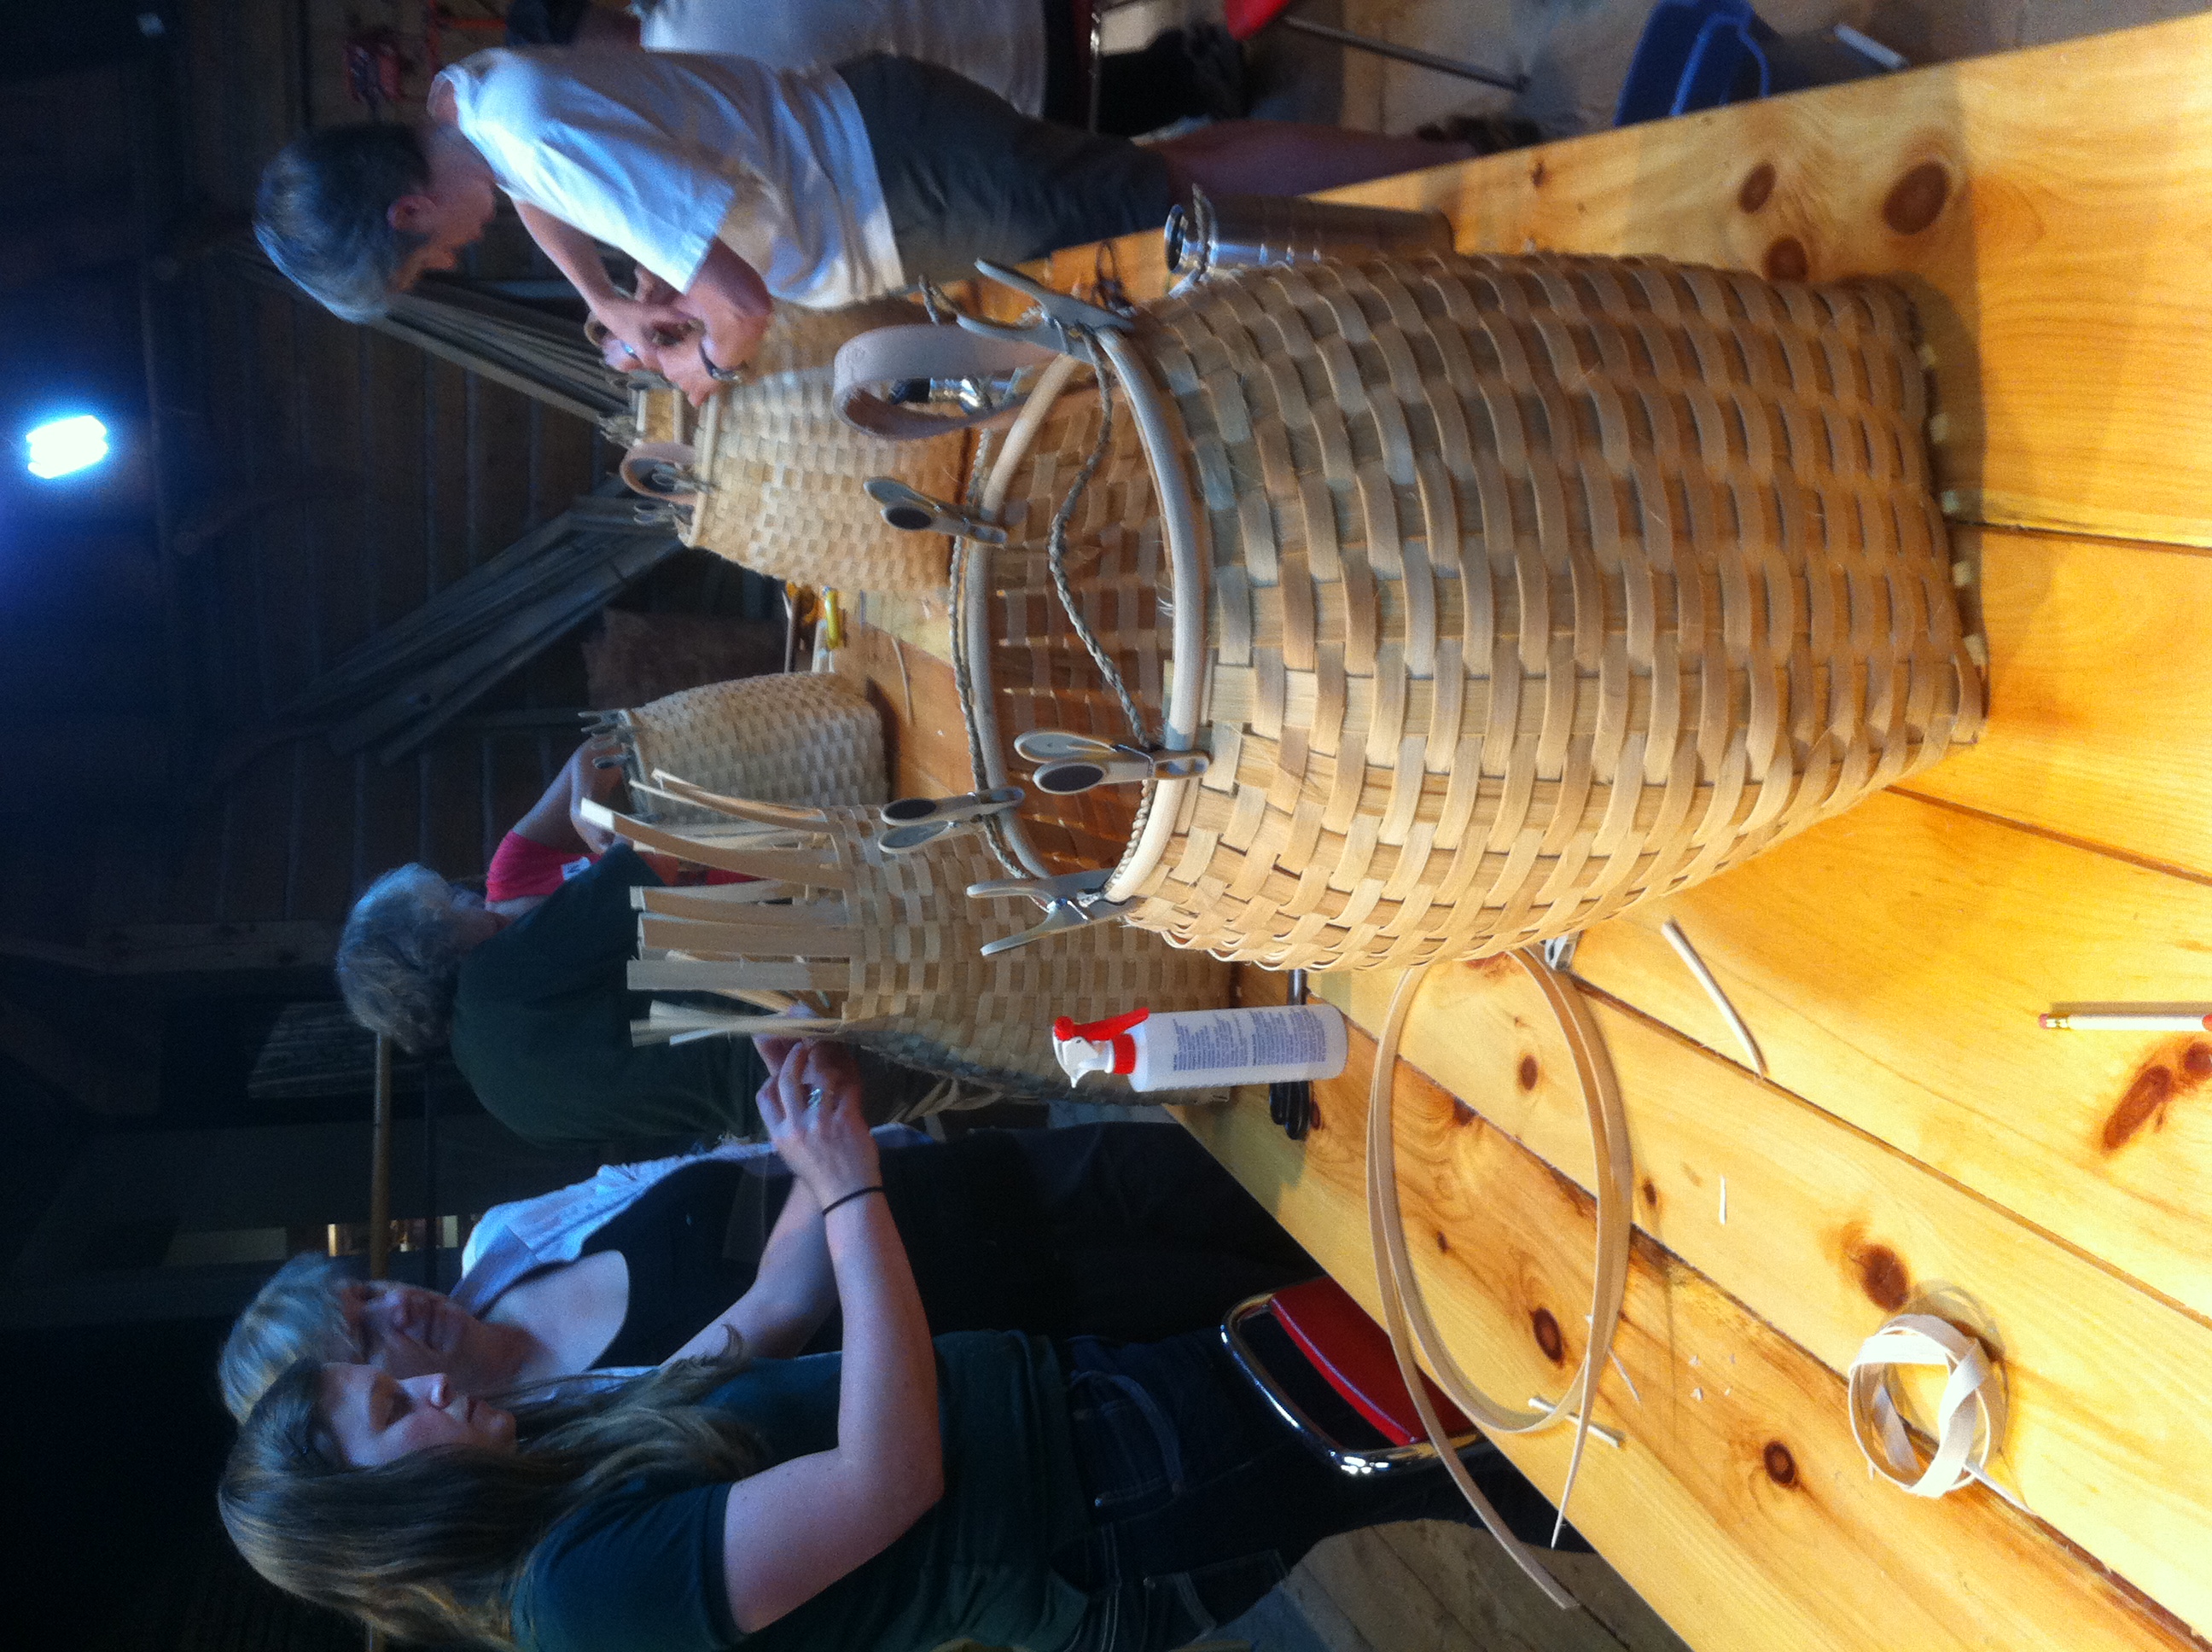
Some years ago, I worked at the Canadian Canoe Museum; it was my best job ever, (Largely because I had amazing coworkers and it was a pretty idyllic setting.) until it fairly abruptly wasn’t (Which had to do with a lot of factors: a changing workplace setting, upheavals in my personal life, and some interpersonal stuff which kind-of created the conditions to make my perfect job awful, quite suddenly). But during the time that it was awesome, it was really awesome, and occasionally I’d have the opportunity to do something really neat. Like weave my very own pack basket.
The Canoe Museum actually has loads of really good courses which I completely recommend – you can check out their full listing here. They’ve been carefully designed so that you can complete the project you’re working on by the end of the allotted time. As someone with more than my fair share of half-completed projects from ill-designed workshops stuffed away to be finished ‘someday,’ I have a keen appreciation for getting to finish a project with an experienced teacher and the appropriate tools.
Pack Basket – completing the base
I’d always wanted to try my hand at basketry; though it’s one of the more derided skills, it’s kind-of fascinating. It’s relatively easy, especially when someone has pre-cut everything for you, but meditative, especially if you’re trying to work fast. You get into a place mentally where you just focus on weaving, and on the shape that you’re creating, and you don’t think about much else except whether or not your bamboo is wet enough.
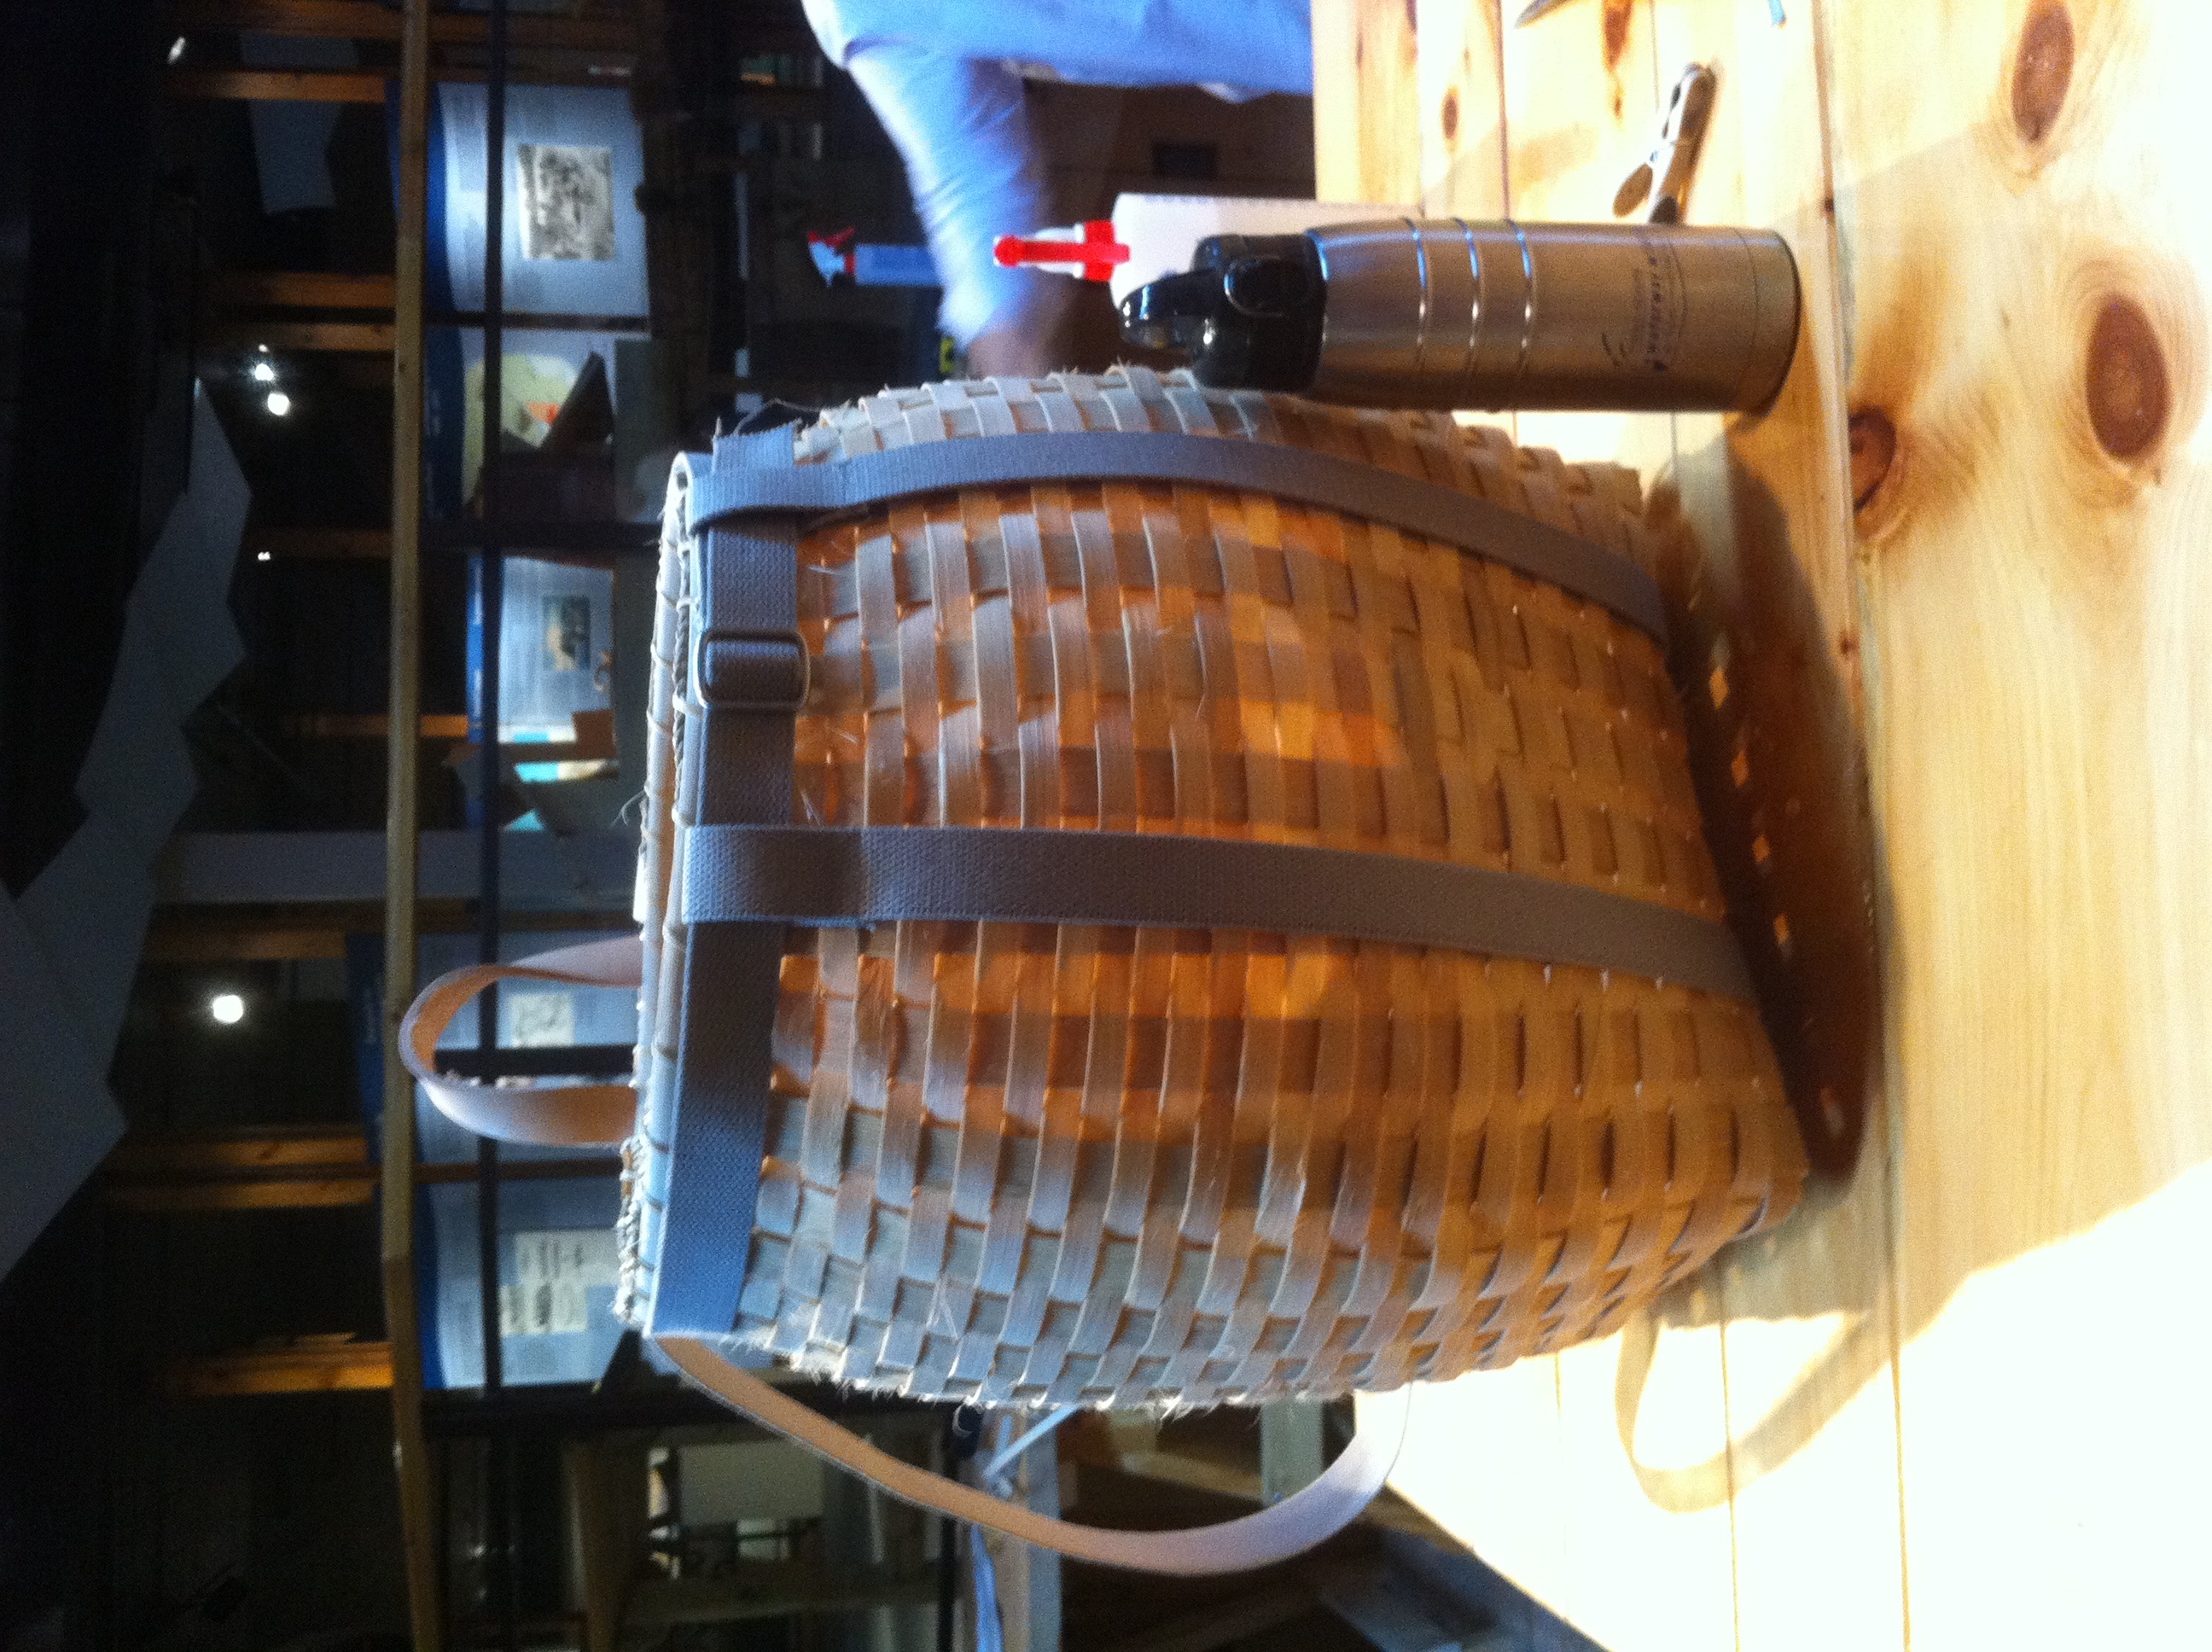
When it was finished, I wore it home on my back, still slightly damp, and so the part of the basket that rests against my back is fairly well-moulded into a shape that is comfortable for me to wear.
I know a lot of people might make this and never use it, or just have it as a decorative object around the house, but I’ve often worn it when biking down to the farmer’s market with my sisters, or to music festivals when I’ve needed to carry unwieldy things. I’ve worn it when wildcrafting – it’s a great container for wild apples, grapes, or dye plants, as it doesn’t crush its contents.
I prefer it to a knapsack – because it holds its shape, it’s easier to find things in it; the small holes in the sides let light in, so you can see what’s in the basket. Additionally, it breathes really well – fabric knapsacks tend to press agains the small of my back, which is where I generate a lot of heat. I find that super-annoying.
However, when you do wear it, you get a lot of attention – sometimes people stop you to compliment you or ask where you got it, and others just give you that look that people give other people who are doing something noticeably different. Most days, that’s not something that stops me, but as beautiful and useful a thing as a pack basket is, lots of people are going to give you the squint-eye if you go around using yours for its intended purpose.
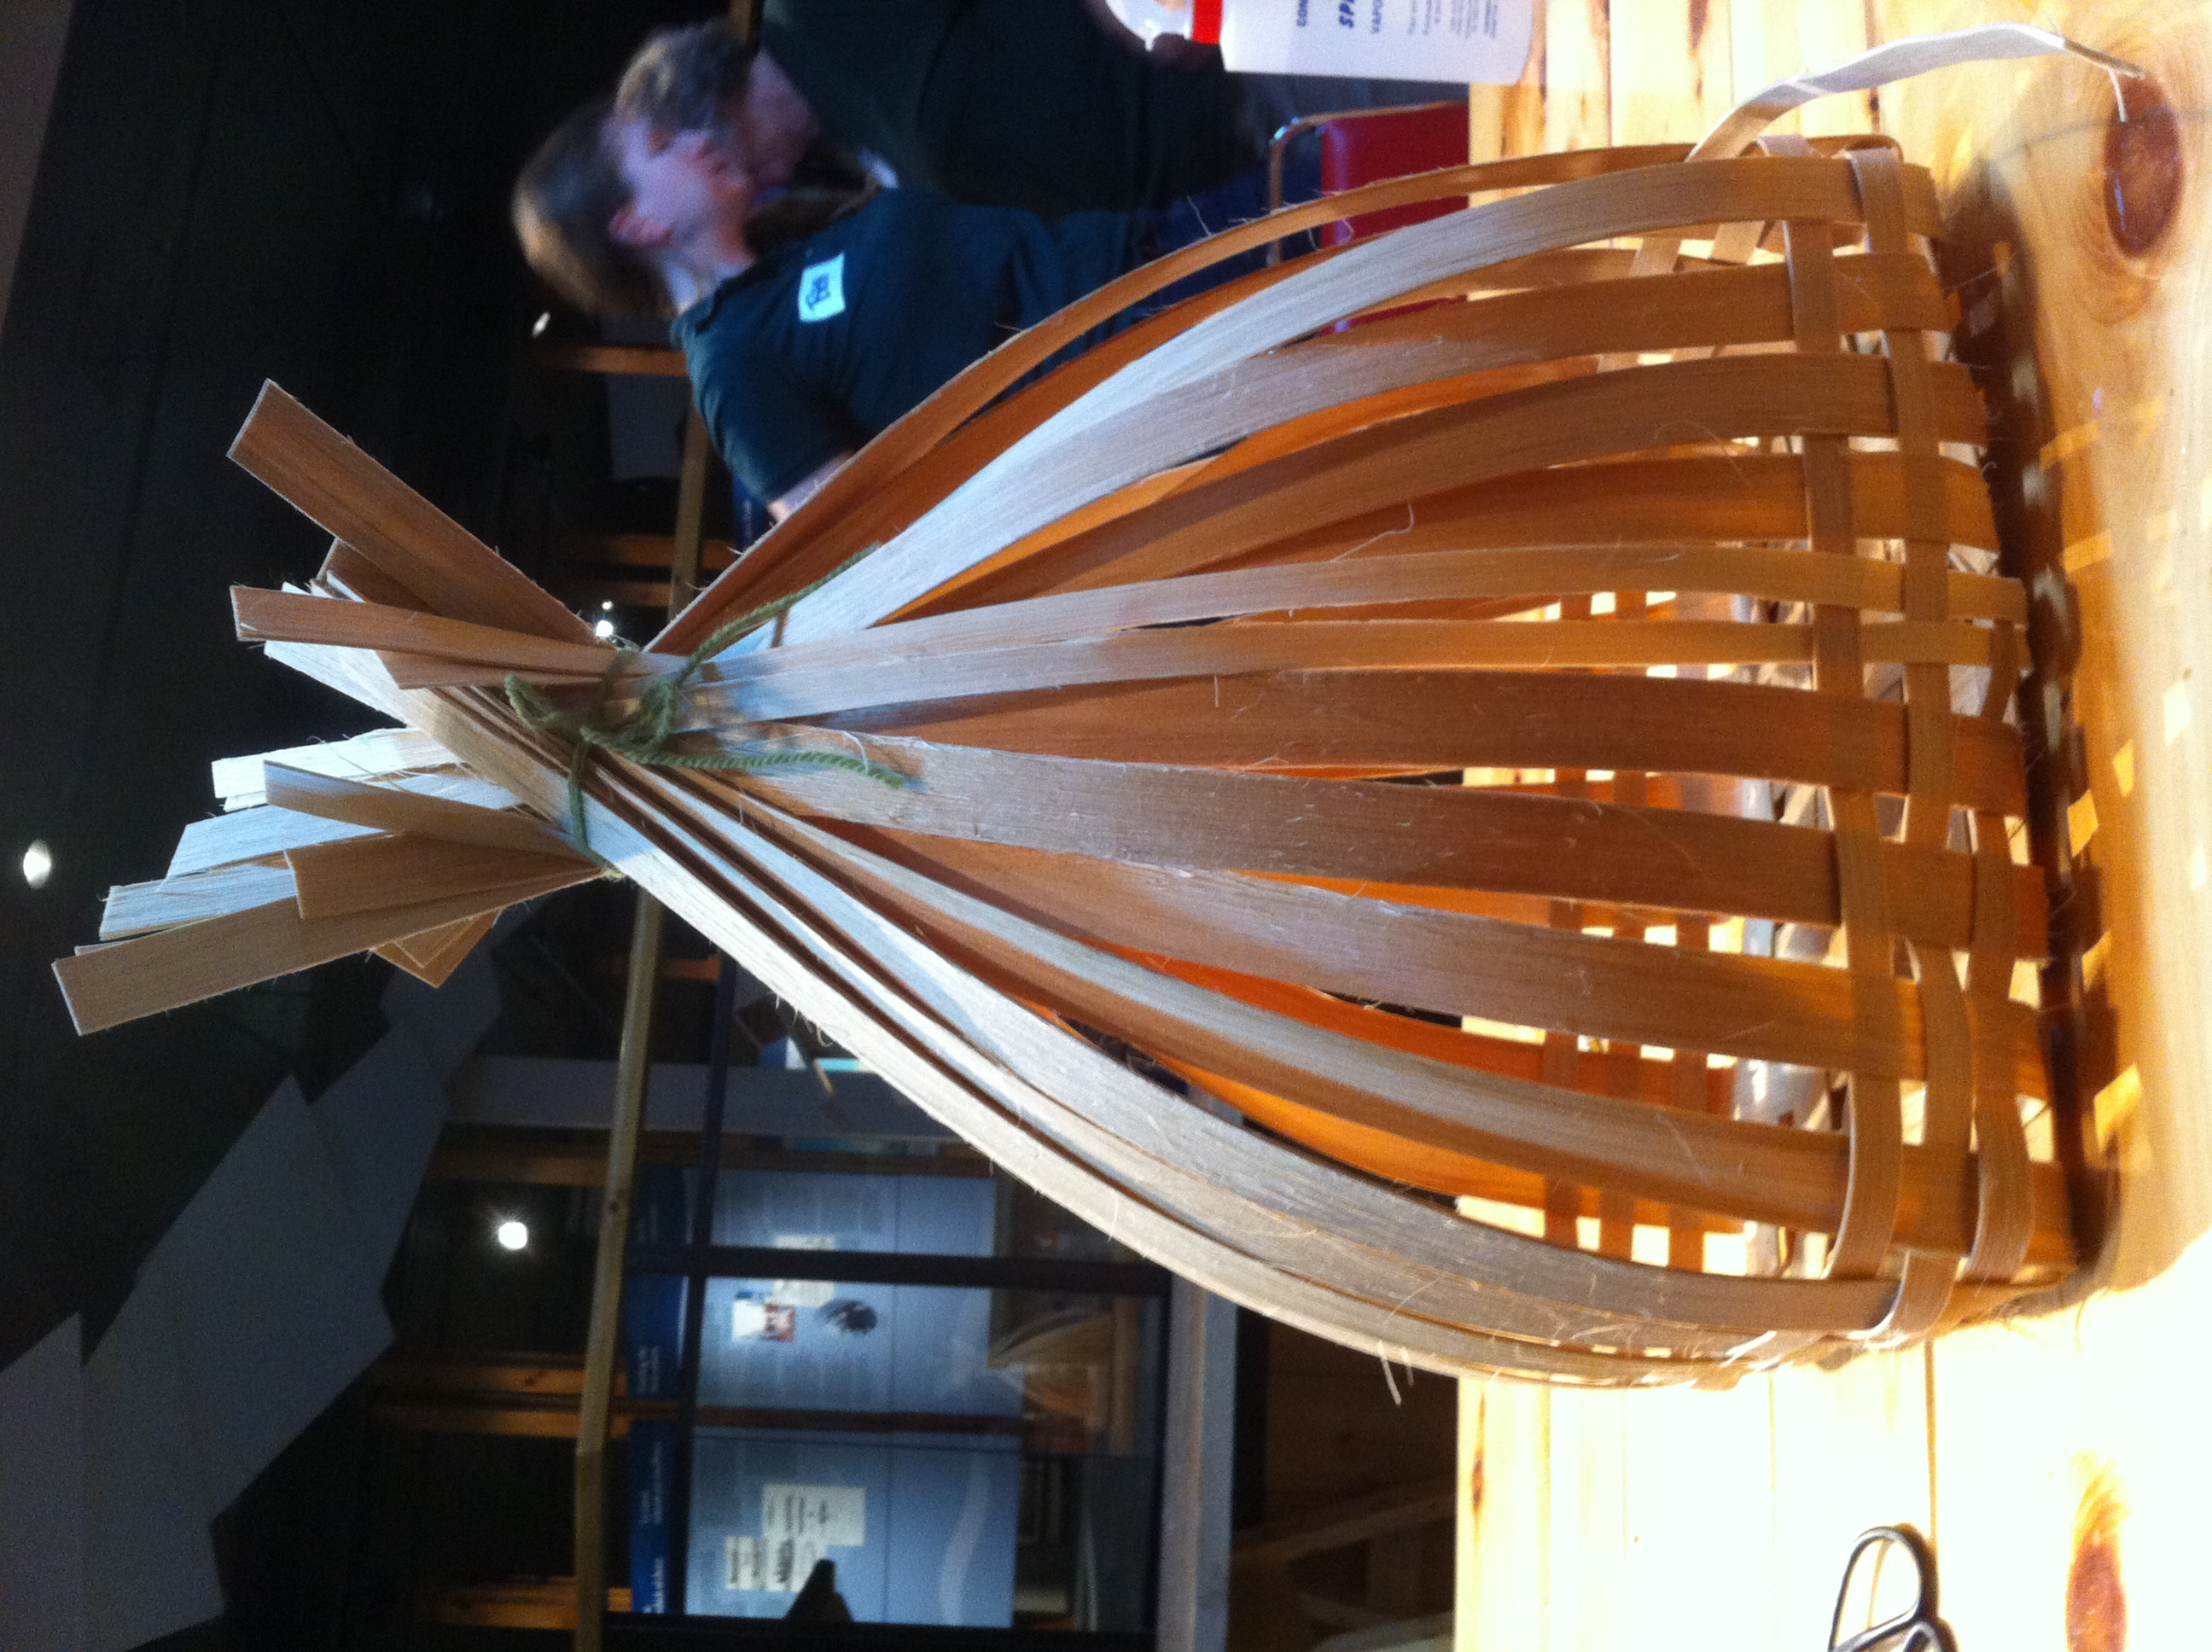
Pack Basket – starting to form the shape.
Pack Basket – starting to form the shape.
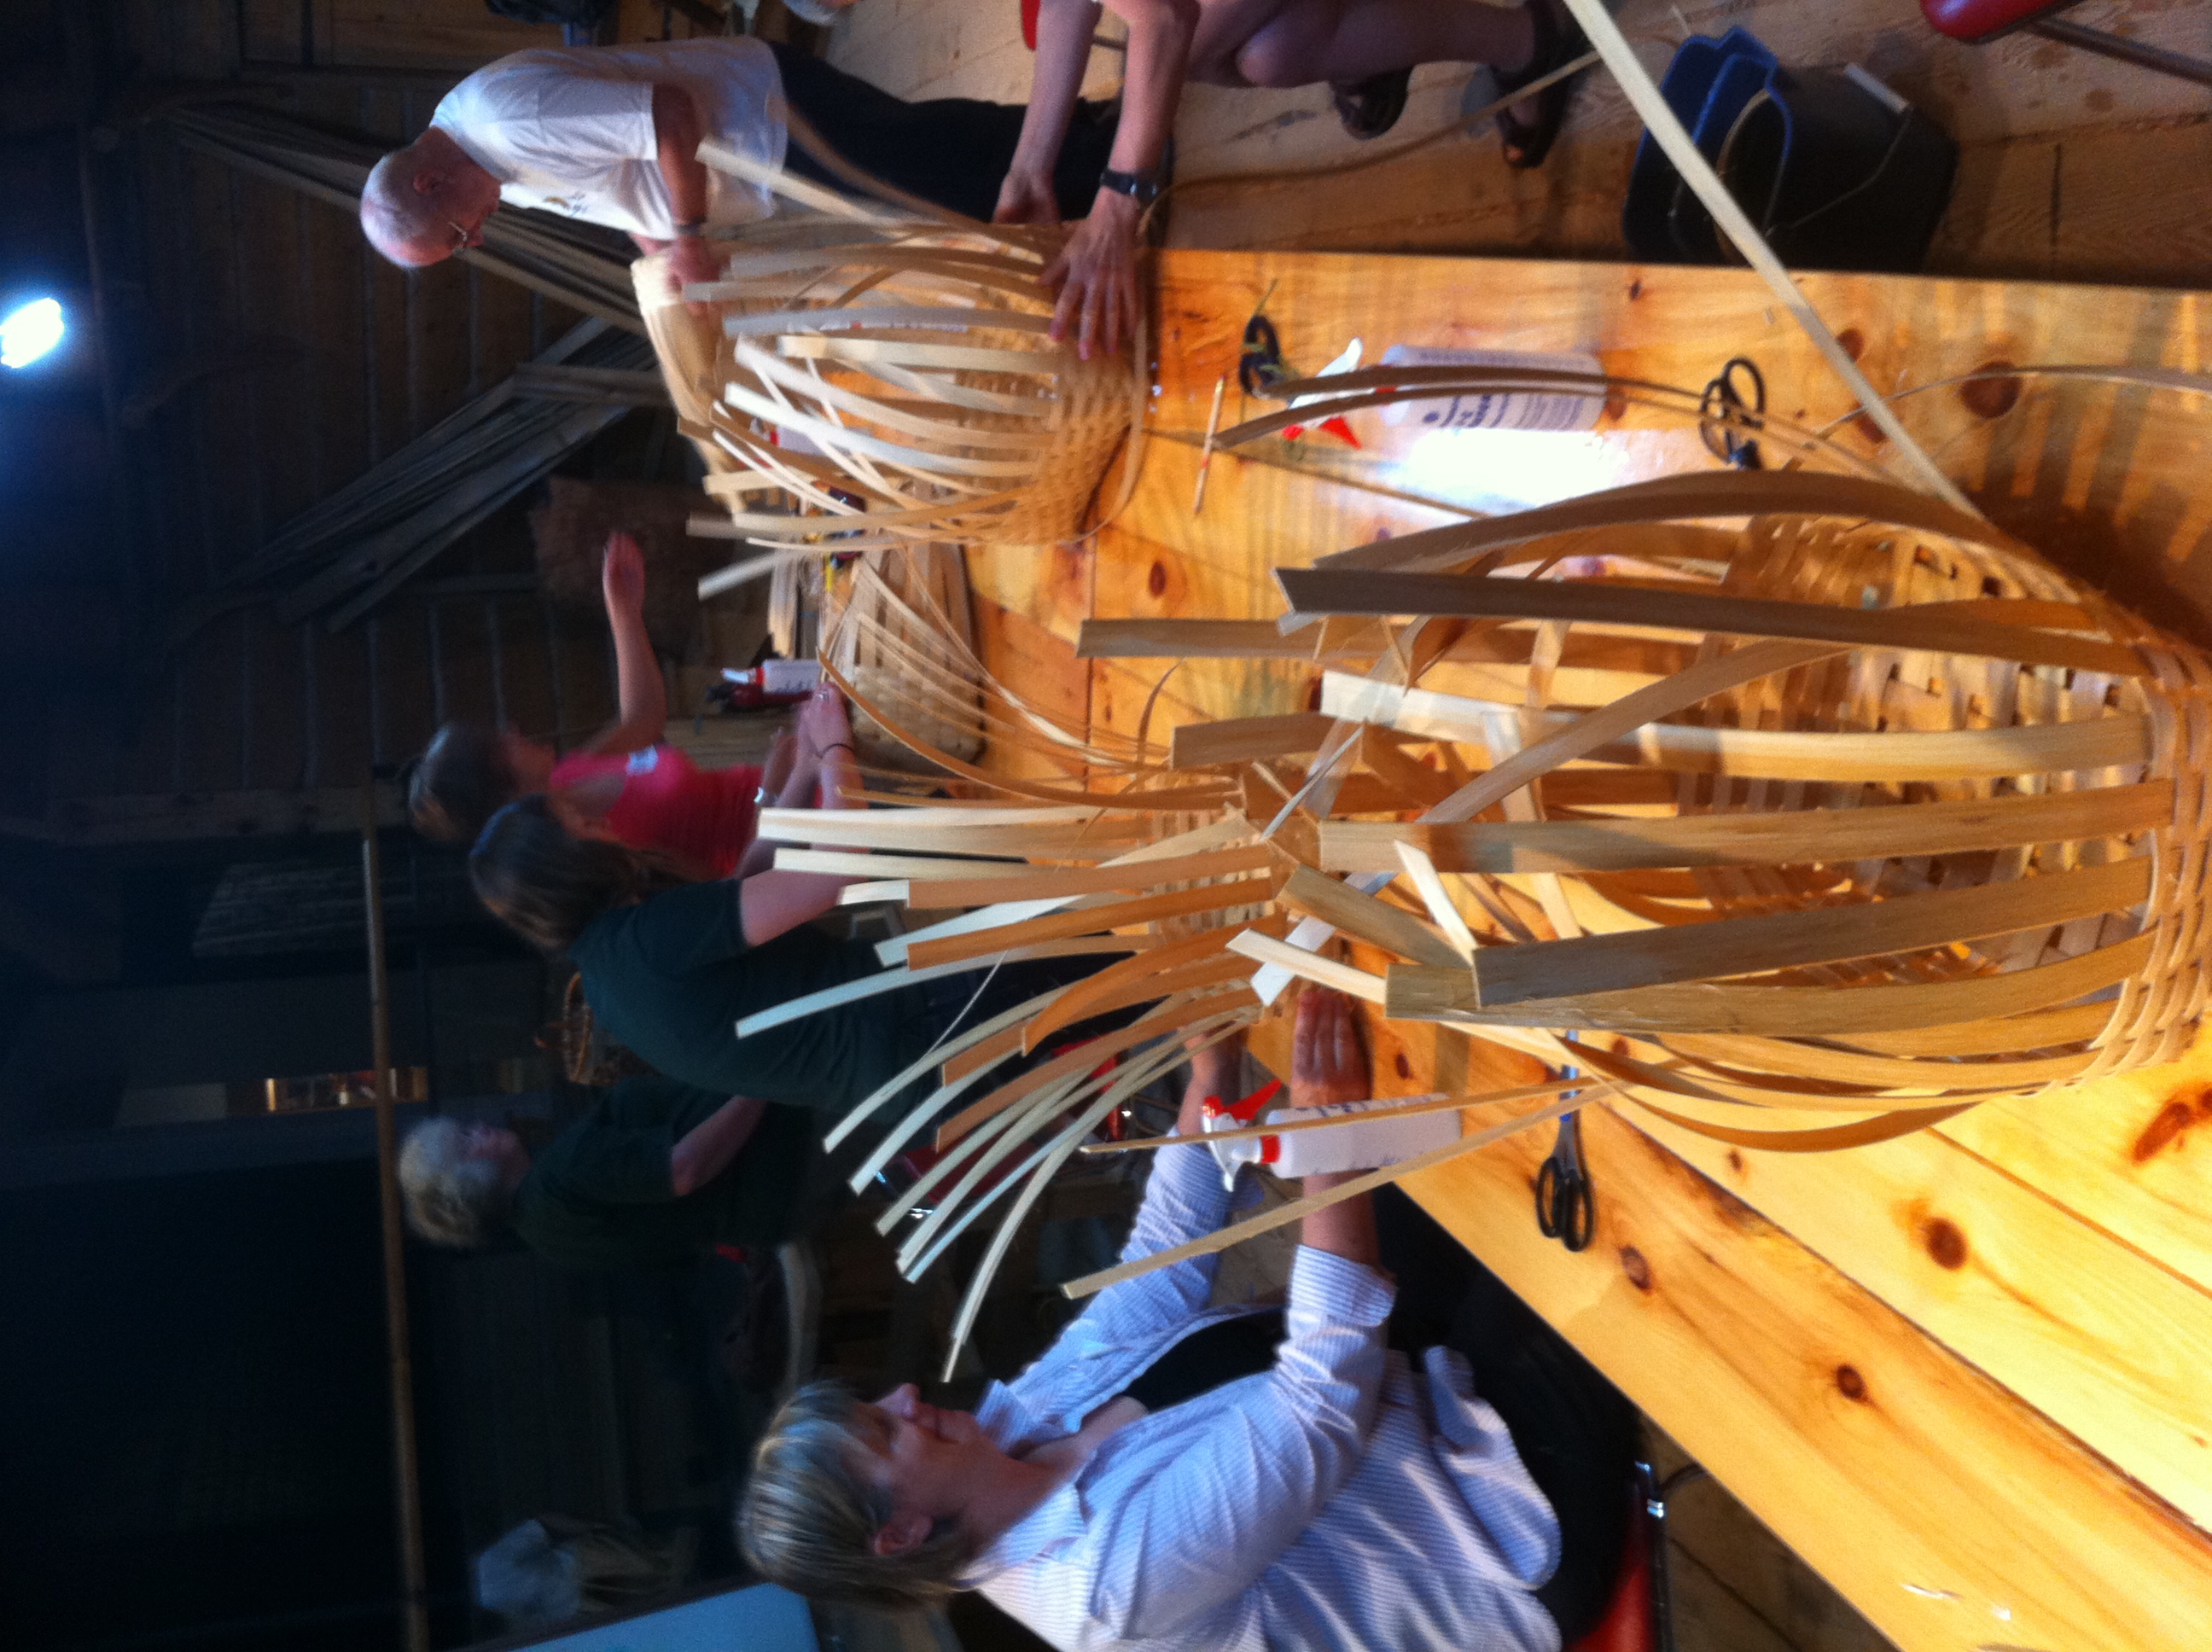
Pack Basket – a few participants weaving
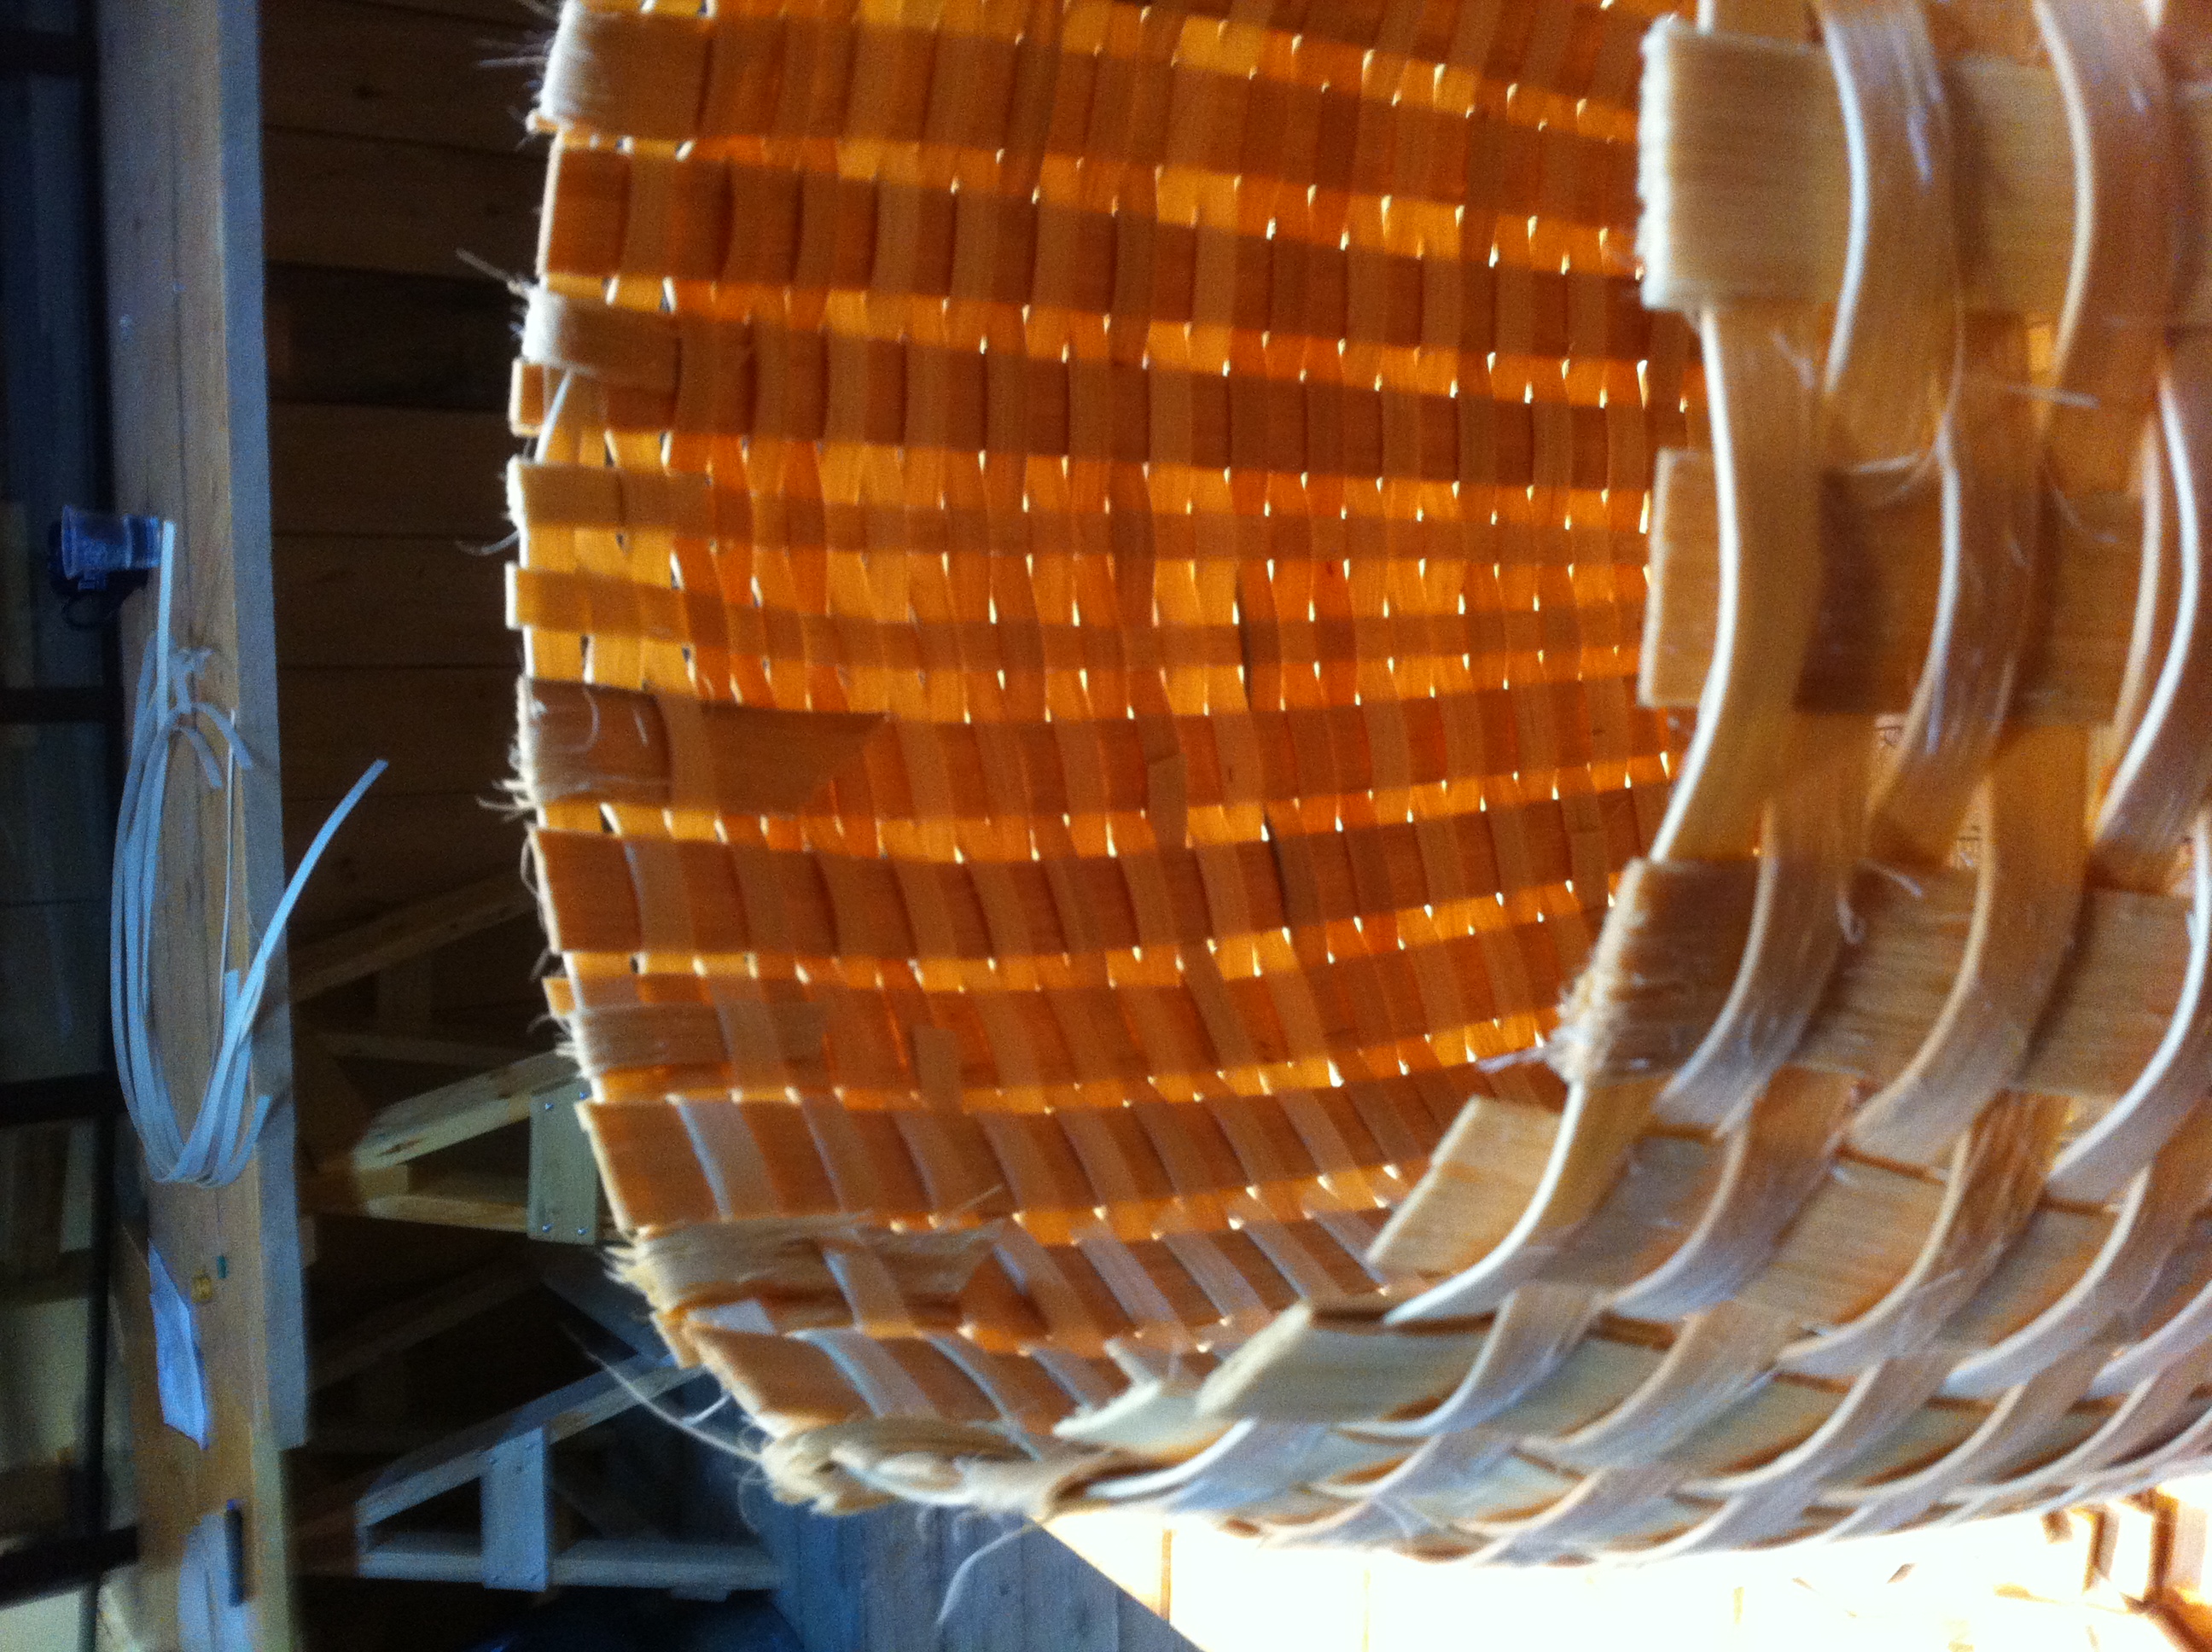
Pack Basket – weaving finished
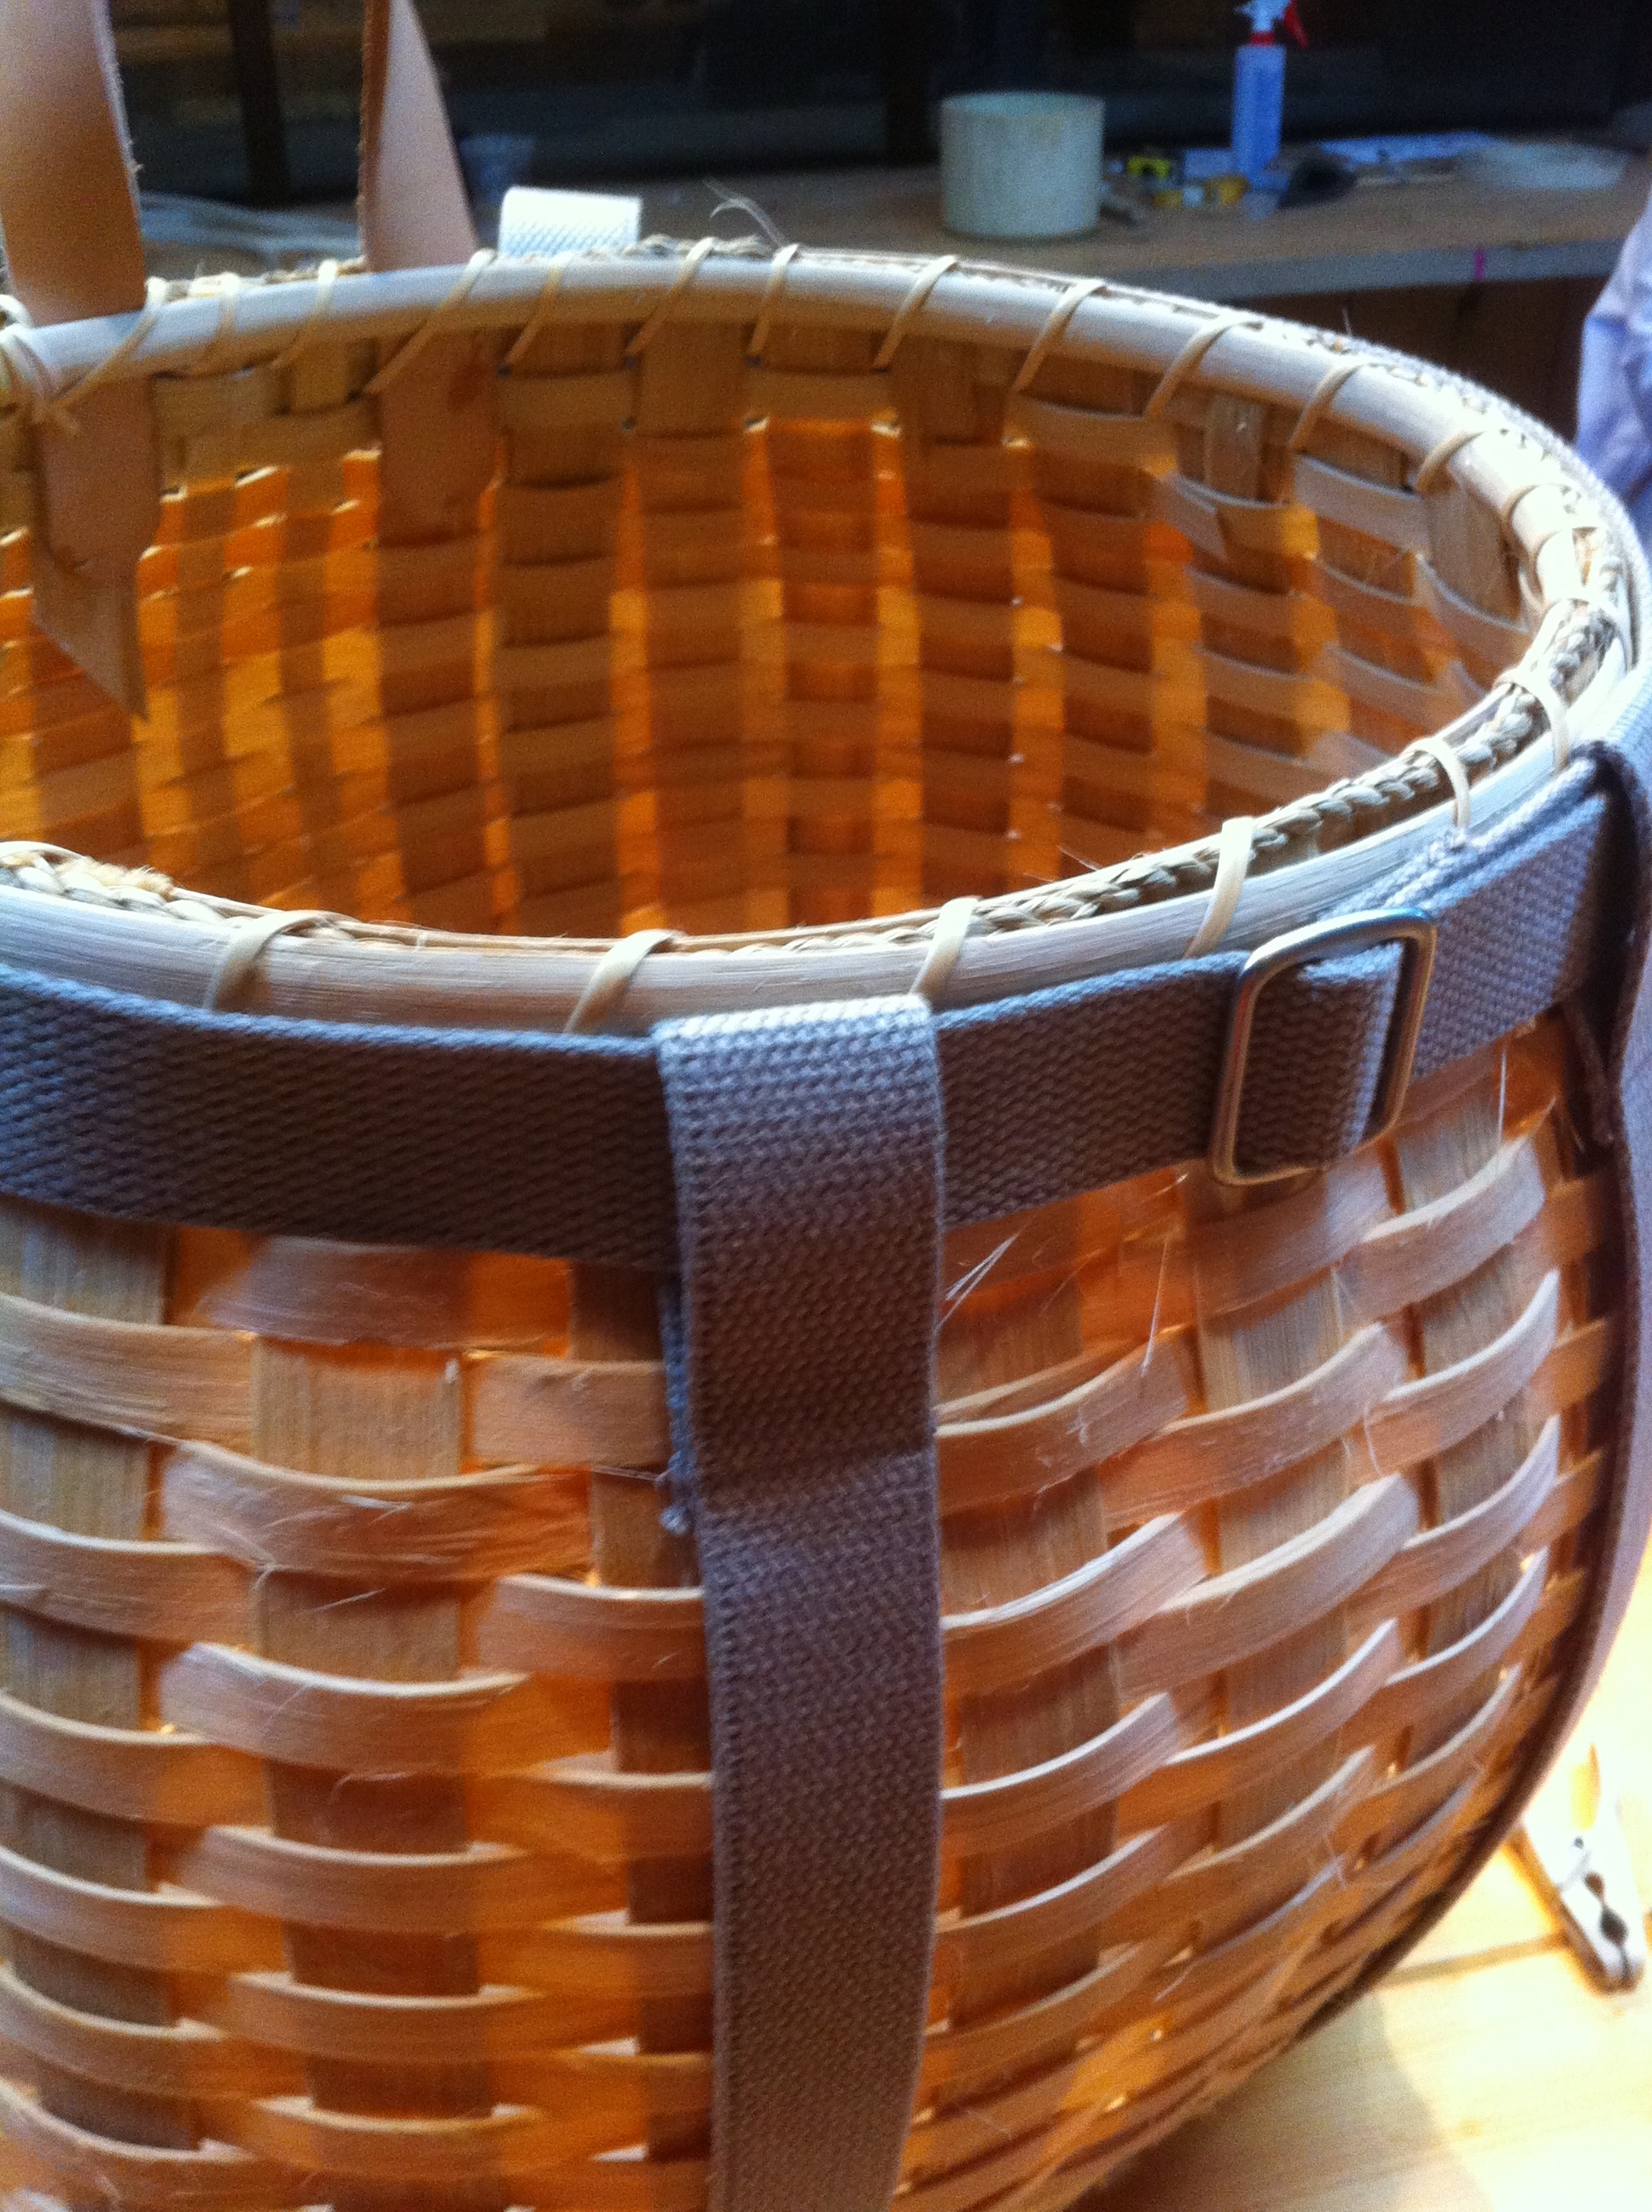
Pack Basket – clamping on the rim
Pack Basket – the rim and straps all fitted and finished!
Pack Basket – ready to be worn on the bike ride home!
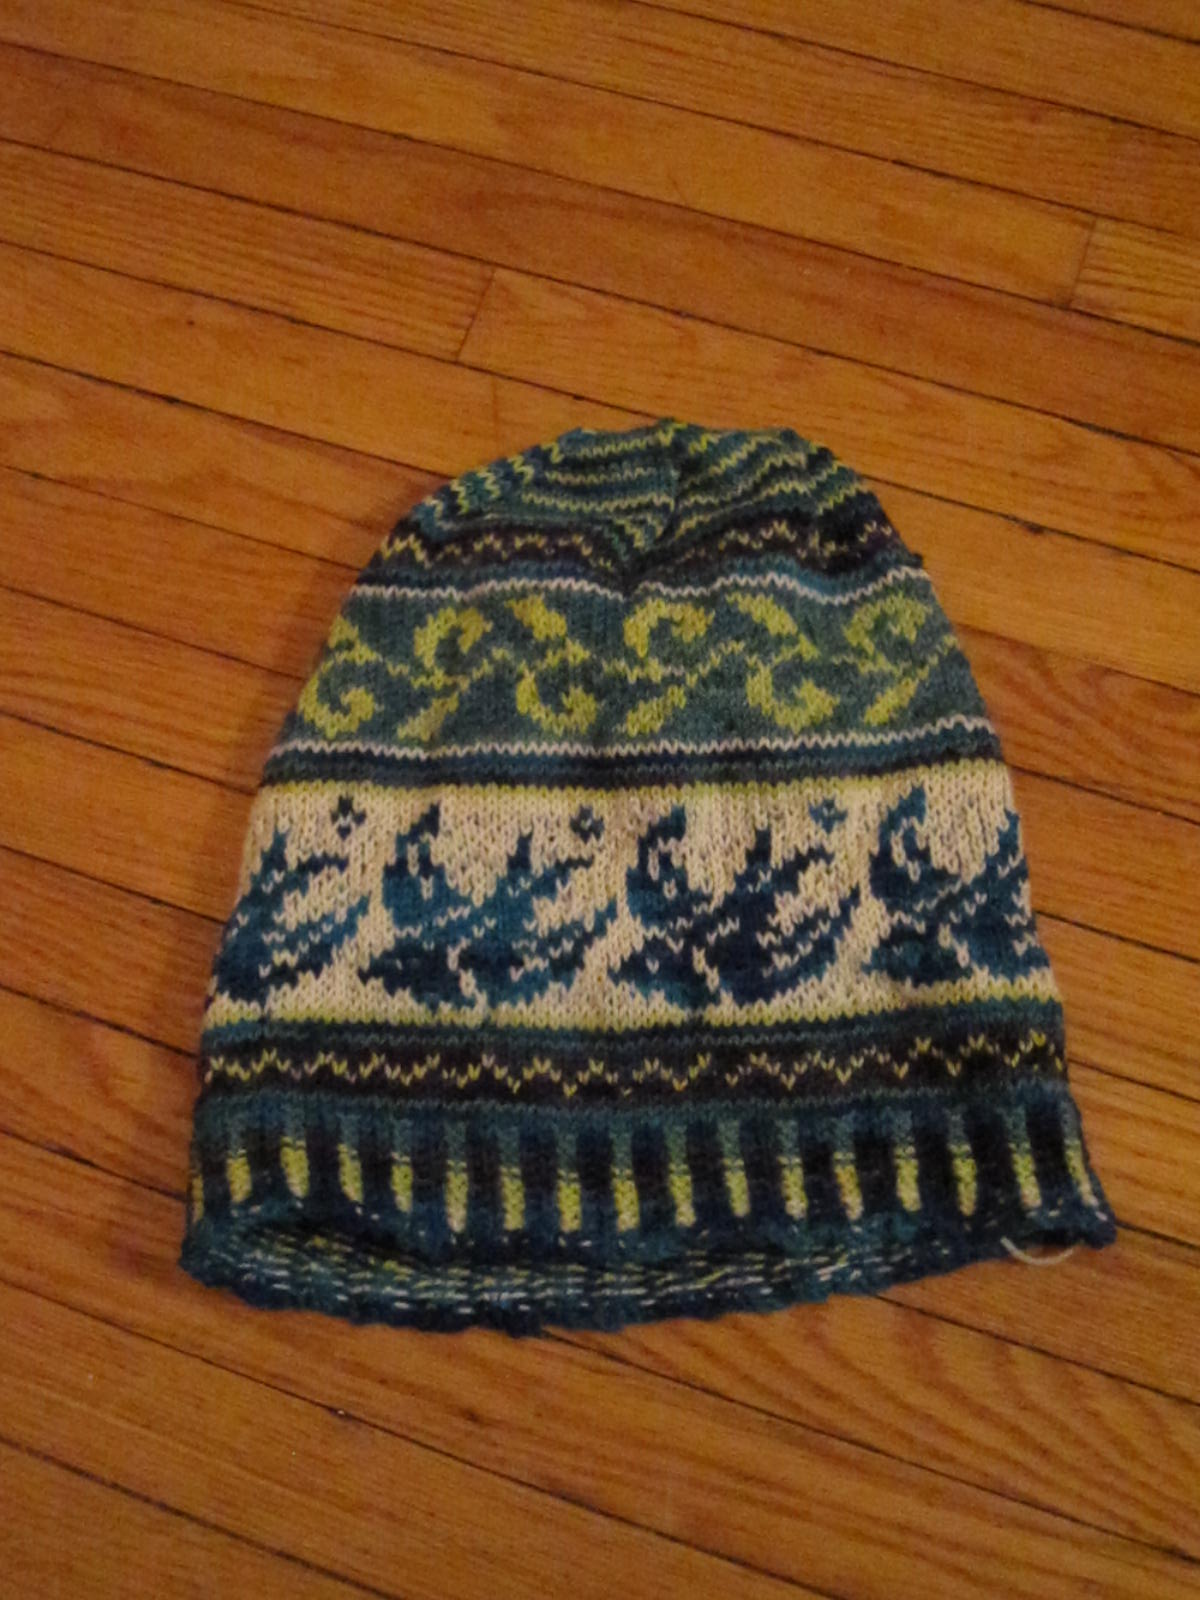
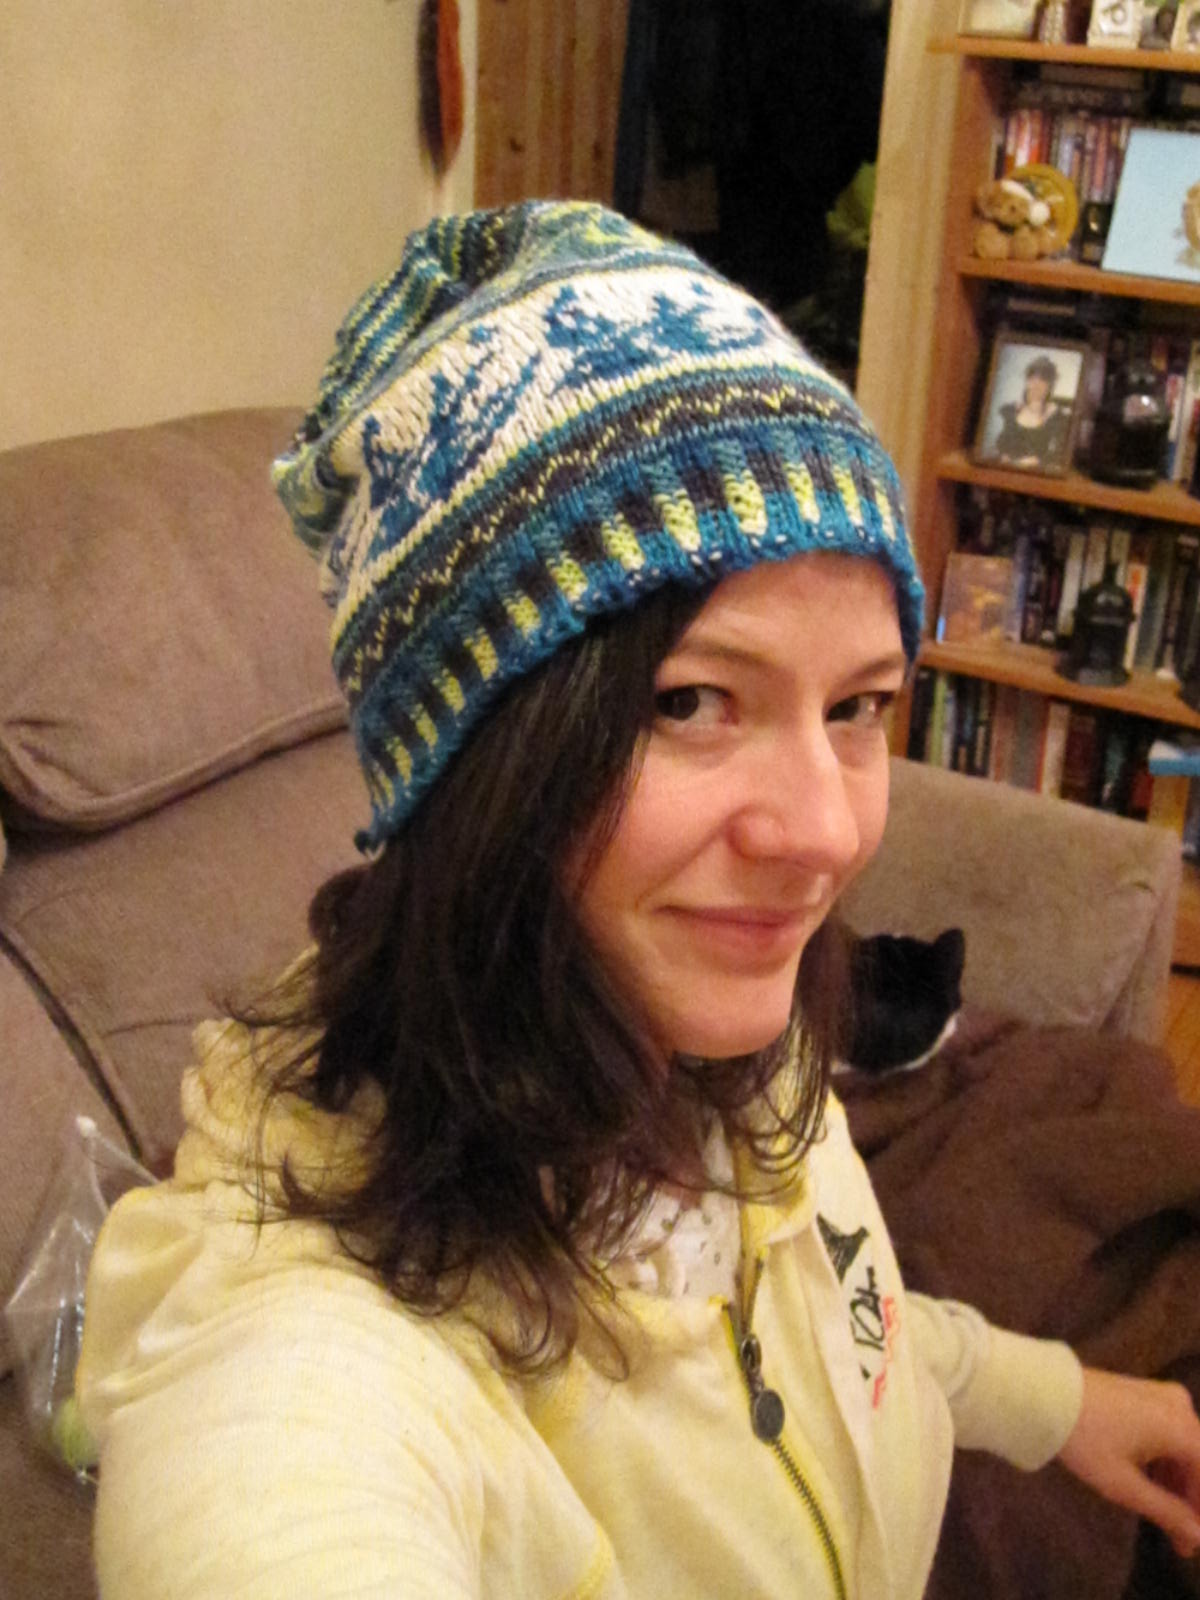
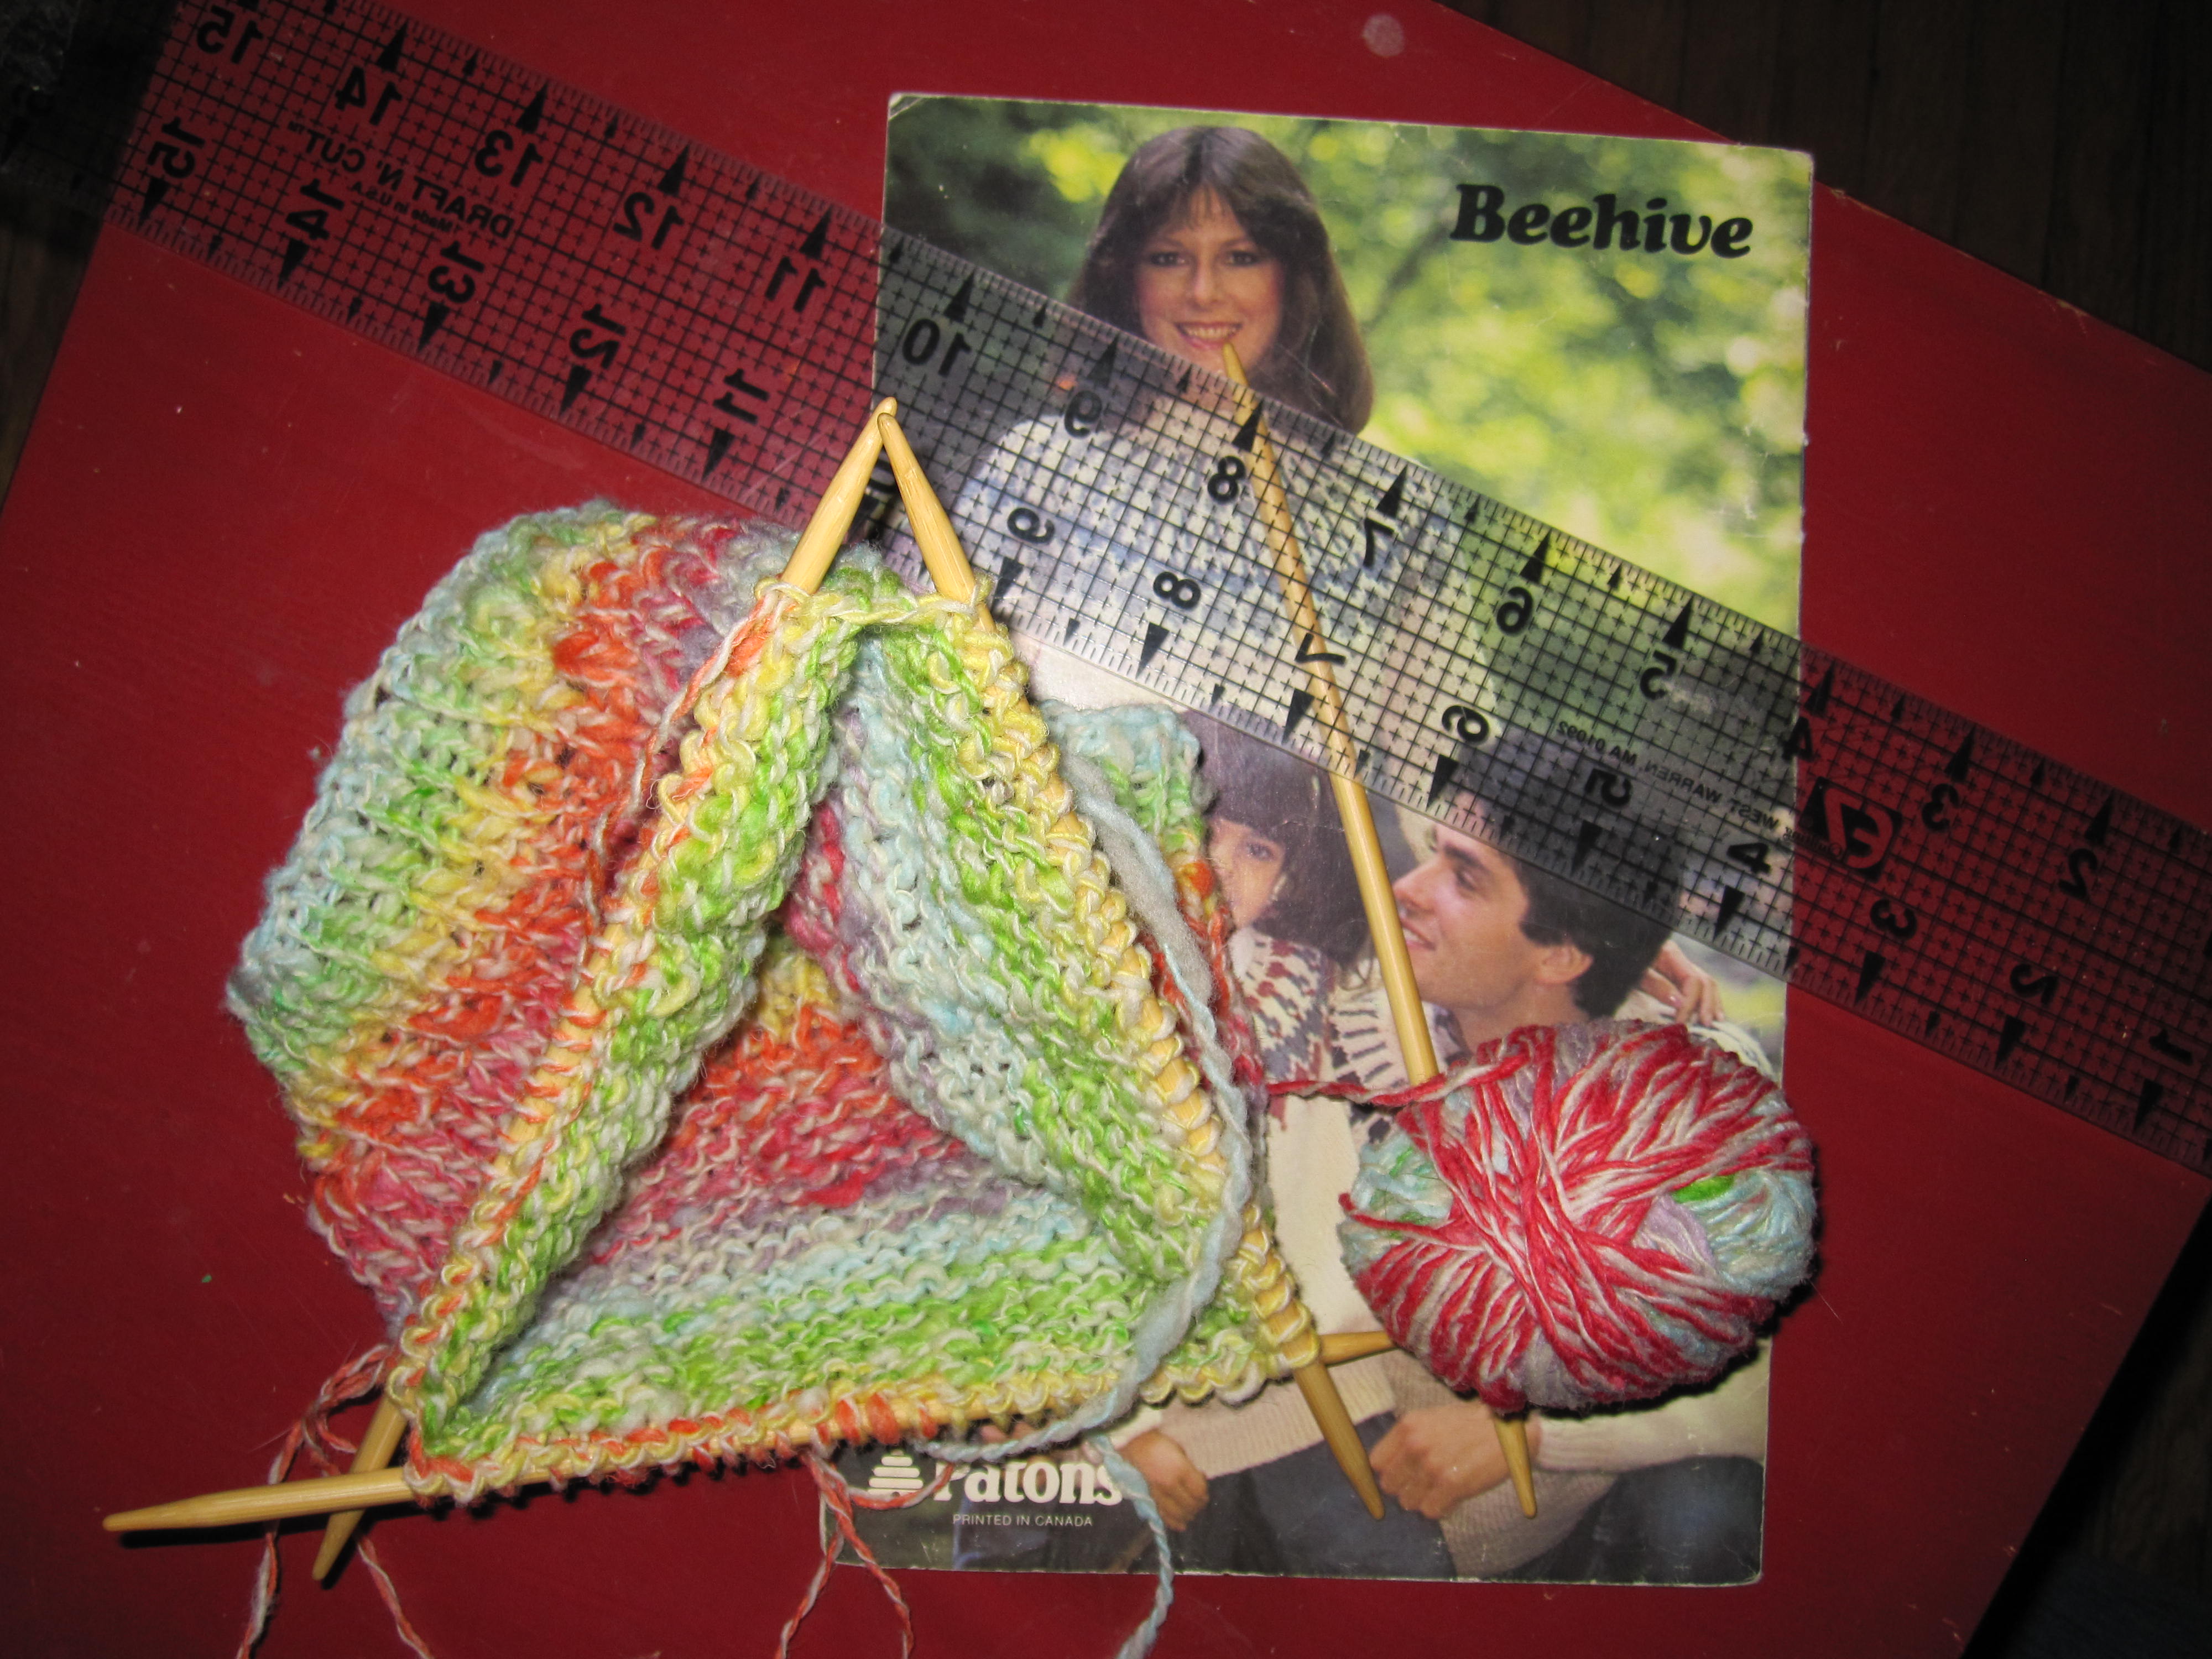
I dyed the unspun wool with Kool-Aid, and then I spun it in rainbow order. Then I knit the scarf. I thought I would make a hat to match and knit it from the pattern in this Pattons knitting book. The pattern is actually a Fair Isle pattern, but I just knit it all from my rainbow wool.
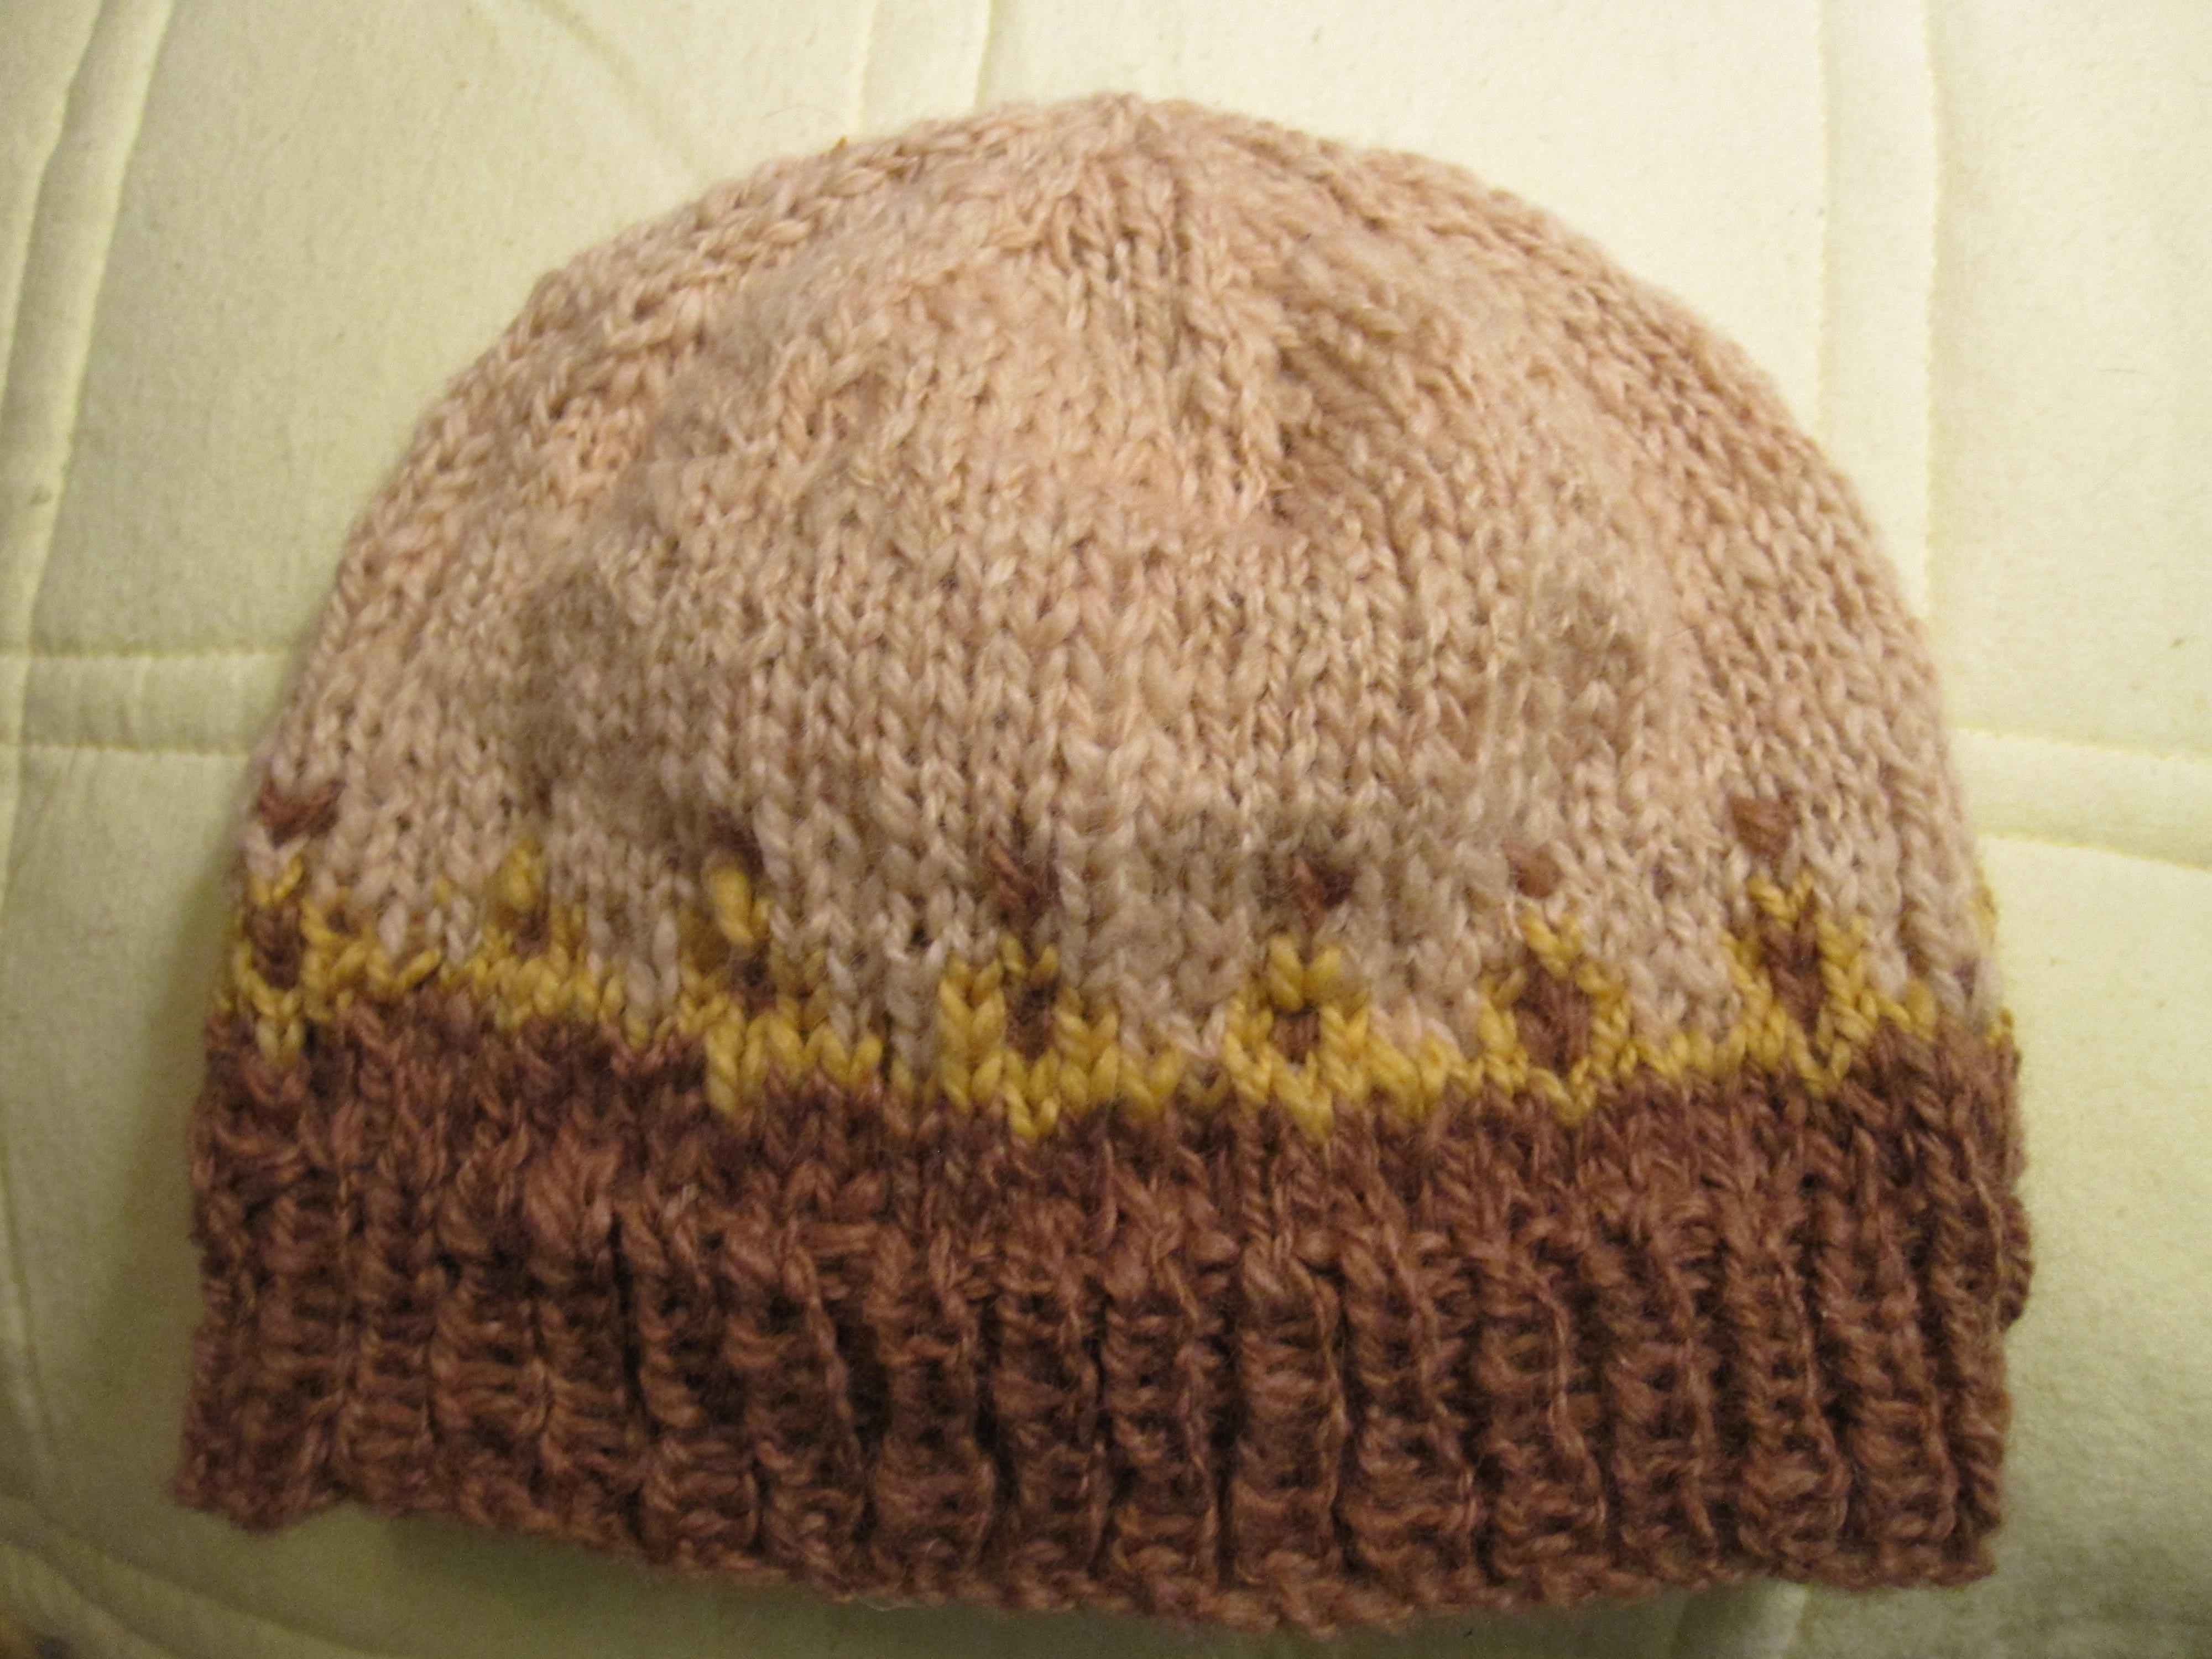
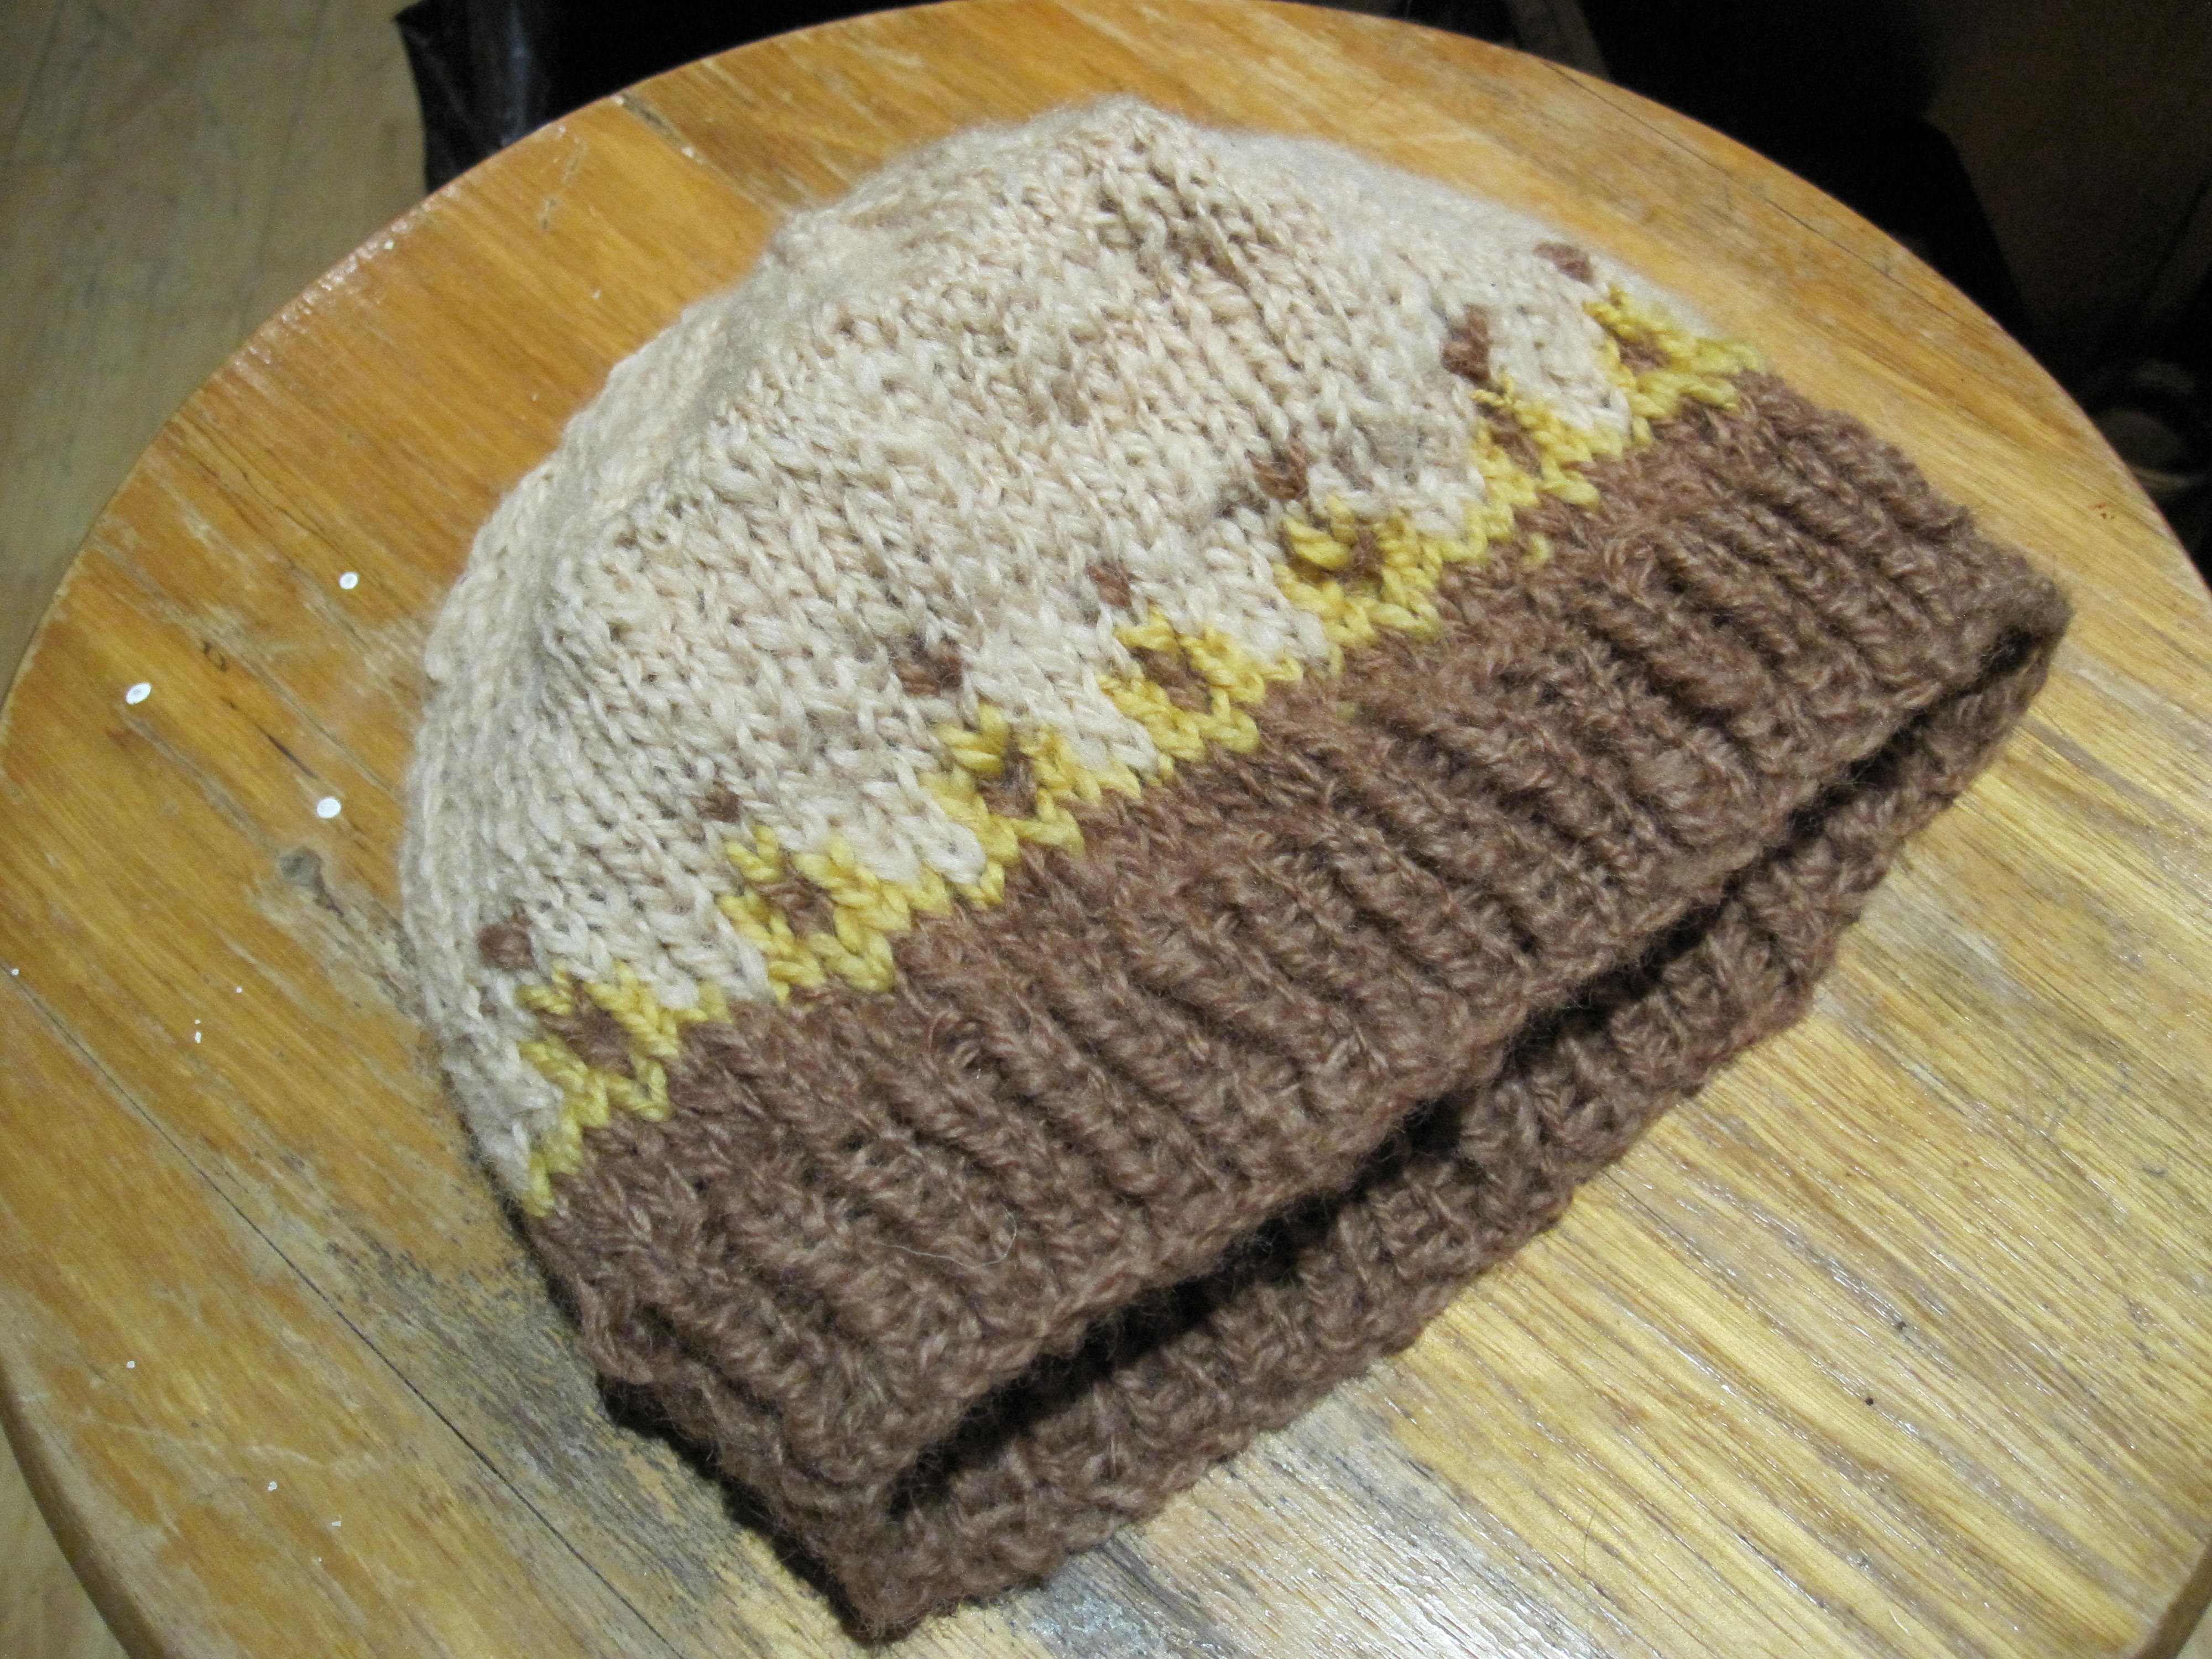
This is the same pattern (with the Fair Isle pattern). This hand spun wool was dyed with Black Walnuts, Onion Skins and Goldenrod.
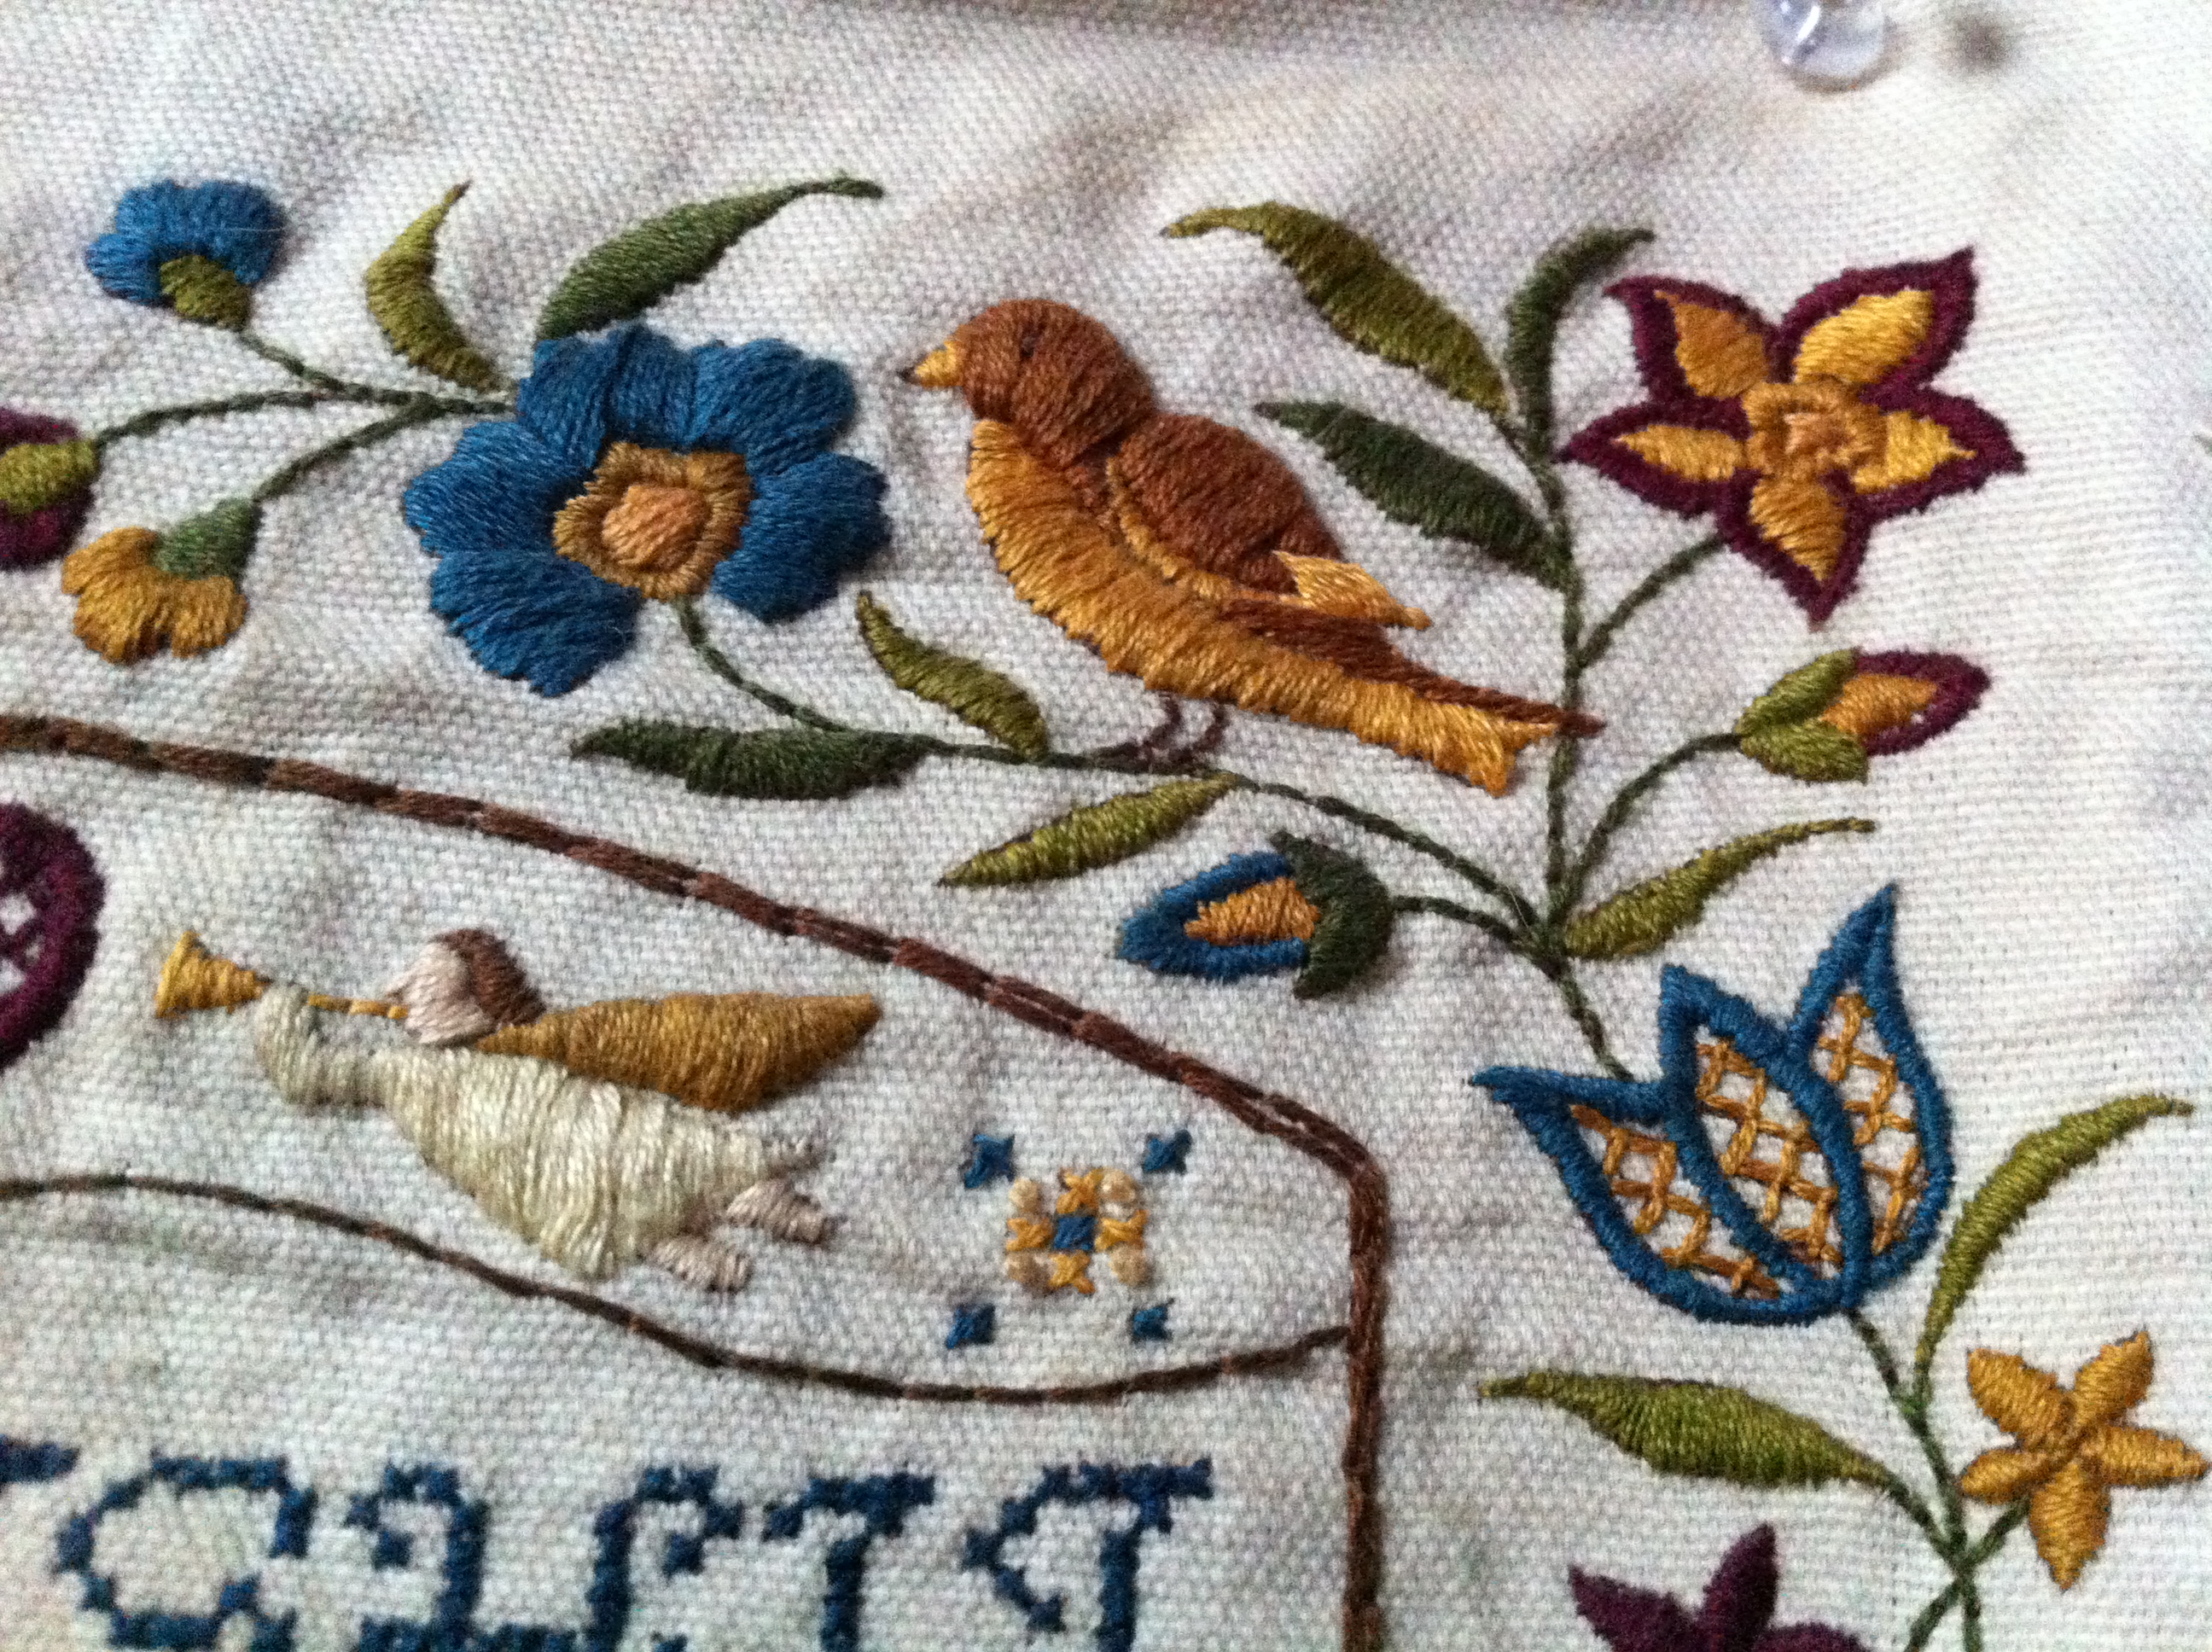
This is an embroidered sampler that I created from a pattern. Generally I design my embroidered pieces myself, but this one was kicking around the house, and so I started working on it. The main change that I made was to re-work the colours, which were originally in some super-gross pastels. I (obviously) prefer the colours in the picture.
I think this design was called a ‘Jacobean’ sampler, but it looks to me more like the 1980s than the 1600s.
You’ll notice that there’s space at the bottom, which is where my name and the date is supposed to go; it’s the one part I can’t seem to get around to finishing. The rest of the sampler has been done for years.
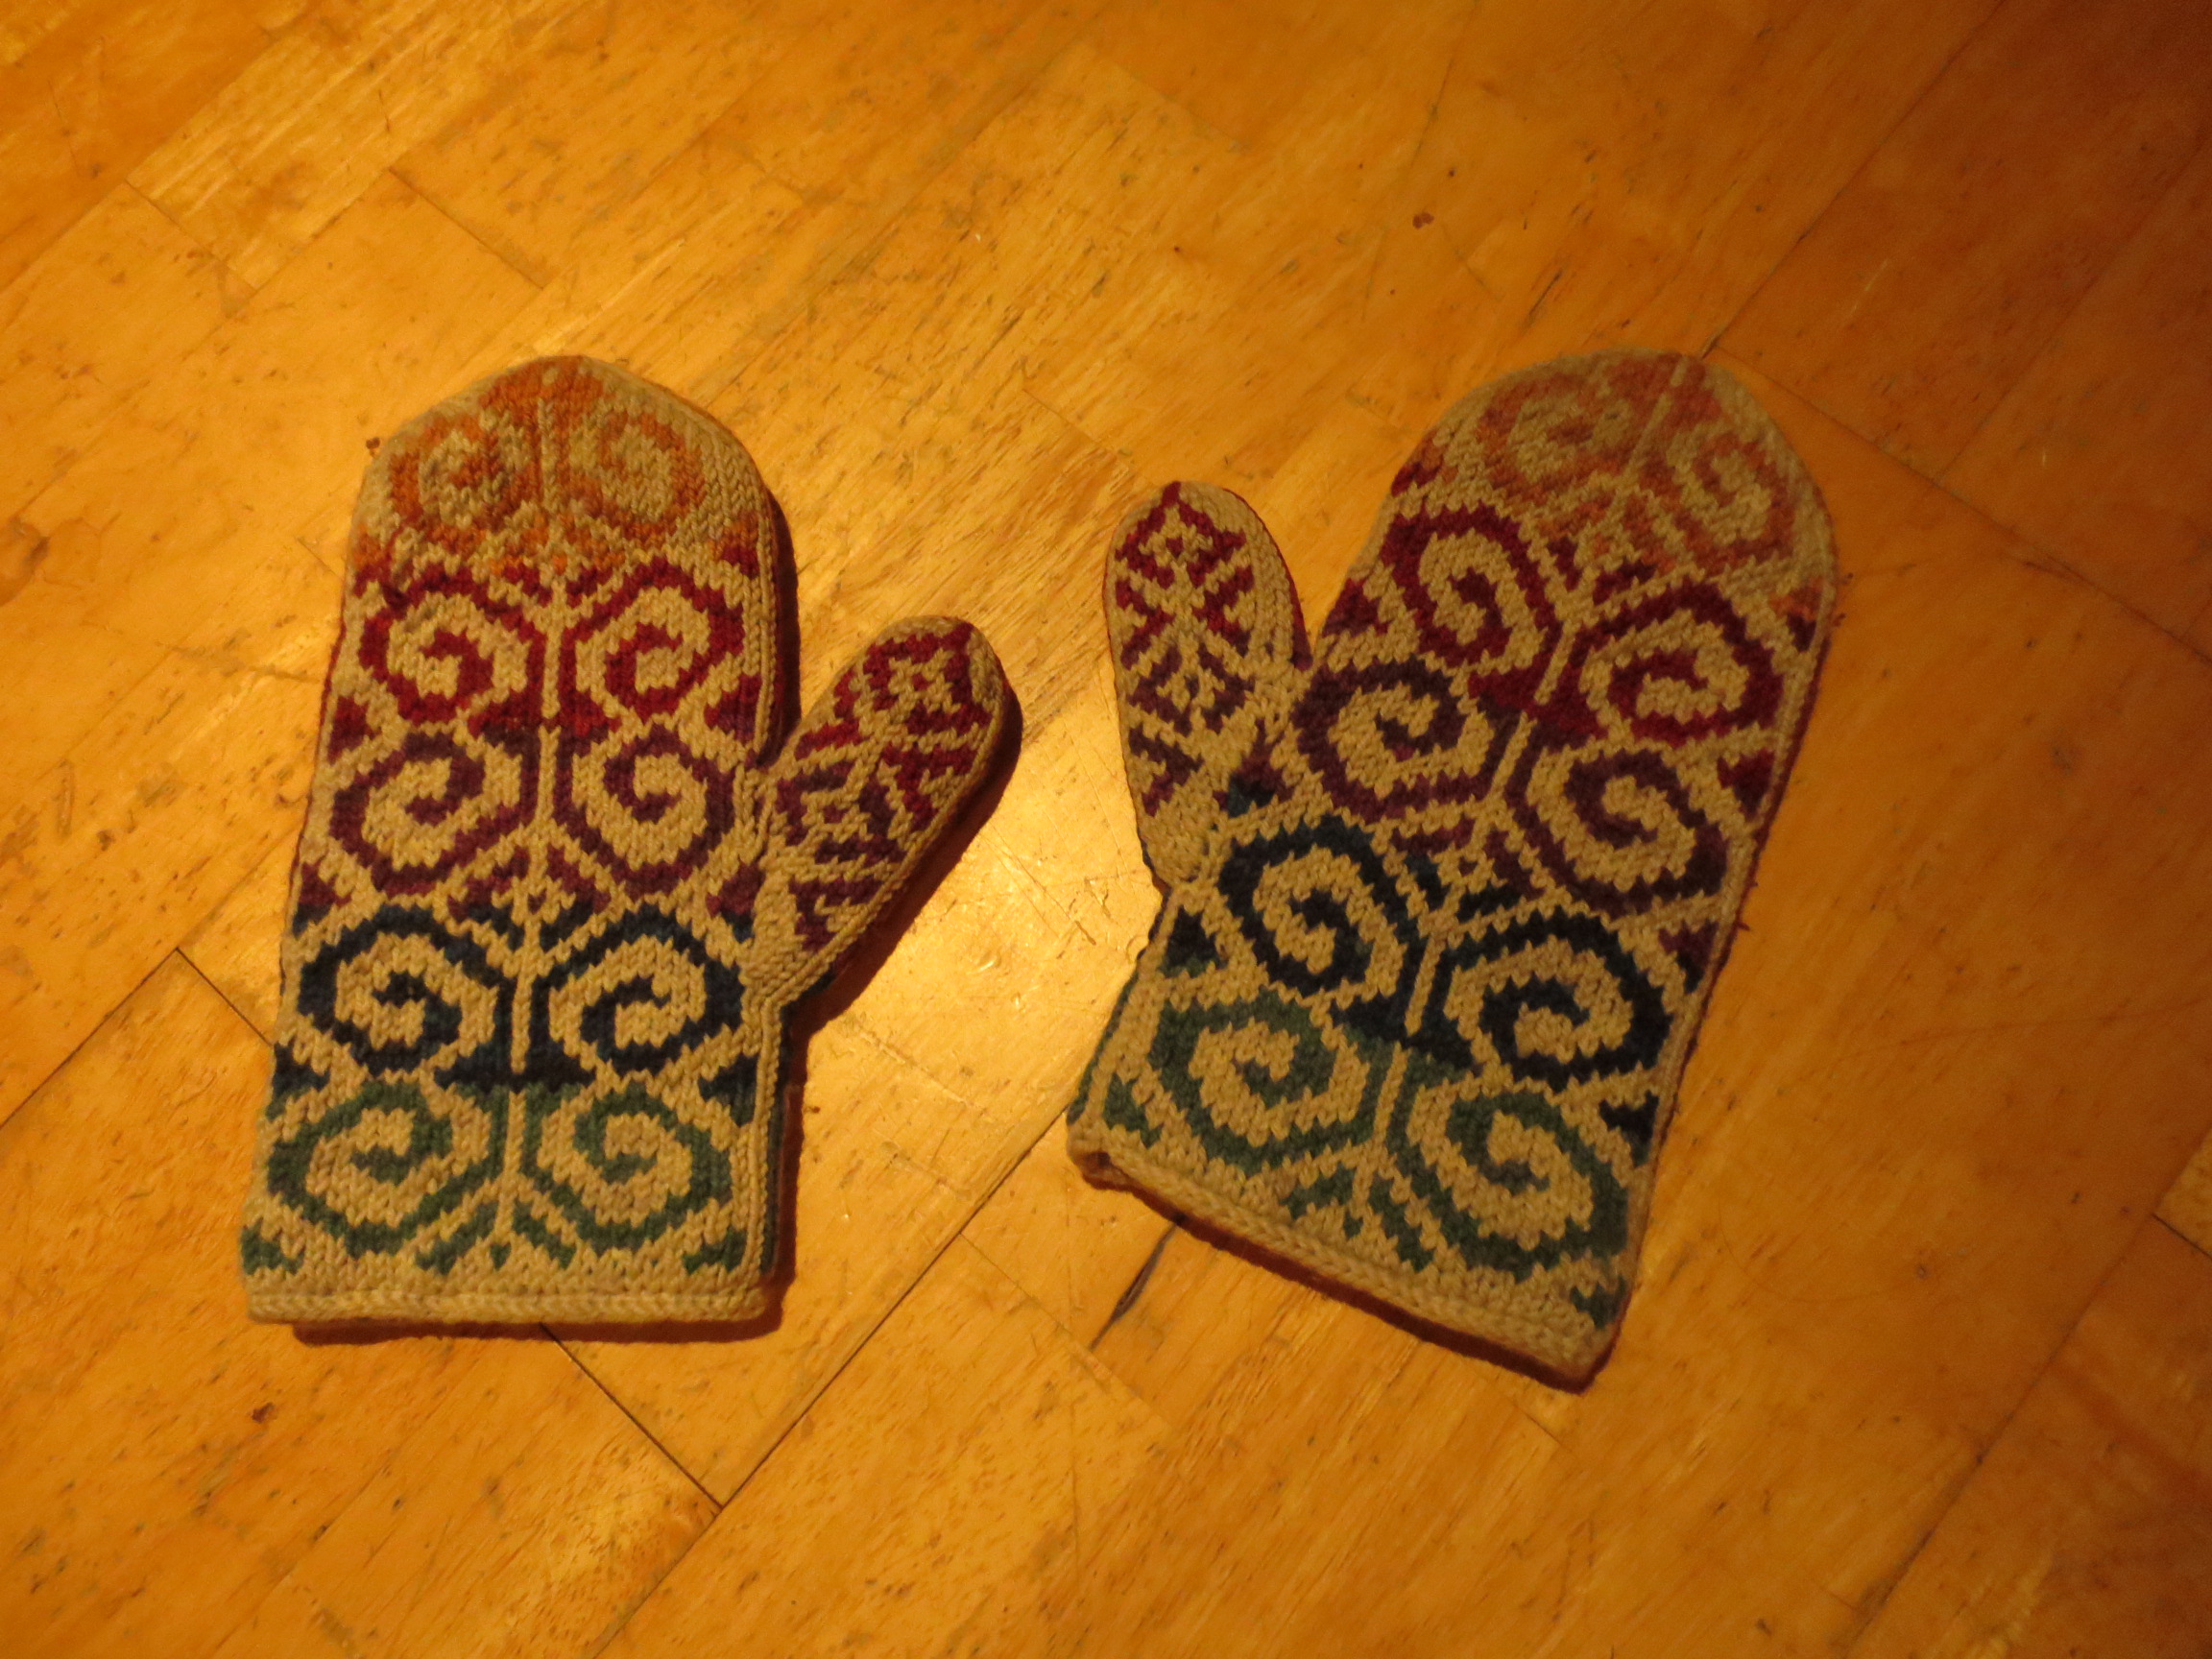
My sister bought me a kit for Christmas one year to make these fiddlehead mittens from Tanis Fibre Arts. They have a knitted lining and are super warm. This was my first attempt at fair isle knitting or knitting with several colours. I love the result, but found the pattern for the lining to be a challenge because it was too big. I re-knit the one mitt’s lining several times, but didn’t redo the other, so it’s a bit bunched in the end. I wear them anyway, I love knitting!
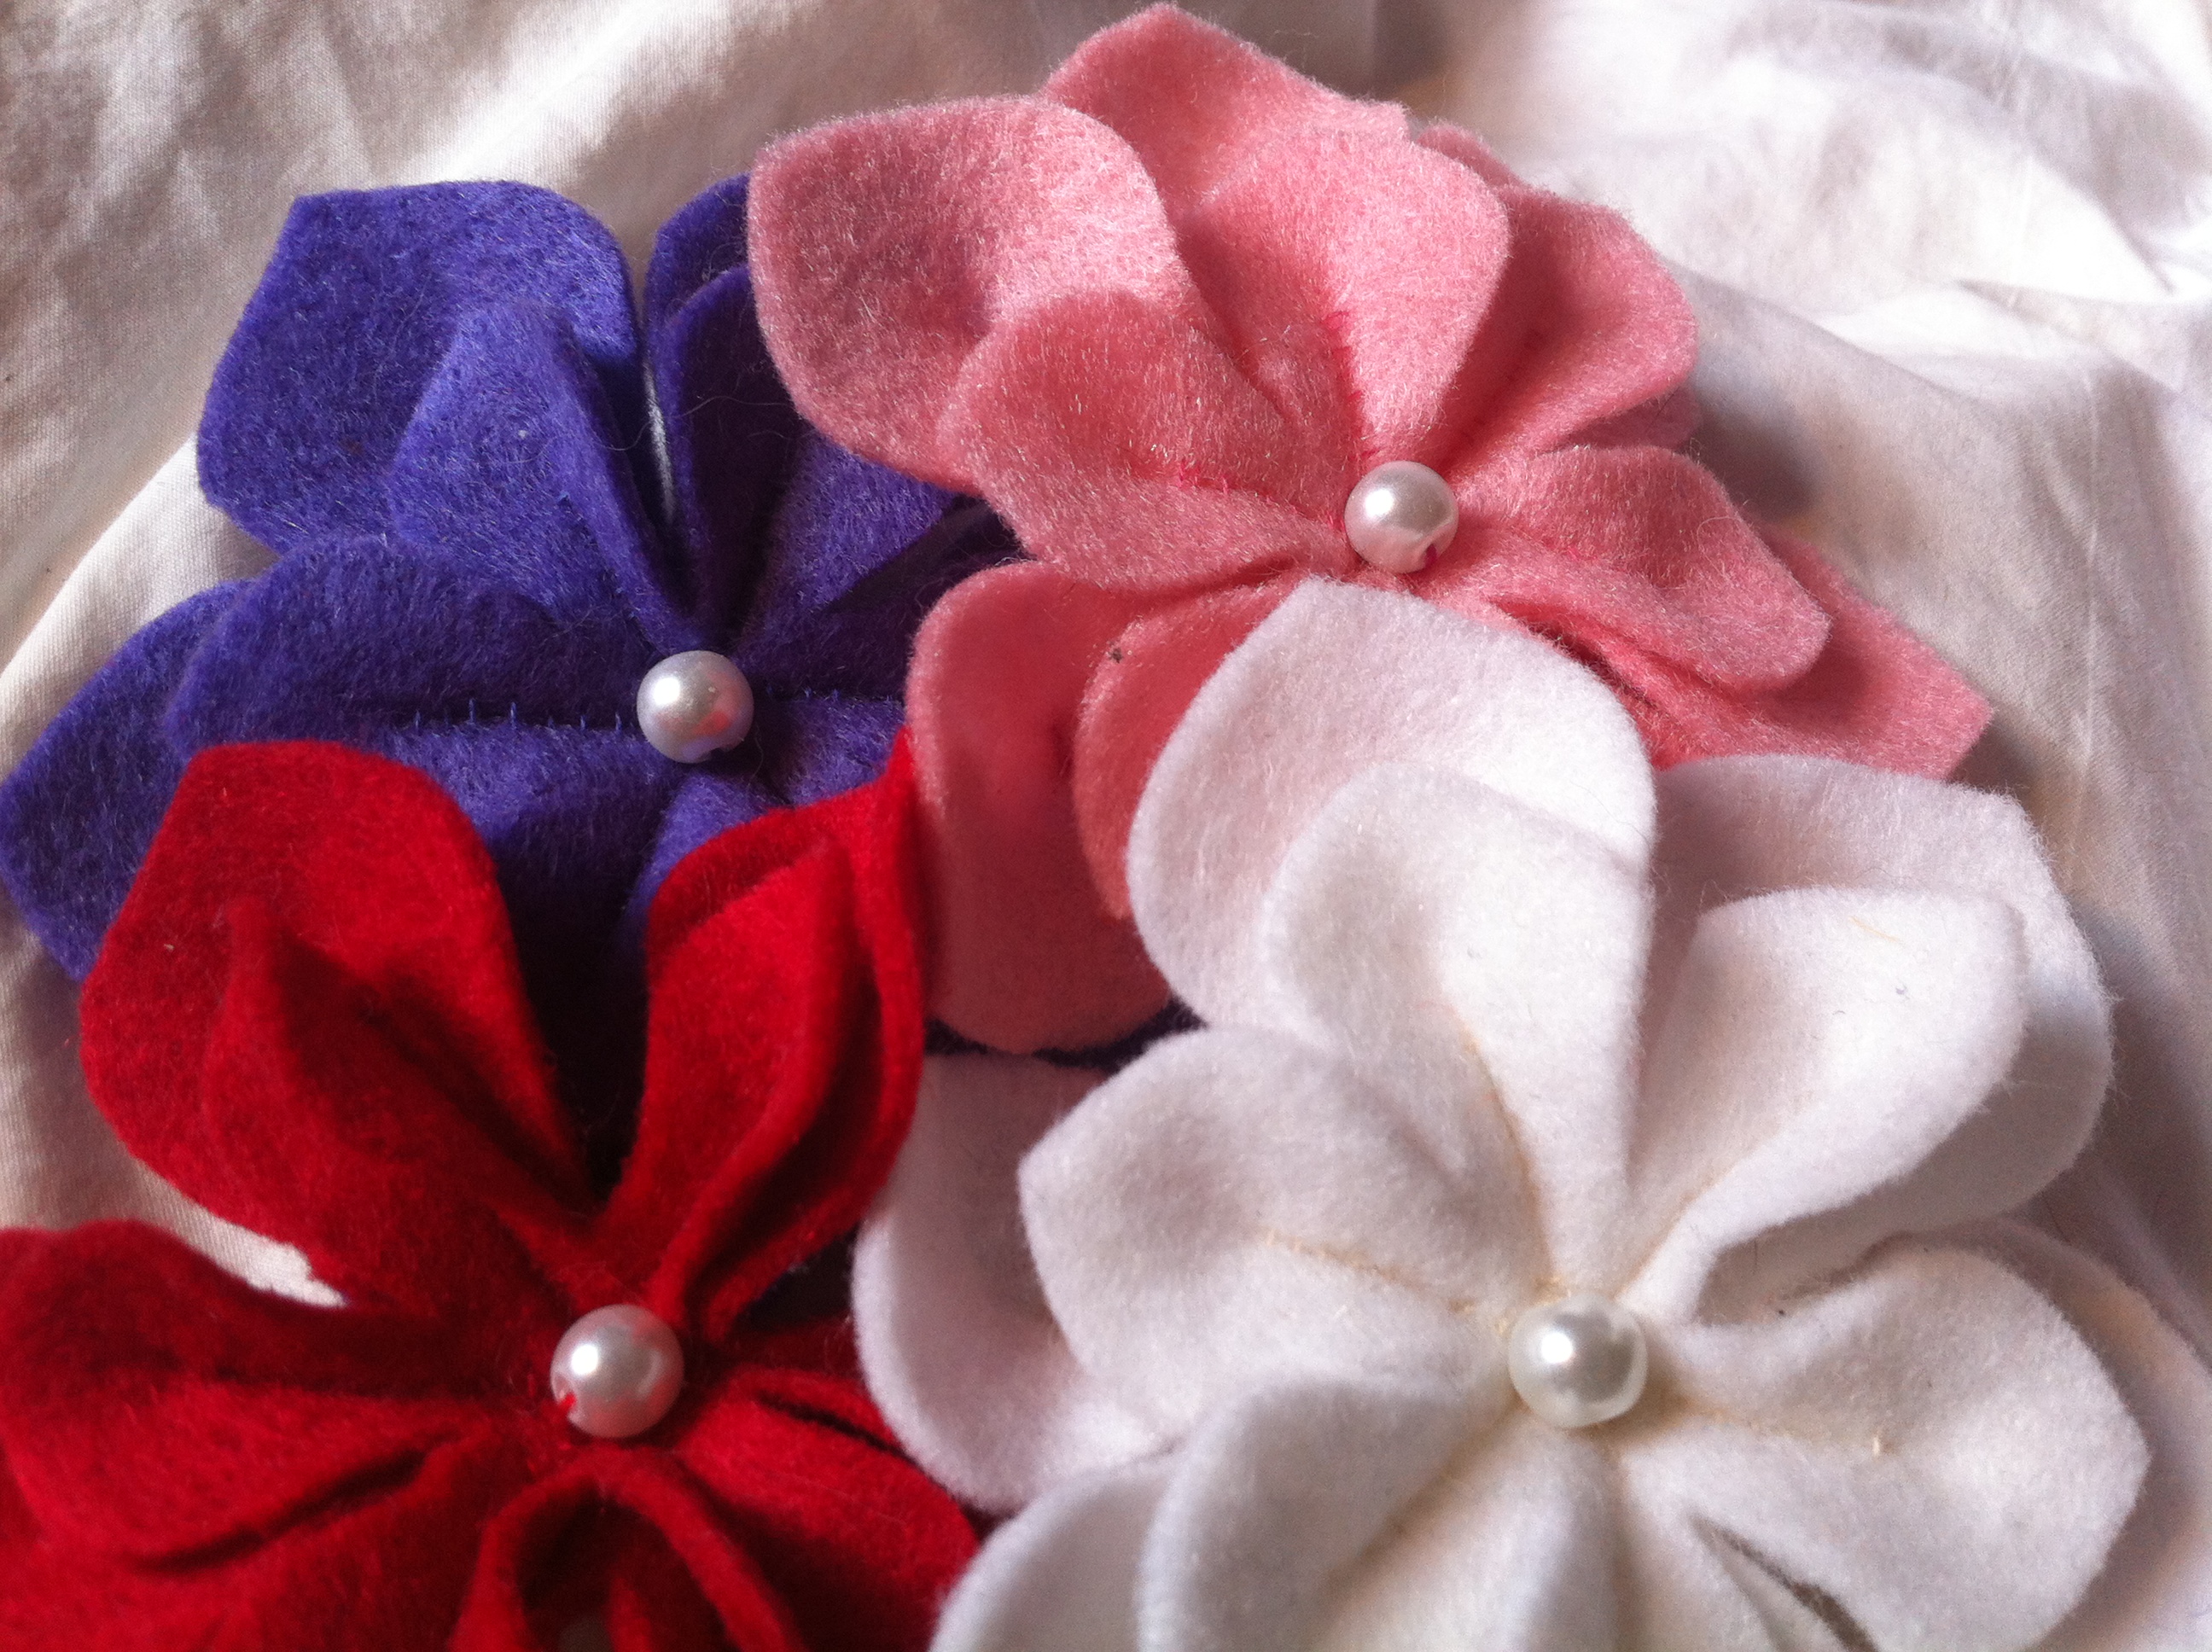
Created using a template I found online, these felt flowers each have barrettes attached to them so that you can put them in your hair, but could also be worn as a brooch or grouped together to make a bouquet.


 My mom and sisters and I are all fans of the