Troll Queen Theatre Mask

Troll Queen Theatre Mask

Back in my late teens-early twenties, I occasionally made papier mache masks for theatrical/costume purposes.  Though I never achieved the mastery of mask-making that my classmate Doug Witt did (see his work here – it’s terrific!)), I’m proud of the work I did.

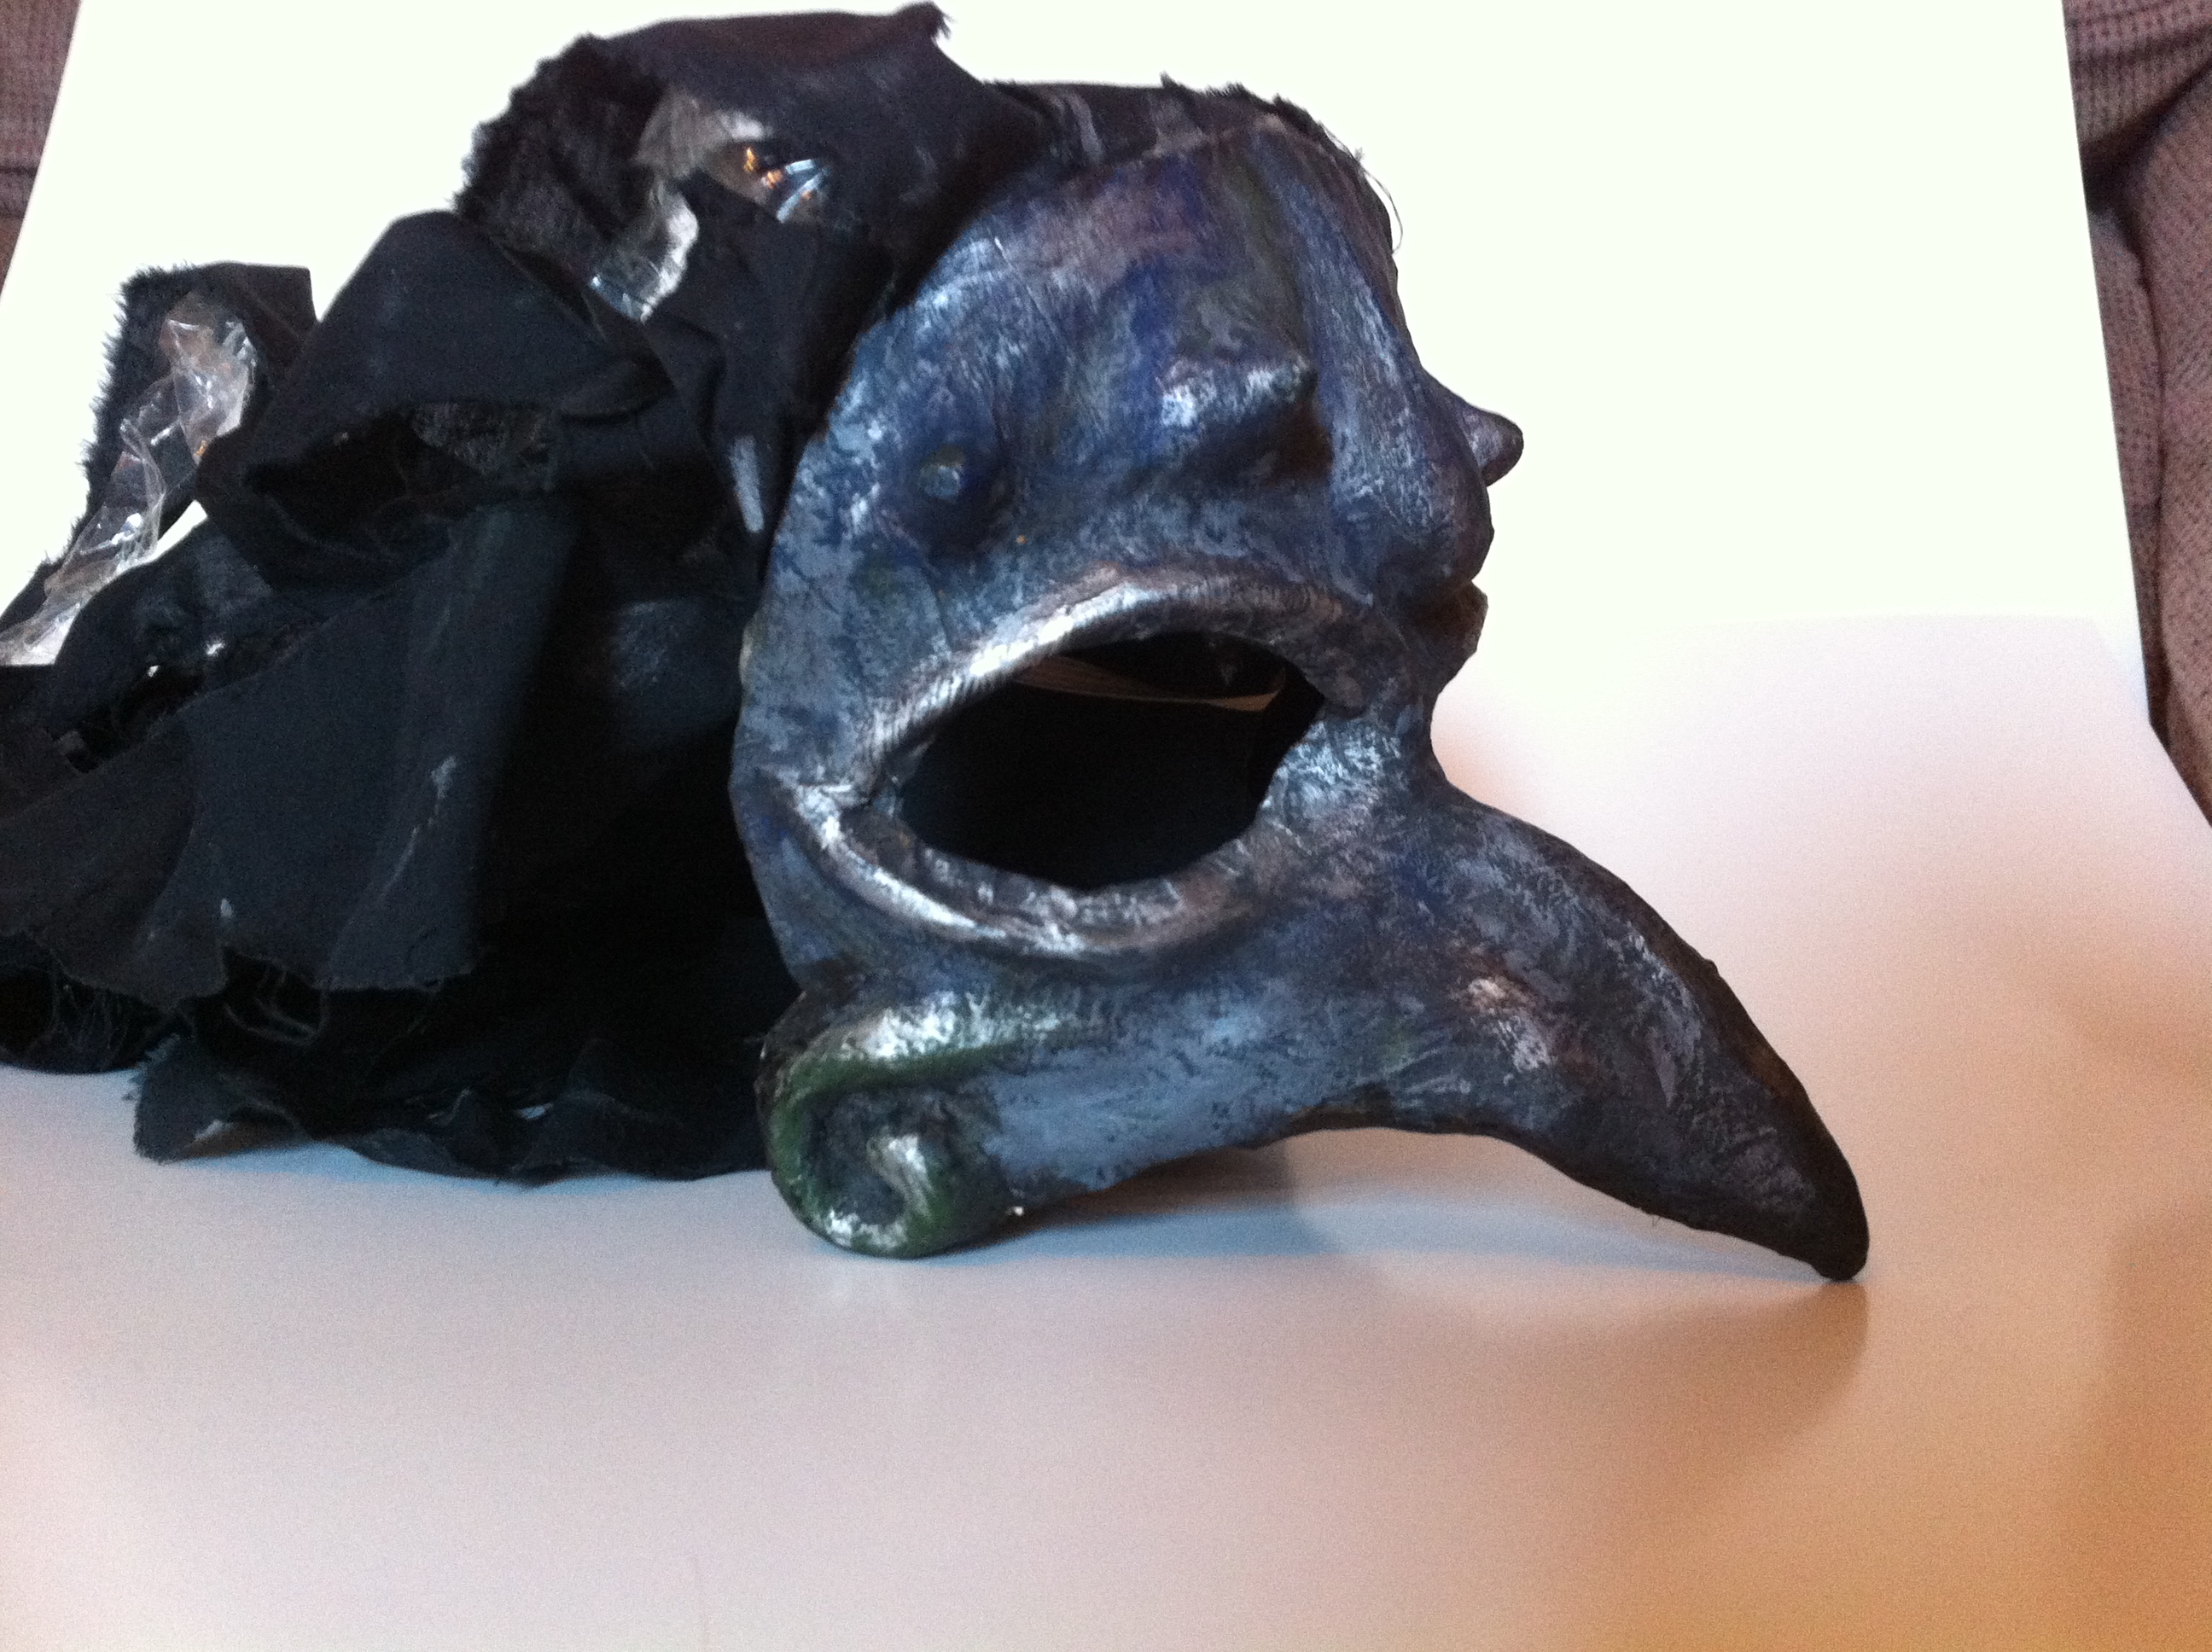
This Troll Queen theatre mask was created for a one-act play called ‘Under the Bridge,’ for the character ( duh) of the Troll Queen. The features were sculpted from plasticine onto a plaster mould of the actor’s face.  I then applied a very light layer of vaseline to the sculpt, and covered it in papier mache.  once removed and cleaned up, this papier mache cast was attached to a basic blank of the actor’s face with more papier mache, at which stage the ‘hair’ and the elastic (to hold the mask on the actor) was attached as well.

Troll Queen Theatre Mask
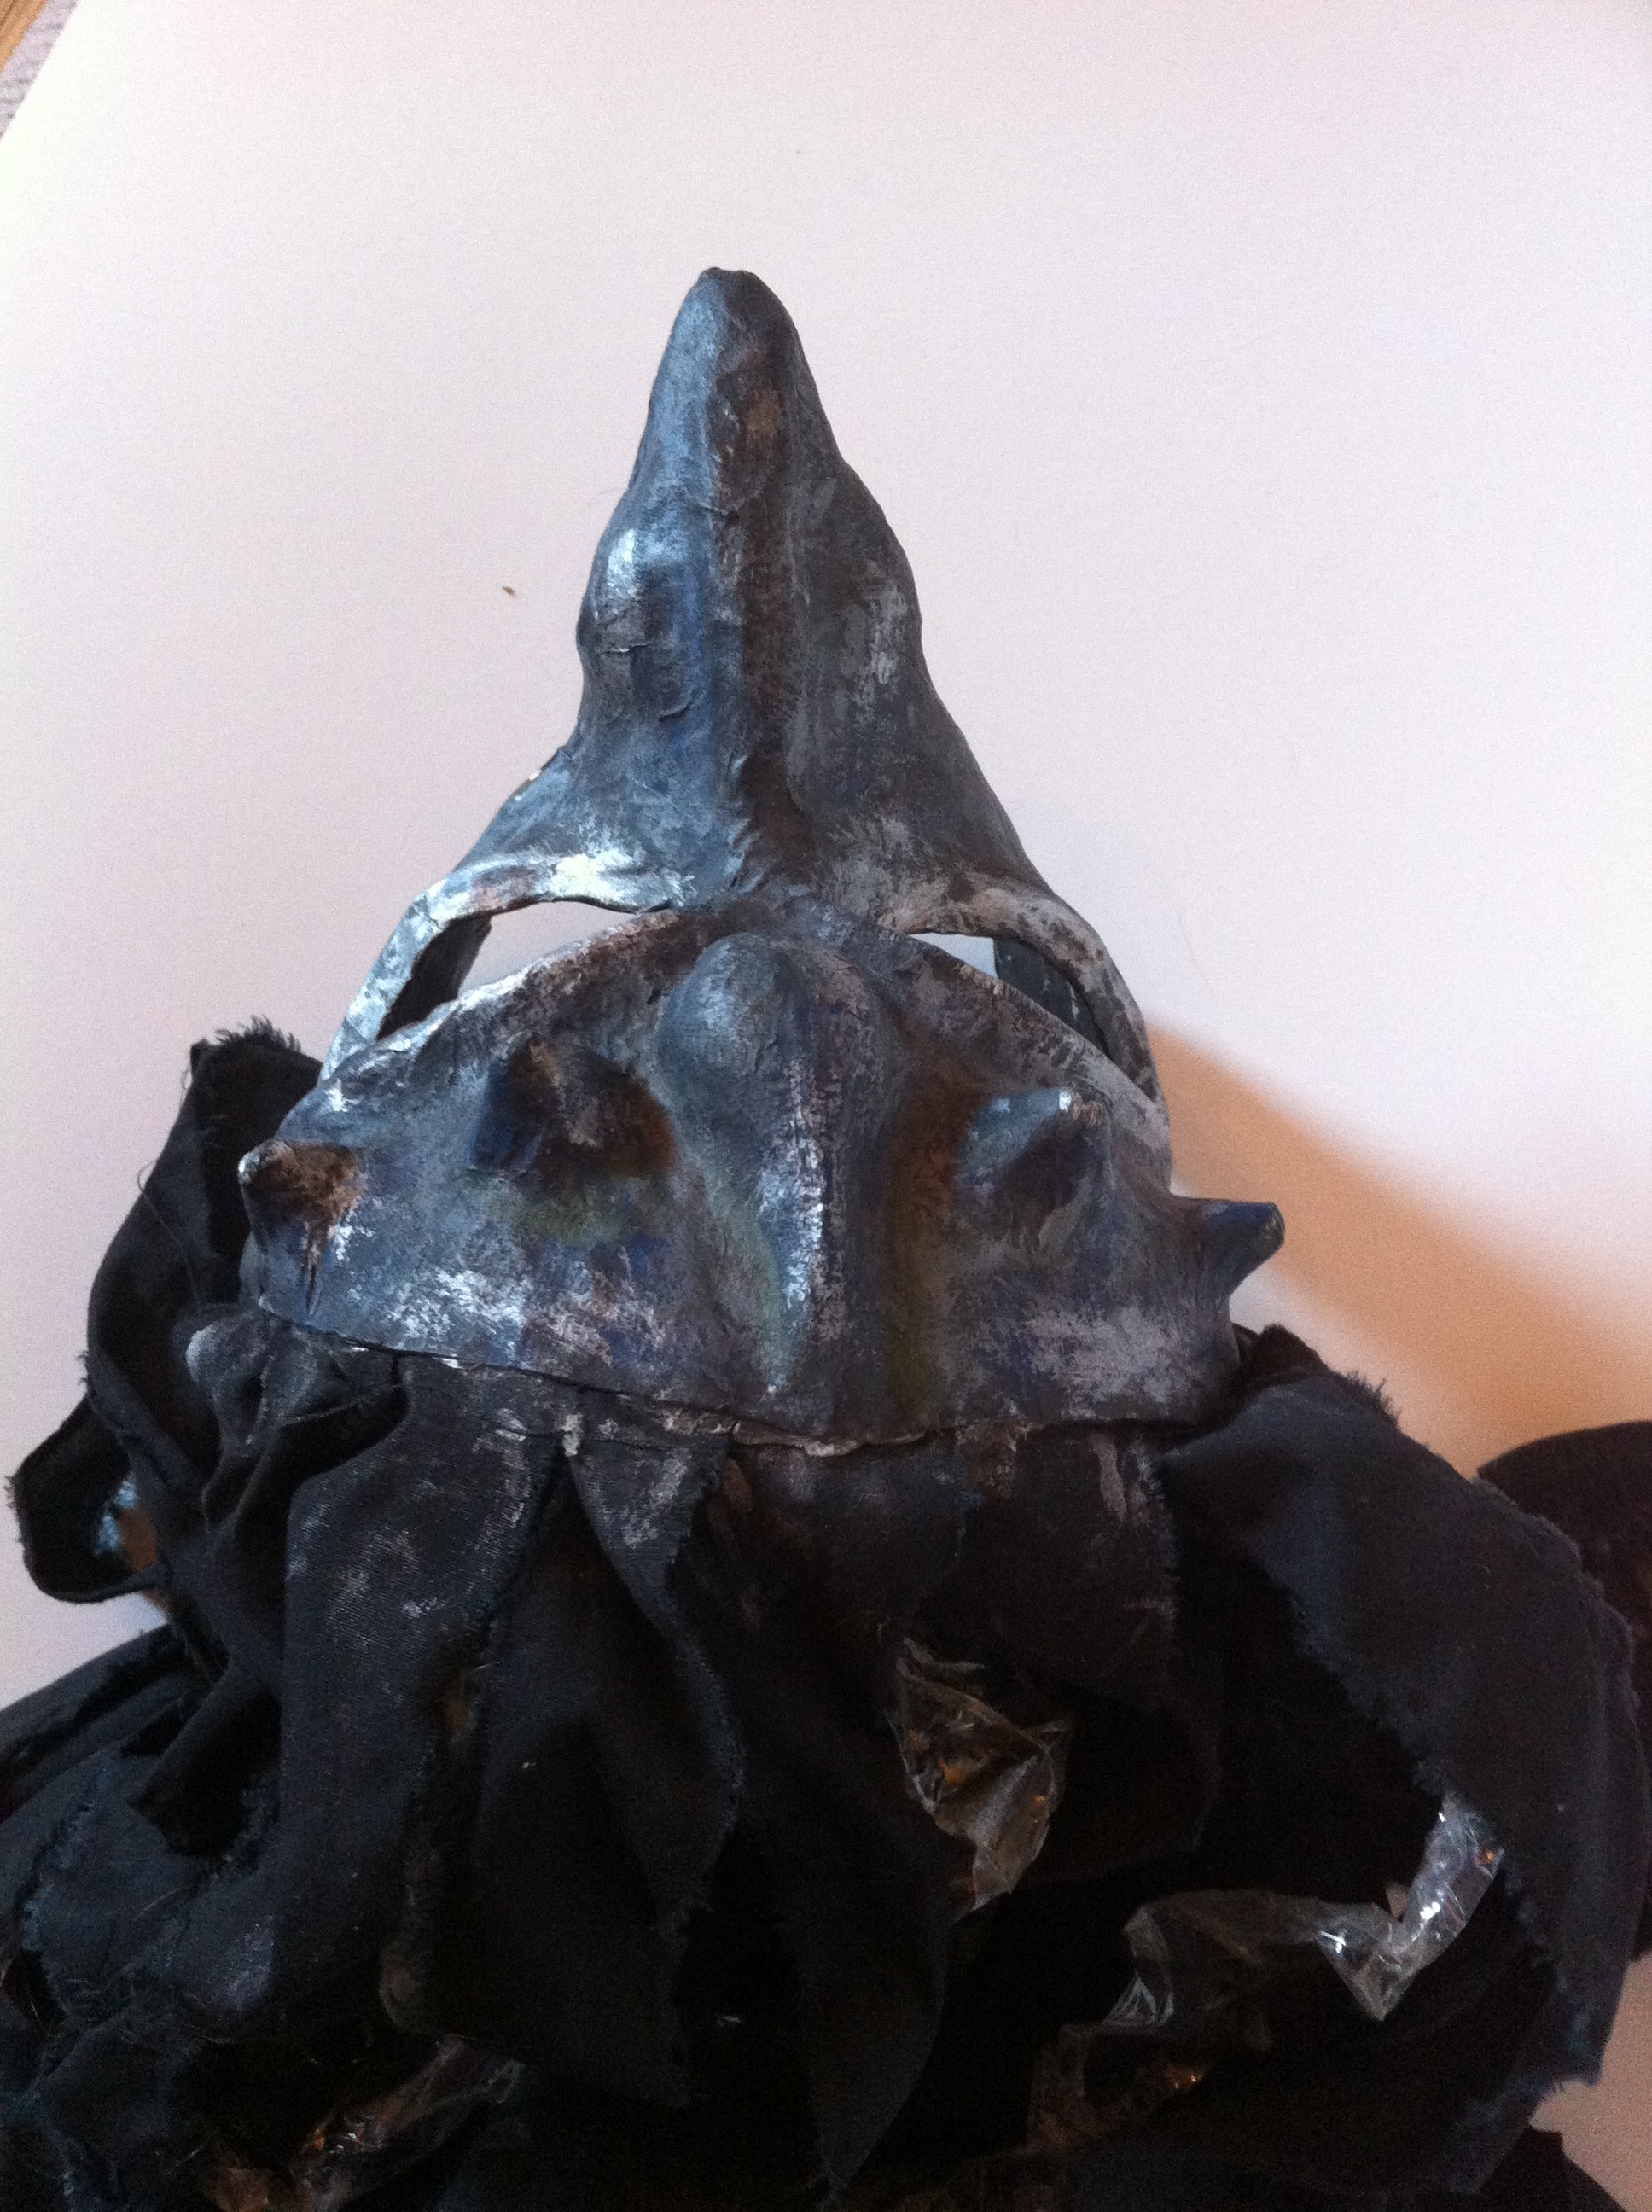
I then painted it to finish it.  In hindsight, this mask is probably too dark to really read on stage; if I was doing it again, I’d be much less subtle about the highlights; the paint job is more appropriate for costume parties or close-up theatre, like street theatre.  Overall, however, both myself and the players were pretty happy with my work. Troll Queen Theatre Mask

Troll Queen Theatre Mask

Owl Linocut Print

This is my Owl Linocut Print!Owl Linocut Print

This pas Spring, I sat in on one of Harbourfront Centre’s School Visits workshops.  This particular day, they were visiting the Museum of Inuit Art (a terrific, small museum full of great work, and which I’d totally encourage you to visit), and taking inspiration from the exhibits on display there to create their own linocuts.

I chose this guy as my inspiration (an owl sculpture by artist Joe Talirunili):

Owl Linocut Print


Then I tried to sketch out my own version of an owl (inspired by the Inuit carving, but differently cute), and transferred the image to the linoblock (you press your drawing against the block, rub vigorously on the back of the drawing, and the pencil lead leaves an impression in reverse that you can then re-trace):

Owl Linocut Print


Then you cut it out with a carving tool; I hadn’t done anything like this since I was in high school, so was re-learning how to carve the rubbery lino as I went.

Owl Linoblock Print


Once you’re done carving, you use a brayer and ink to ink the linoblock, and then press it onto paper very carefully. I don’t have any photos of that part, since I needed both hands.  In the end, I was pretty happy with the end product, and I’d love to get some more materials and work with this medium again.

Owl Linocut Print

Embroidered Sampler

Embroidered SamplerThis is an embroidered sampler that I created from a pattern.  Generally I design my embroidered pieces myself, but this one was kicking around the house, and so I started working on it.  The main change that I made was to re-work the colours, which were originally in some super-gross pastels. I (obviously) prefer the colours in the picture.

I think this design was called a ‘Jacobean’ sampler, but it looks to me more like the 1980s than the 1600s.

You’ll notice that there’s space at the bottom, which is where my name and the date is supposed to go; it’s the one part I can’t seem to get around to finishing.  The rest of the sampler has been done for years.

Here are some close-ups:

Embroidered Sampler Embroidered Sampler Embroidered Sampler Embroidered Sampler Embroidered Sampler

Hand-Sewn Felt Flowers

photo (1)

Created using a template I found online, these felt flowers each have barrettes attached to them so that you can put them in your hair, but could also be worn as a brooch or grouped together to make a bouquet.

Lodge Quilt

Lodge Quilt


We haven’t worked on it in a little while, but this is a square from the Lodge Quilt that Cassie and i have been working on for a few years. The pattern is called Ohio Star, and the reason we call it the Lodge Quilt is because it’s for my dream cottage, The Lodge.  I don’t have it yet, but the quilt isn’t finished yet either.